Downloading and Subscribing to Reports
In your Merchant Hub, access the Reports section under Reports and Invoices --> Reports. On the front page of the section, you can generate a report, subscribe to a report (Alerts tab) and see a list of reports you've generated (Report History tab).
Getting Reports
To get a report, first you must preview the report's data, then you can download it in a format of your choice. Finally, you can subscribe to its changes by setting an alert (see Report Alerts below).
- If you have multiple merchants, set the merchants you’d like to see results for at the upper right:
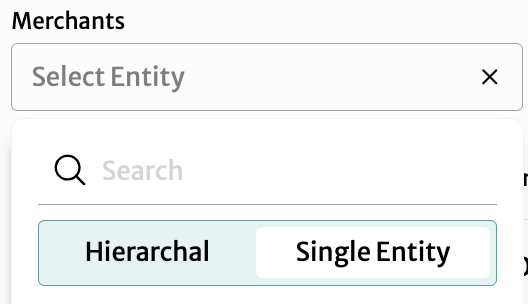
- Select the Hierarchical tab to choose multiple merchants (selecting Single Entity tab lets you return to just viewing one merchant). Check the merchants you'd like to add.
- You can also search for merchants here.
- Once you have made your selection, click Cancel or OK.
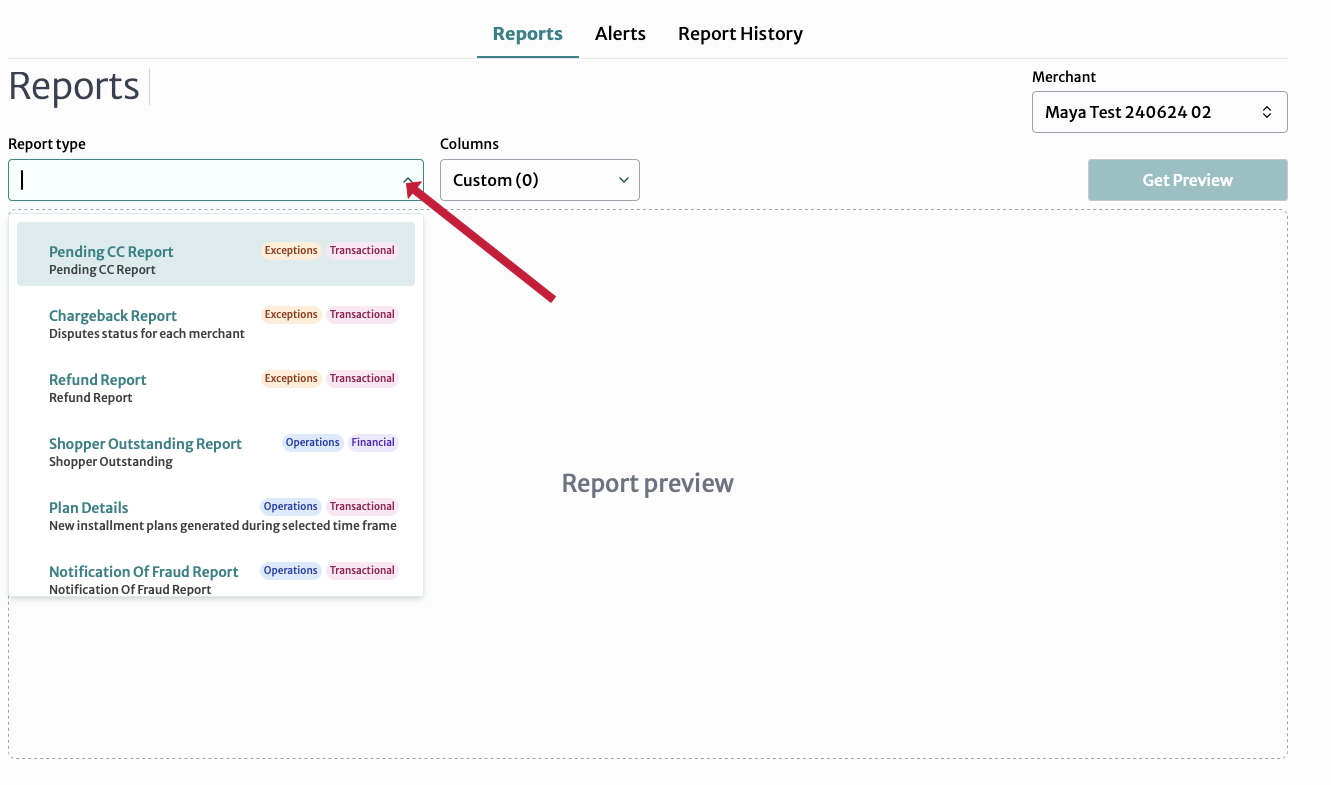
- Choose your report and get a preview:
- Select Report Type: Use the dropdown at upper left to choose the type of report you need
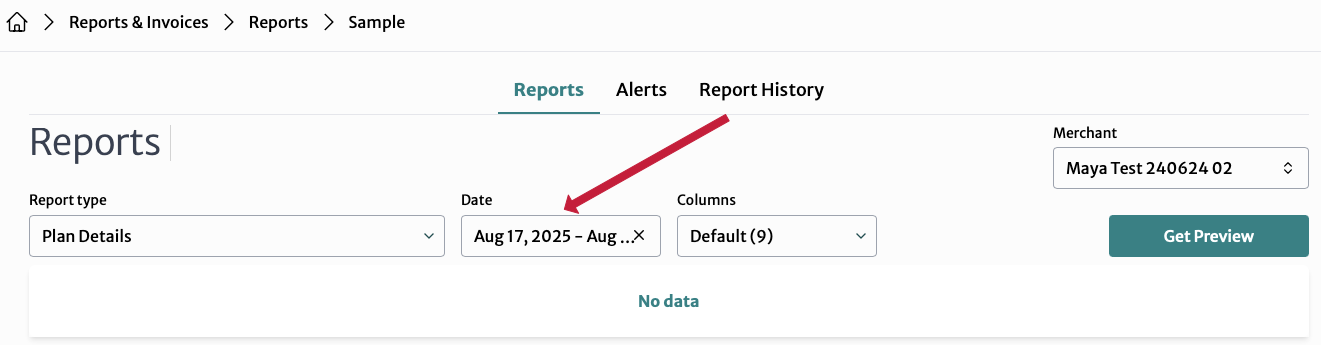
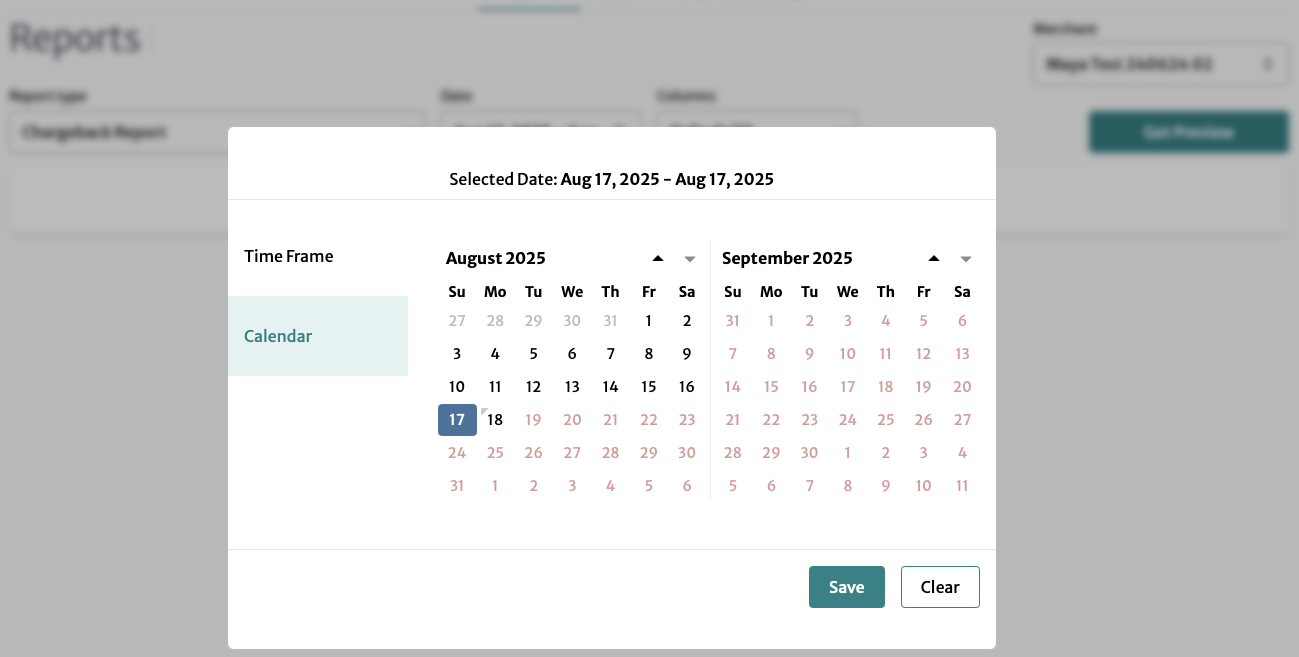
- Set Date Range: If the report has a selectable date range, it will appear when you click on the report type. Click on the date field and select the appropriate date range for your report using either Time Frame or the Calendar
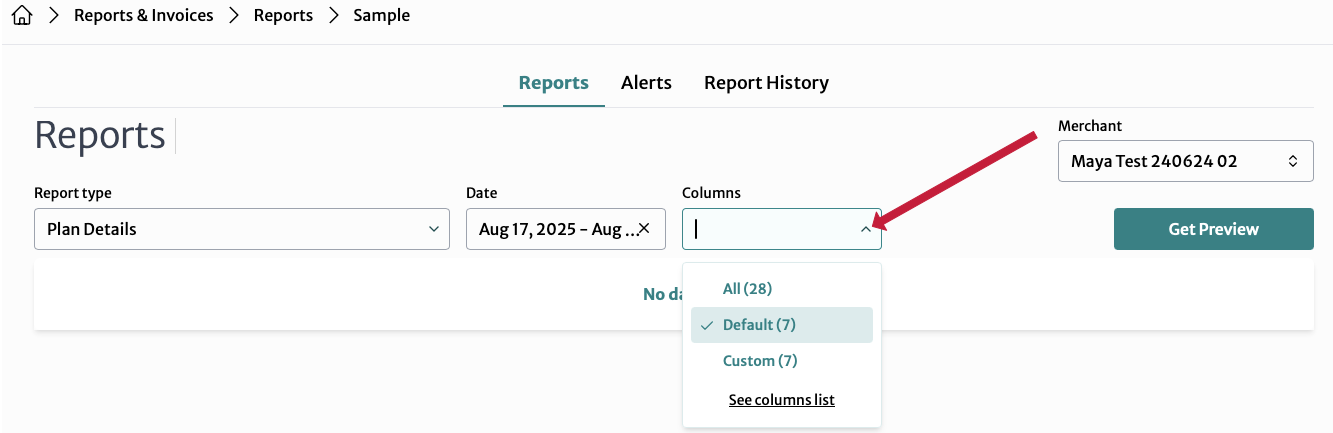
- Choose Columns: Under Columns, you can choose to display All, choose Default (a selection of the columns most people find useful), or choose the See columns list popup, which lets you set Custom by dragging and dropping columns. Click Save when you are finished.
- Get Preview: Click the Get Preview button to generate and view a report preview.
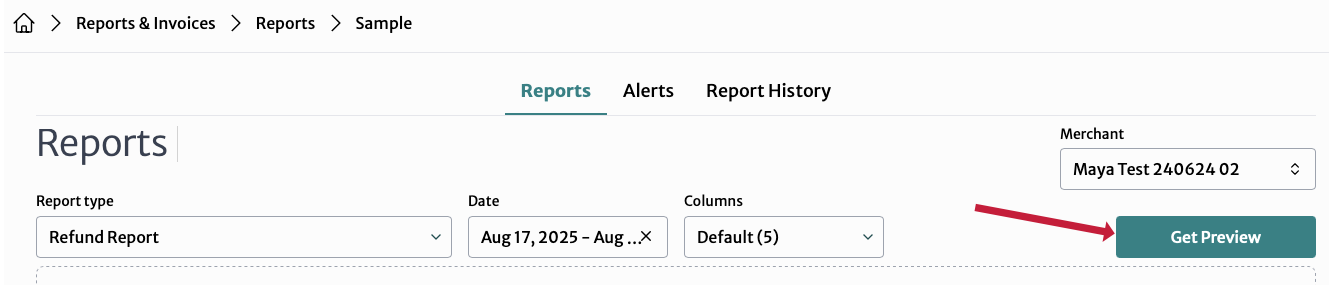
Once you have the preview you can Export this report using the button at bottom (choosing a format, either CSV, JSON, TSV, VLCSV, or XLS).

Report Alerts (Subscriptions)
Under the Alerts tab, you can set up and manage your alert subscriptions, which will send you new reports on a periodic basis (you can also set alerts when you are downloading reports, see the section above).
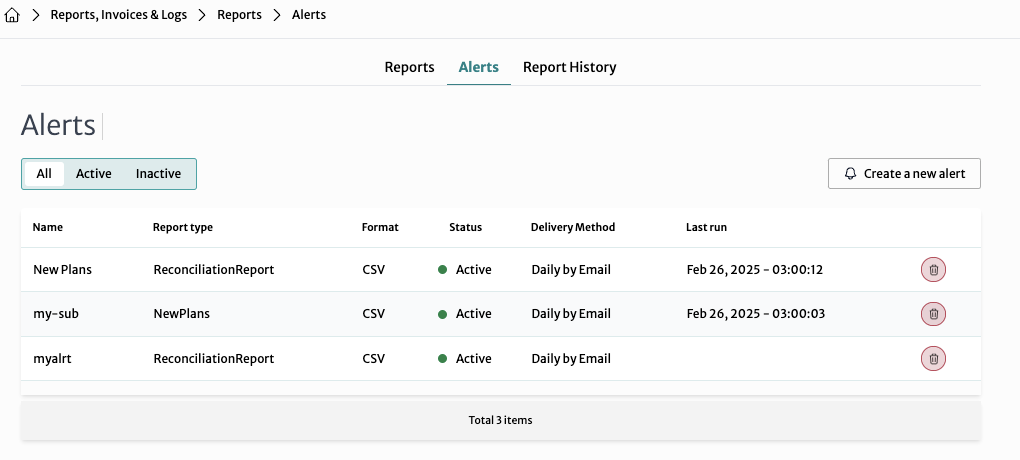
On the main page of the Alerts section, you can see existing alerts and also filter by Active or Inactive alerts. Click on a row to edit an existing alert or on the trashcan icon to delete it. (Editing an alert opens a window with the same options as Create a new alert; see section below)
Create a New Report Alert
Click the Create a new alert button to receive periodic email or SFTP updates for a specific report.
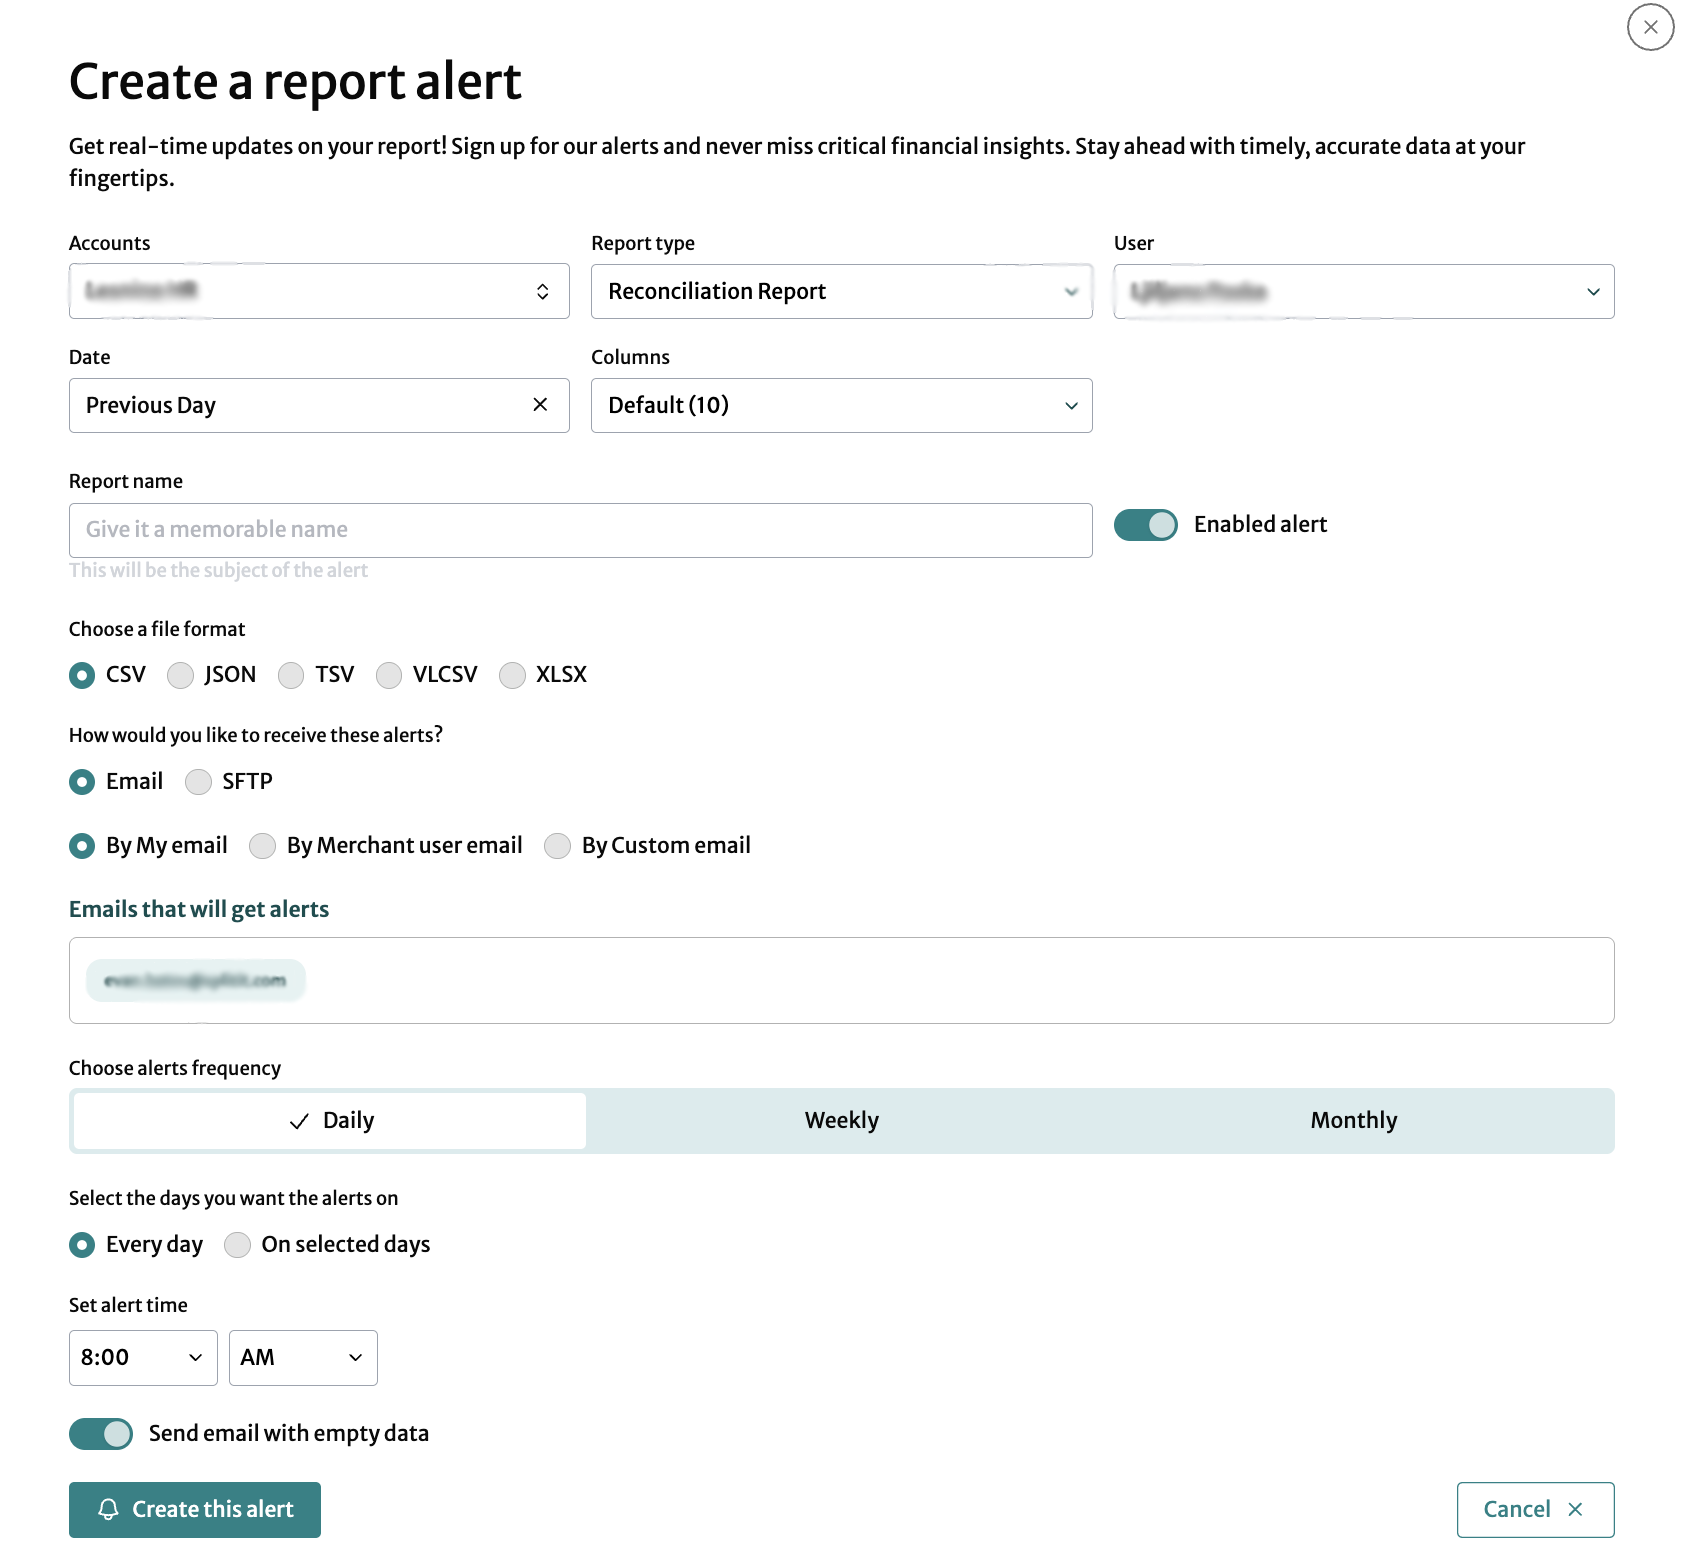
- Account: If you have multiple accounts, set the account(s) for which you'd like reports (use Hierarchical to select multiple accounts and Single Entity for just one; note that Account is carried over from any previous selections)
- Report Type: Select the type of report for which you want to create an alert
- User: Select the user on your account who should get the report
- Date: Select the time frame for your report, choosing day, month, quarter, week or year, either current or previous
- Columns: Choose the columns from the dropdown menu to include in the report; you can choose to display All, choose Default (a selection of the columns most people find useful), or choose the See columns list popup, which lets you set Custom by dragging and dropping columns. Make sure to click Save when you are finished.*
- Report Name: Enter a name for the report. This will be the subject of the alert.
- Enabled Alert: Toggle to enable or disable the alert
- Choose a File Format: Select the format for the report file (e.g., CSV, JSON, TSV, VLCSV, XLSX)
- Delivery Method: Choose how you would like to receive the alerts:
- Email: Alerts will be sent via email
- SFTP: Alerts will be sent via SFTP
- Email Recipients:
- By My Email: Use your email
- By Merchant User Email: Use the merchant's email
- By Custom Email: Enter a custom email
- Emails that will get alerts: Specify the email addresses that will receive the alert (this field is prepopulated from the above fields)
- Choose Alerts Frequency:
- Daily: Alerts will be sent daily
- Every day is the default but you can also choose specific days by clicking On selected days
- You can specify the time of the alert
- Toggle Send email with empty data to enable or disable sending emails even if the report has no data
- Weekly: Alerts will be sent weekly (you can specify the day)
- On selected days is automatically selected
- You can select the day of the week when you'd like the report sent
- You can specify the time of the alert
- Toggle Send email with empty data to enable or disable sending emails even if the report has no data
- Monthly: Alerts will be sent monthly
- Set the day of the month when you'd like to receive the alert
- Set the time of the alert
- Toggle Send email with empty data to enable or disable sending emails even if the report has no data
- Daily: Alerts will be sent daily
Click the Create this alert button to save and activate the alert (or Cancel to exit).
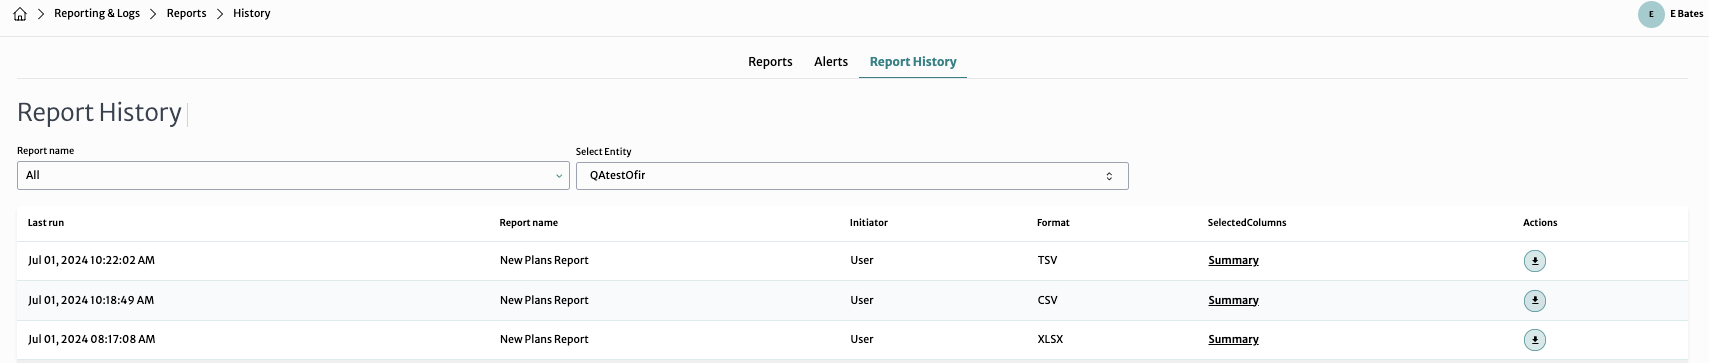
Report History
Click on the Report History tab to view previously generated reports. If applicable, begin by selecting the account for which you'd like to see history. You can see when the report was run, its name, the user who initiated it, its format, and the columns it included (SelectedColumns). You can also download it with the downward-facing arrow icon.
 *
*