Wix
Use the instructions below to enable the Splitit installments payment option in the payment and checkout experience on your Wix site, along with messaging that will introduce your customers to installment payment options early in their shopping experience.
Note: Splitit's Wix plugin is available for use in the following countries: USA, Canada, UK, France, Spain, Germany, Netherlands, Portugal, Sweden, Denmark, Italy, Austria, Poland, Turkey, South Africa, Brazil, Argentina, Japan, Singapore, Hong Kong, South Korea, Australia, New Zealand, and India.
Setup
- On your Wix dashboard, go to Settings -> Accept Payments.
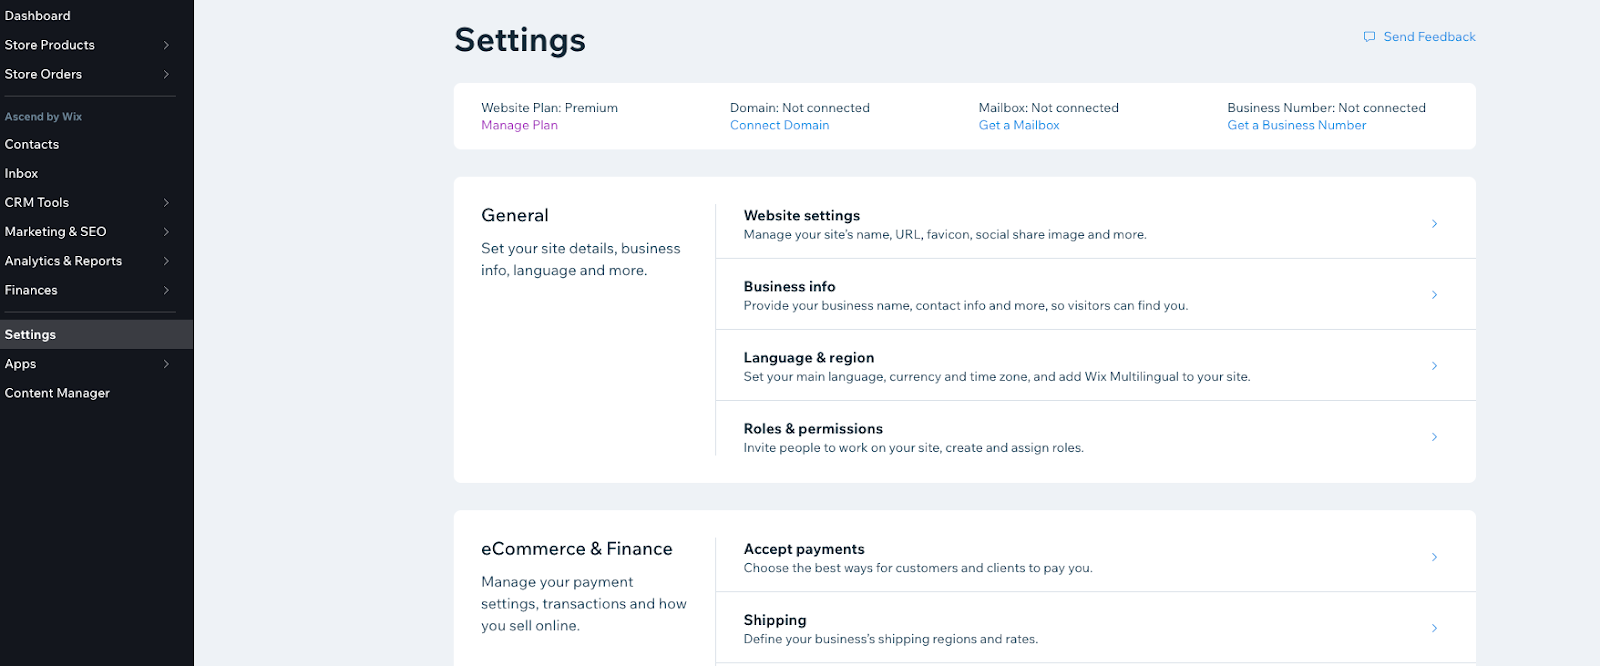
2. At the bottom of the screen, select See More Payment Options.

3. Select Connect for Splitit.

4. If you don't have a Splitit account, on the next page, go to Create Splitit Account. This will take you to Splitit, where you need to establish an account. If you already have a Splitit account, go to your Splitit dashboard then proceed to Step 5(b).
5. (a) When you receive your confirmation email from Splitit, click Activate My Account and establish a password for your Splitit portal. You will be taken to your Splitit dashboard.
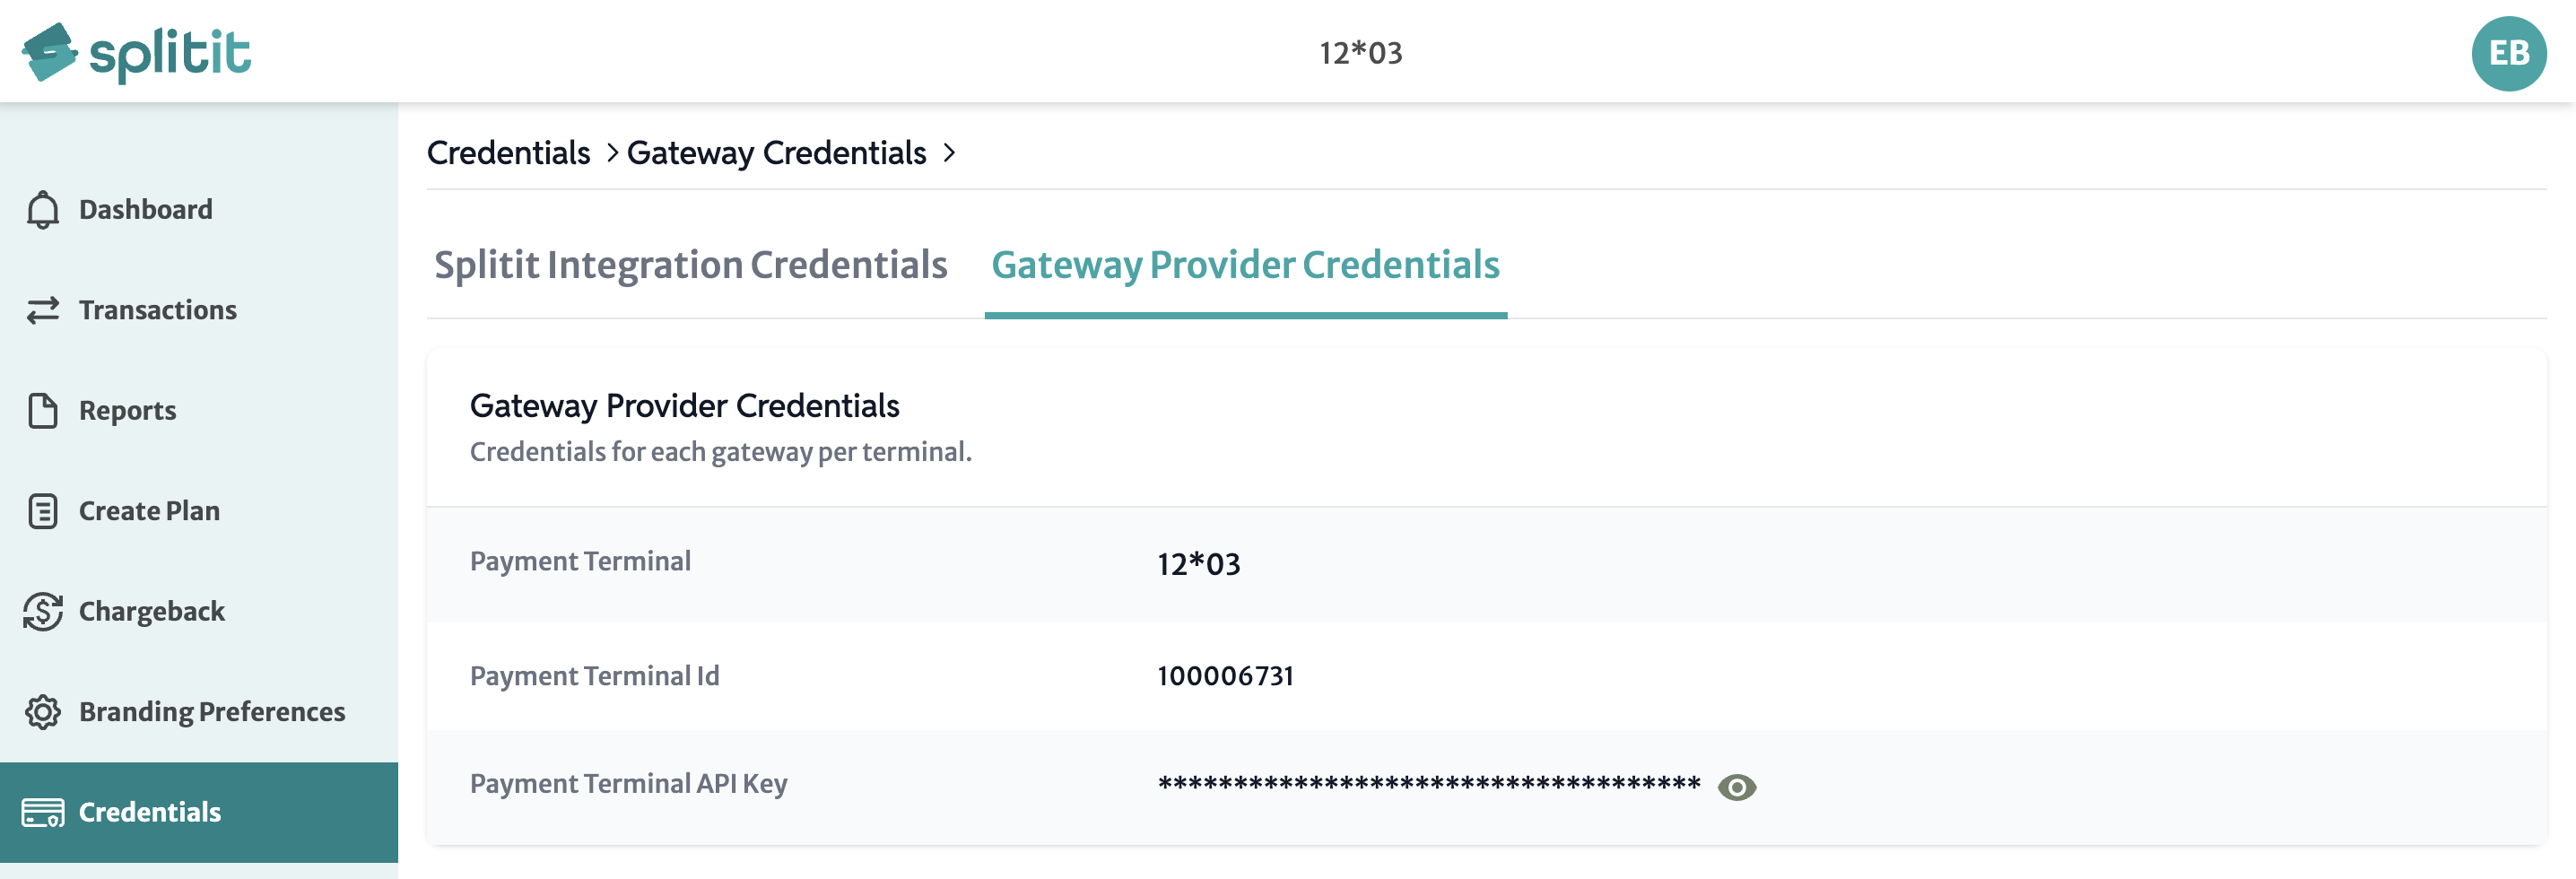
(b) You'll need three items from your dashboard to make Splitit API calls: an API Username and an API Password, which you can find under Credentials-> Splitit Integration Credentials-> Reveal API Keys; and also a Payment Terminal API Key, which can be found under Credentials-> Gateway Provider Credentials-> Payment Terminal API Key (it is possible to have more than one, make sure to set the one you want to use).
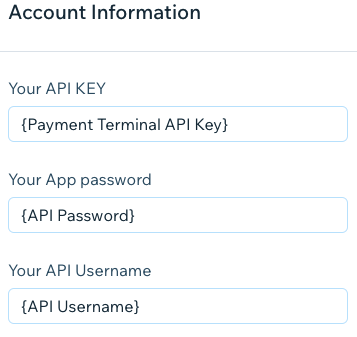
6. Return to Wix and enter your credentials for the Splitit Plugin:
7. Select Connect.