Connecting Authorize.Net
To use Authorize.Net as your processing gateway with Splitit, you'll need to collect your Authorize.Net credentials, submit your Authorize.Net credentials to Splitit, and configure Authorize.Net webhooks.
Obtain your Authorize.Net Credentials
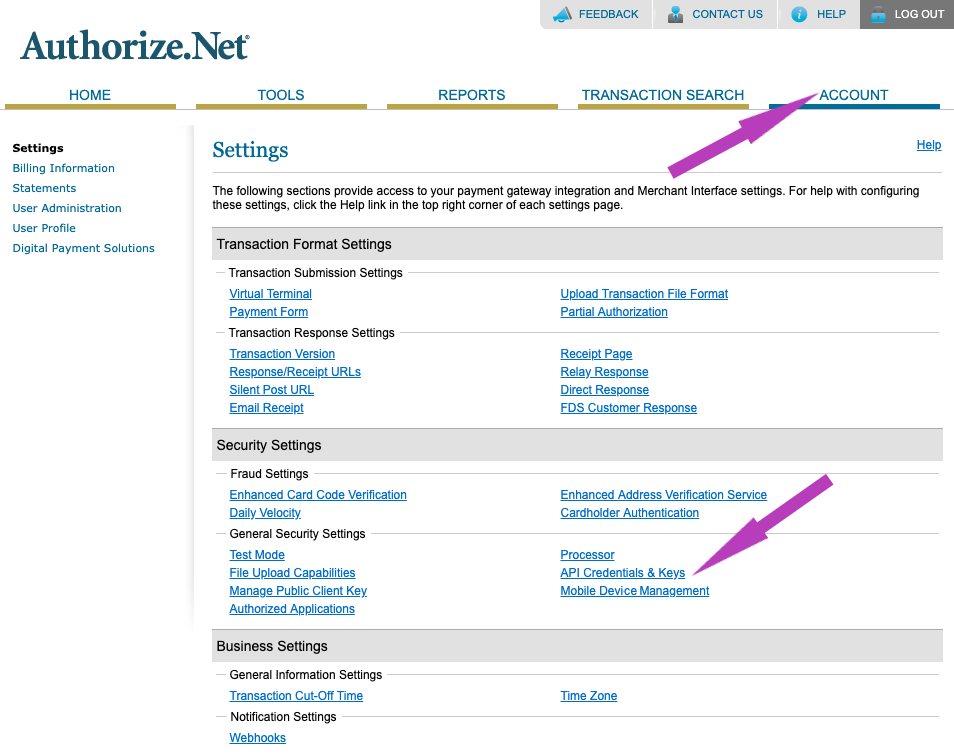
1. Log into the Merchant Interface.
2. Click Account from the main toolbar.
3. Under Security Settings, click API Credentials & Keys.

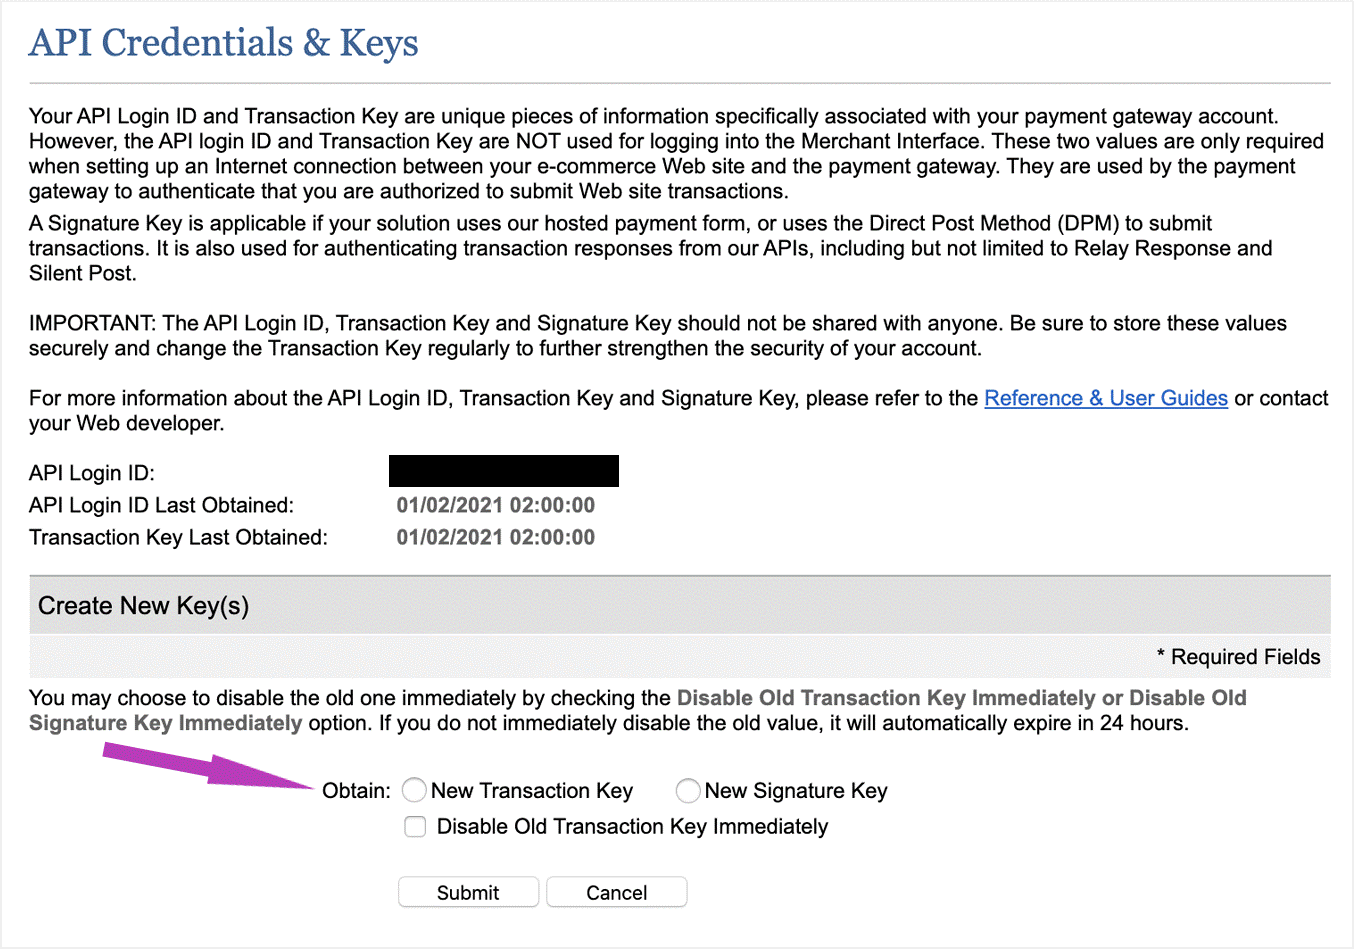
4. Make a note of your API Login ID.
5. Under Create New Key(s) select Obtain: New Transaction Key (Note that you may also choose to disable the old transaction key by clicking the box entitled Disable Old Transaction Key Immediately. You may want to do this if you suspect your previous transaction key is being used fraudulently.)

6. Click Submit to continue.
7. Authorize using the PIN process and your registered email.
8. Copy the displayed transaction key then Continue or close your browser window.
Submit Your Authorize.Net Credentials to Splitit via a Secure Form
1. Contact your personal Onboarding Manager or the Onboarding Team at onboarding@splitit.com to receive a secure form link where you can post your credentials.
Configure Required Webhooks
1. Go to Account > Settings in your Authorize.Net Merchant Interface.
2. Under Business Settings select Webhooks.

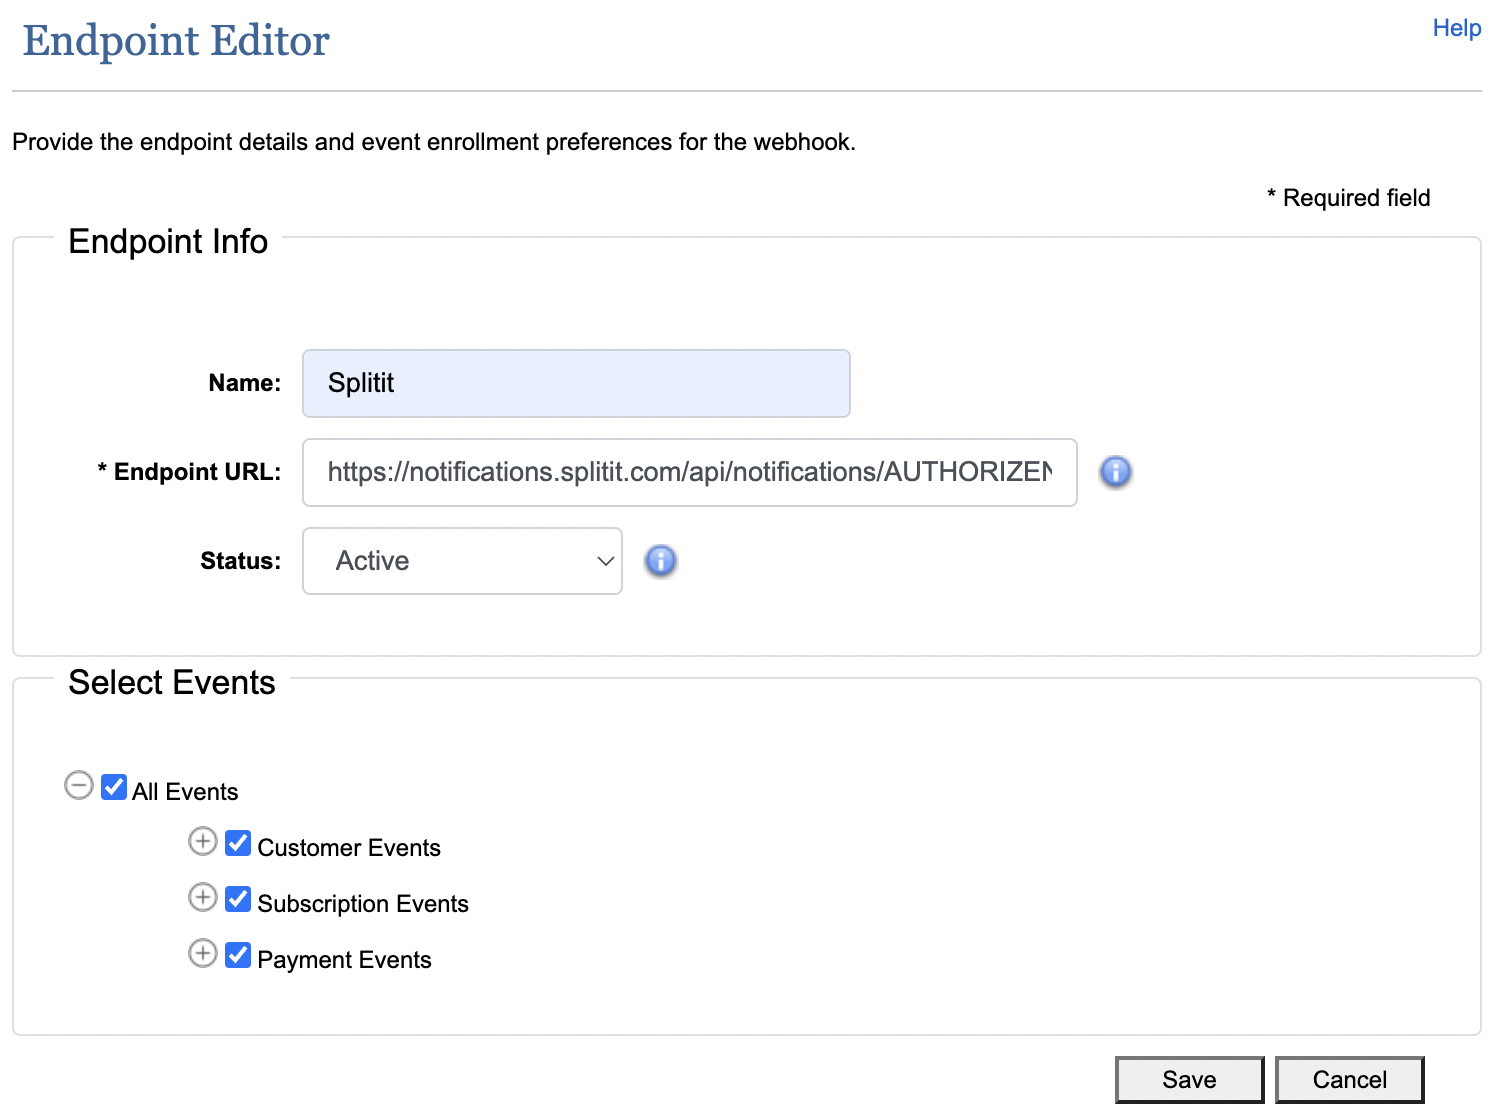
3. In the Webhooks section, click Add Endpoint.

4. In the Endpoint Editor popup, enter Name as "Splitit" (or anything else), set the Endpoint URL as "https://notifications.splitit.com/api/notifications/AUTHORIZENET", set Status to "Active" and for Select Events check "All Events." Click Save.

5. You may receive an alert from Authorize.Net that you need to create a new Signature Key, which you can do in the Authorize.Net merchant portal under Account > Settings > Security Settings > API Credentials & Keys > Create New Key(s). (This won't affect processing at all, unlike a Transaction Key.)
This concludes the process, but for any additional assistance please contact your personal Onboarding Manager or the Onboarding Team at onboarding@splitit.com.