Okta Integration
Large merchants sometimes need to integrate their Okta SSO with Splitit. This document covers the initial Okta administration required on the merchant's side. After this is done, Splitit will need to do some setup as well.
Merchant Setup in the Okta Admin
Step 1: Create an Application
- Find the Applications → Applications menu item, or navigate to /admin/apps/active within your Okta admin portal
- Create a new application there
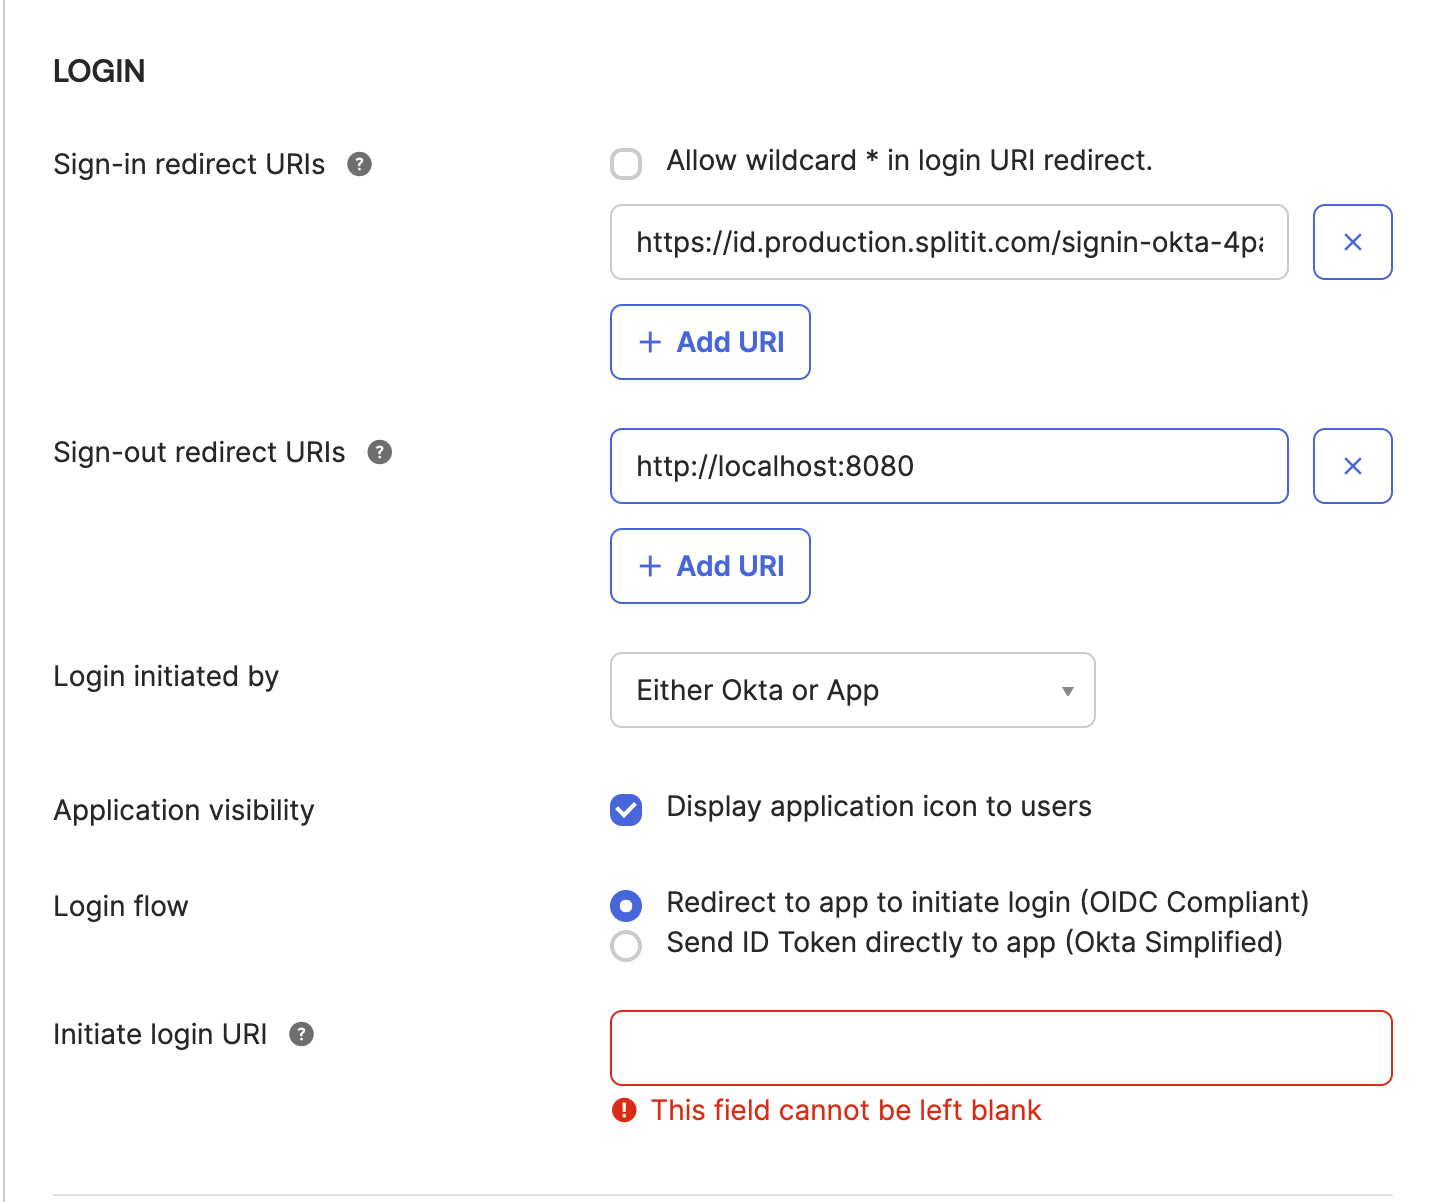
Application Settings
-
Client ID: You will provide this securely to Splitit (via direct message in Slack, later deleted)
-
Client Secret: You will provide this securely to Splitit (via direct message in Slack, later deleted)
-
It’s recommended that you use PKCE for better security
-
The app name should be something like “Splitit SSO” or “Splitit Login”
-
Application-Type should be "Web"
-
Grant Type should be "Authorization Code"
-
Sign-in redirect URLs (both should be present):
https://id.production.splitit.com/signin-okta-MERCHANT_CODEhttps://id.splitit.com/signin-okta-MERCHANT_CODE
-
Federation broker mode: This is better to turn off, at least during initial integration. Later you can turn it on if you'd like to try it.
Step 2: Get the Okta domain and provide it to Splitit
You can find this only on the dropdown shown here:
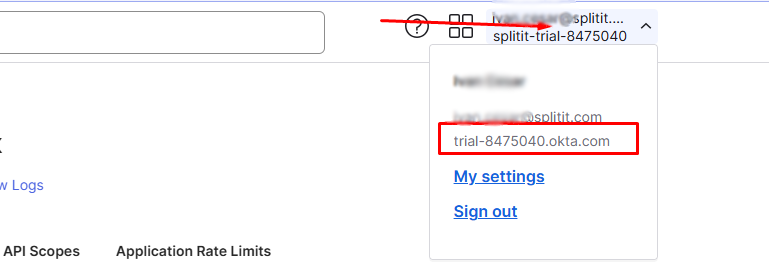
- The resulting domain would be
https://trial-8475040.okta.comand should be provided to Splitit.
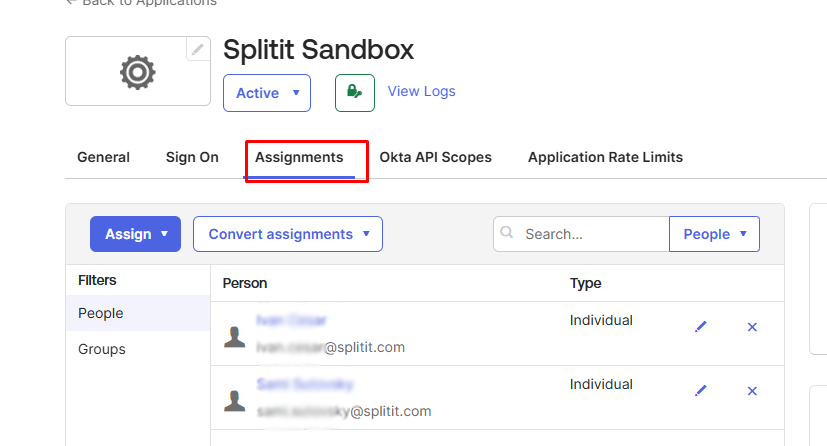
Step 3: Assign users
More experienced Okta admins may want to add groups here, but you can also add individual users for test purposes.
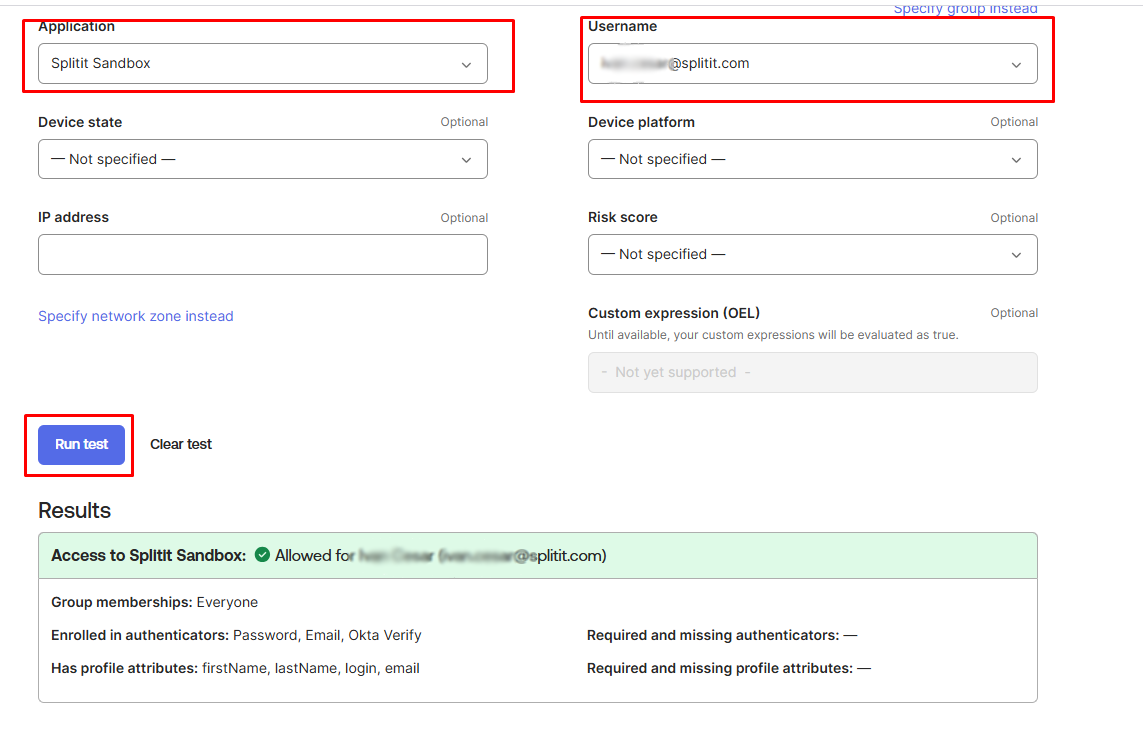
Step 4: Verify Policy on the OKTA side
Navigate to Reports → Access Testing Tool (the relative URL in the
Okta portal is /reports/access-policy-simulation). Click Run test and view the results. Failure here usually indicates a misconfiguration in your Okta setup from the previous steps.
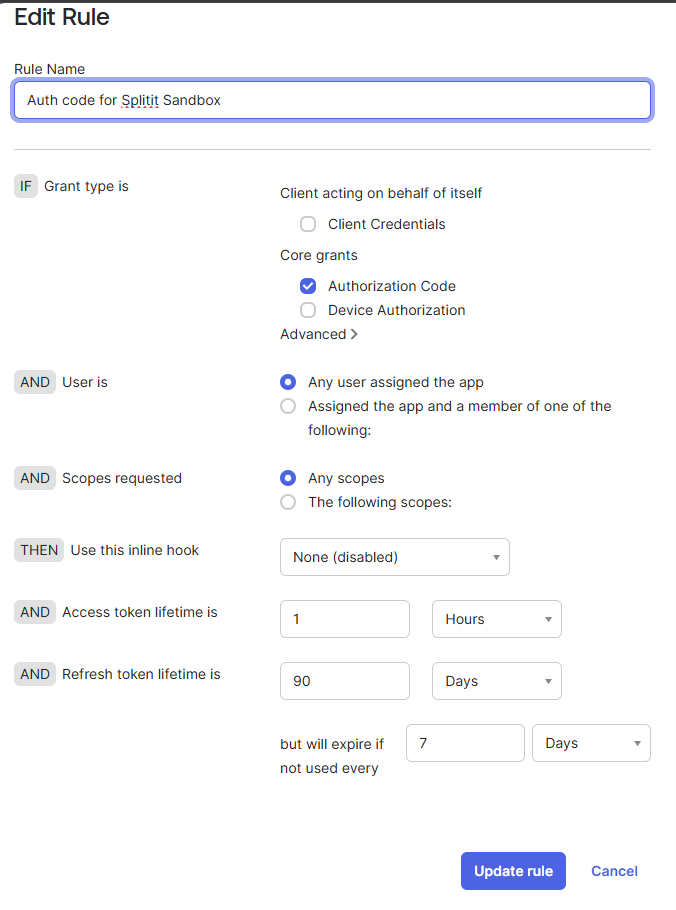
Step 5: Adjust Authorization Server
Navigate to Security → API → Authorization Servers, then select the tab Access Policies.
Create a policy for your "Splitit Login App" with the settings below:
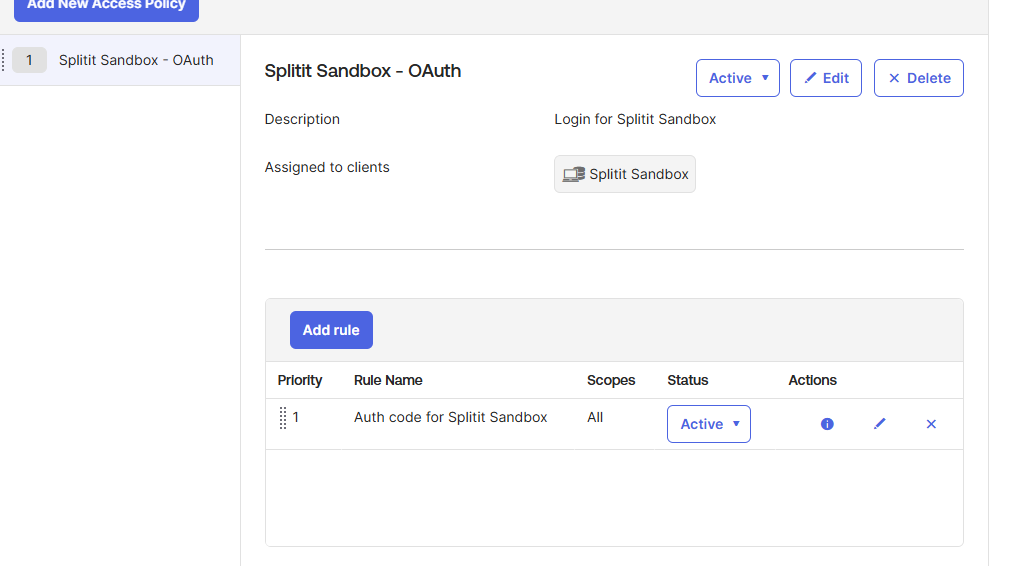
The following pertains to the Rules:
-
It’s important to set Core grants = Authorization Code. The others are not needed. Splitit only needs the openid and email scopes, and will not read any other scopes if provided.
-
Generally, all of the default settings can be kept.
💡 Debugging your Okta integration can be done by navigating to Reports → System Log.
Okta Workforce Identity Cloud (OIC)
Note that the authorization server is not available for merchants who do not have the full Identity Cloud, or are missing API Access Management (even if they have default OIDC).
The important thing is to set Initiate login URI to be https://login.sandbox.splitit.com/okta/**MERCHANT_CODE** (get your Merchant Code from Splitit)