Onboarding WooCommerce to VIS Installments
If you are a VIS Installments for WooCommerce merchant:
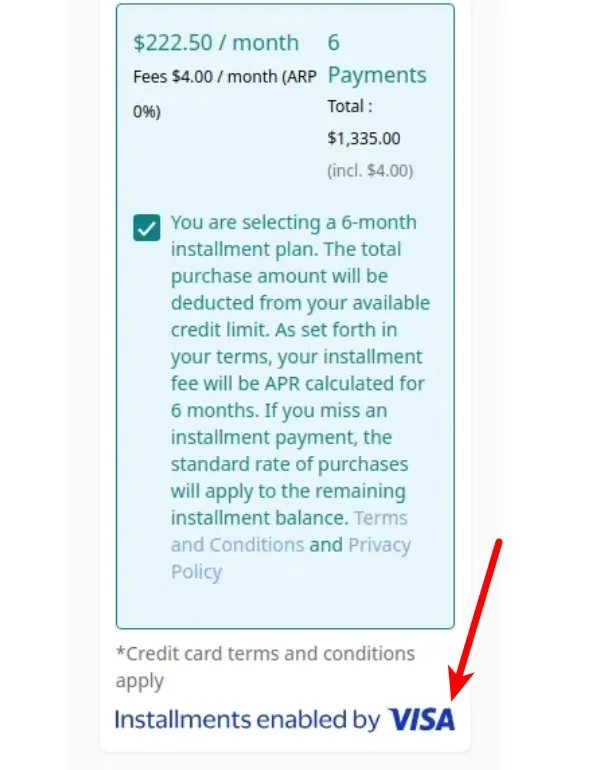
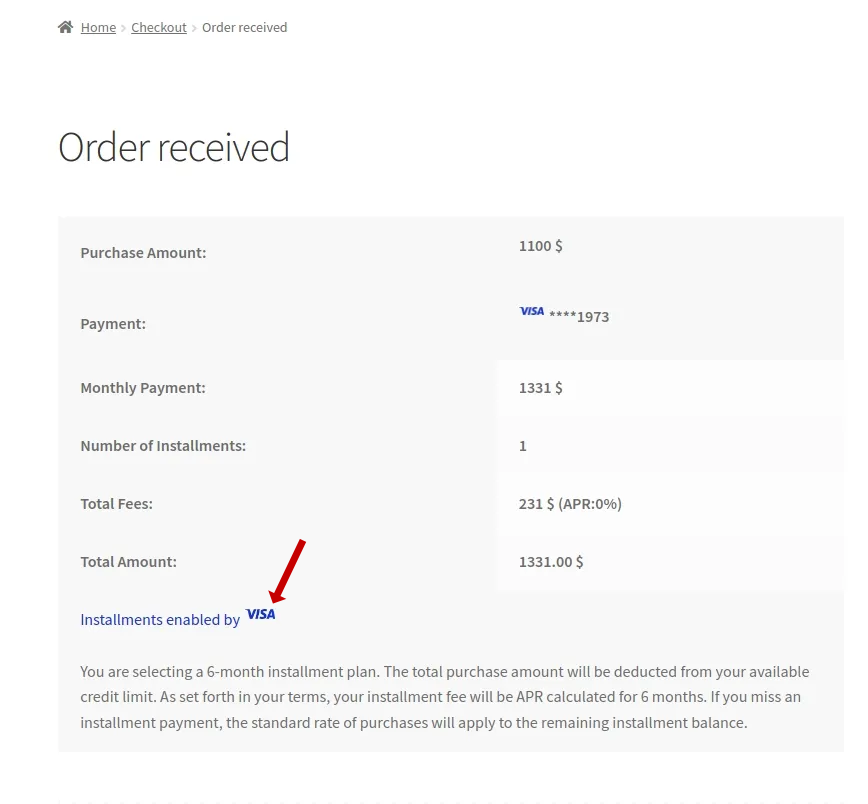
- "Installments by Visa" will be added to your checkout page and also your success page (the page that shows after an order has gone through):
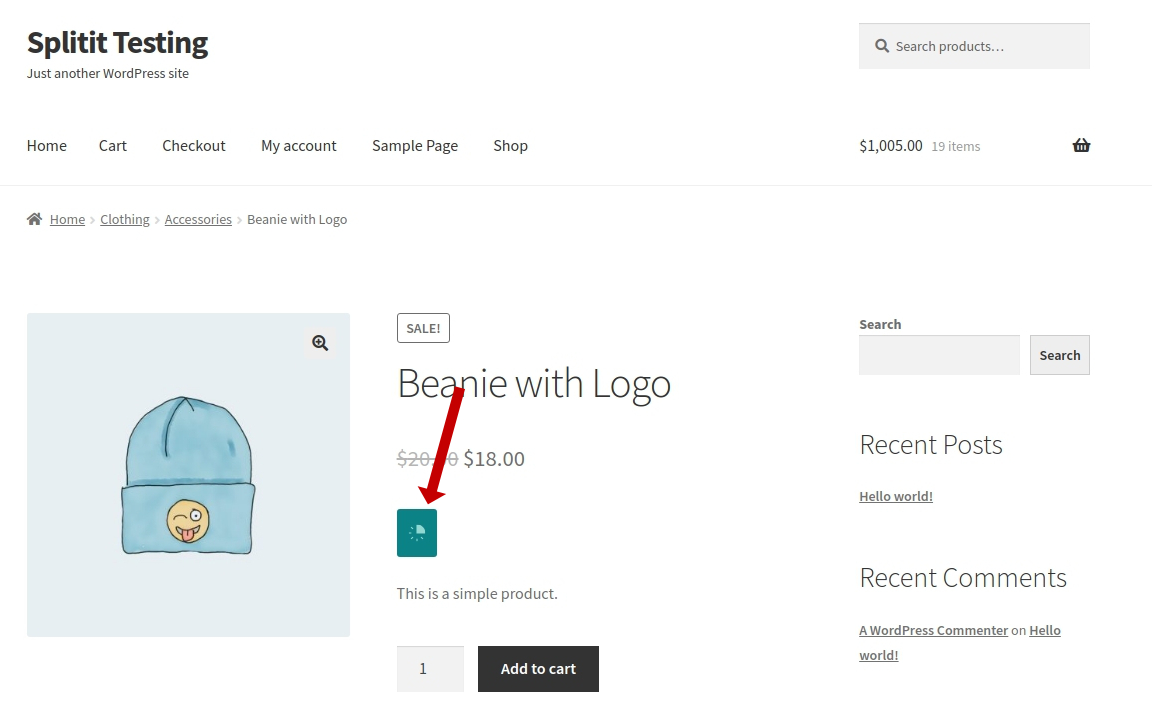
- The Visa logo will appear throughout your On-Site Messaging:
Setup
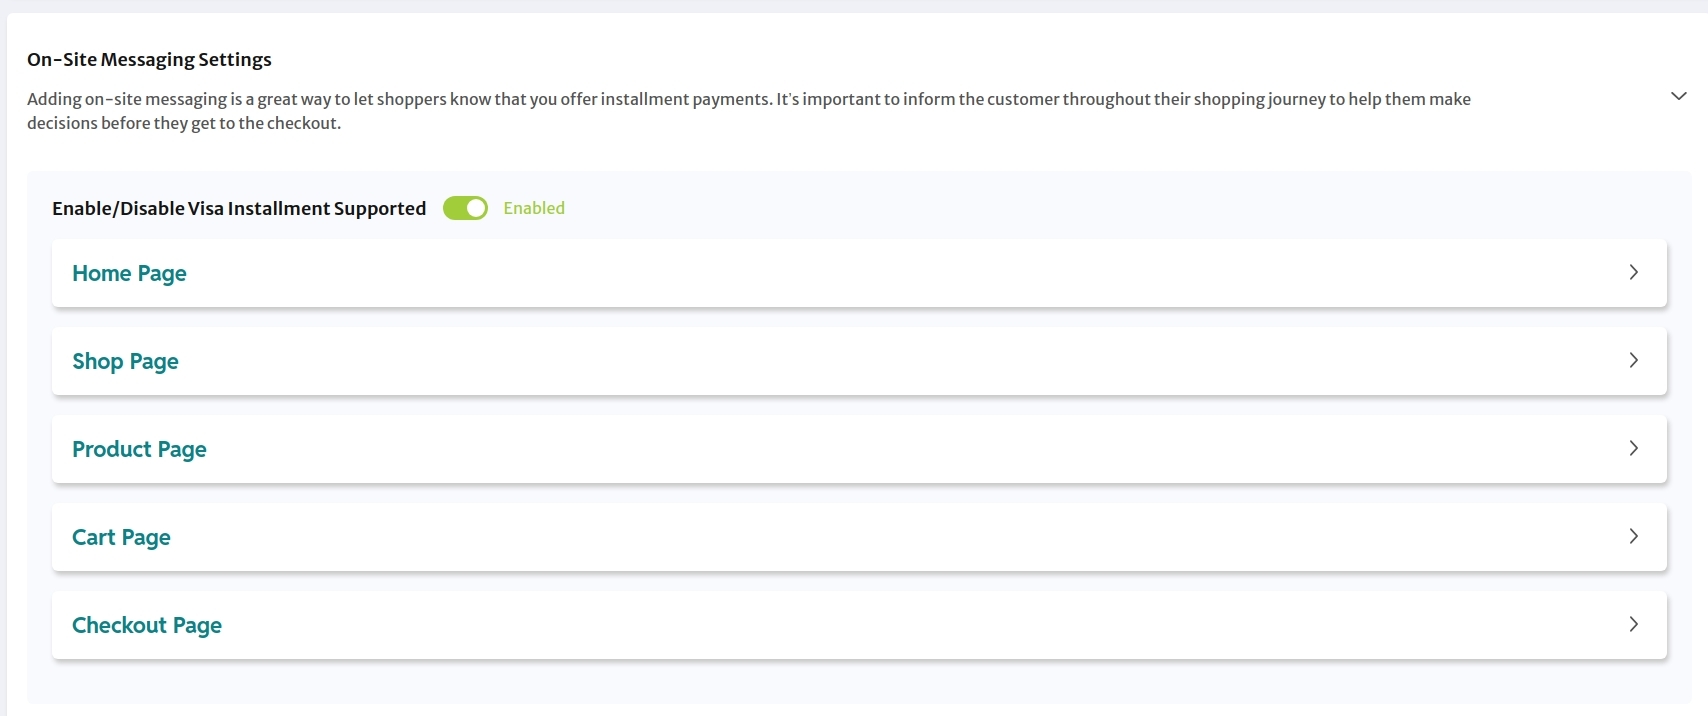
1. Enable Visa Installments
In your On-Site Messaging Settings, set Enable/Disable Visa Installment Suppported to Enabled.
2. Request Splitit Activation
Reach out to your Account Manager to activate VIS on Splitit's side (if it hasn't been activated).