Quickstart
Learn how to integrate Splitit purely using API calls, i.e., without forms or other premade UI. For alternatives that feature premade UI, please refer to the documentation for Checkout Solutions, Splitit Go or Platform Plugins.
1. Fetch Your Credentials
Register for a sandbox account here or contact sales for a production account.
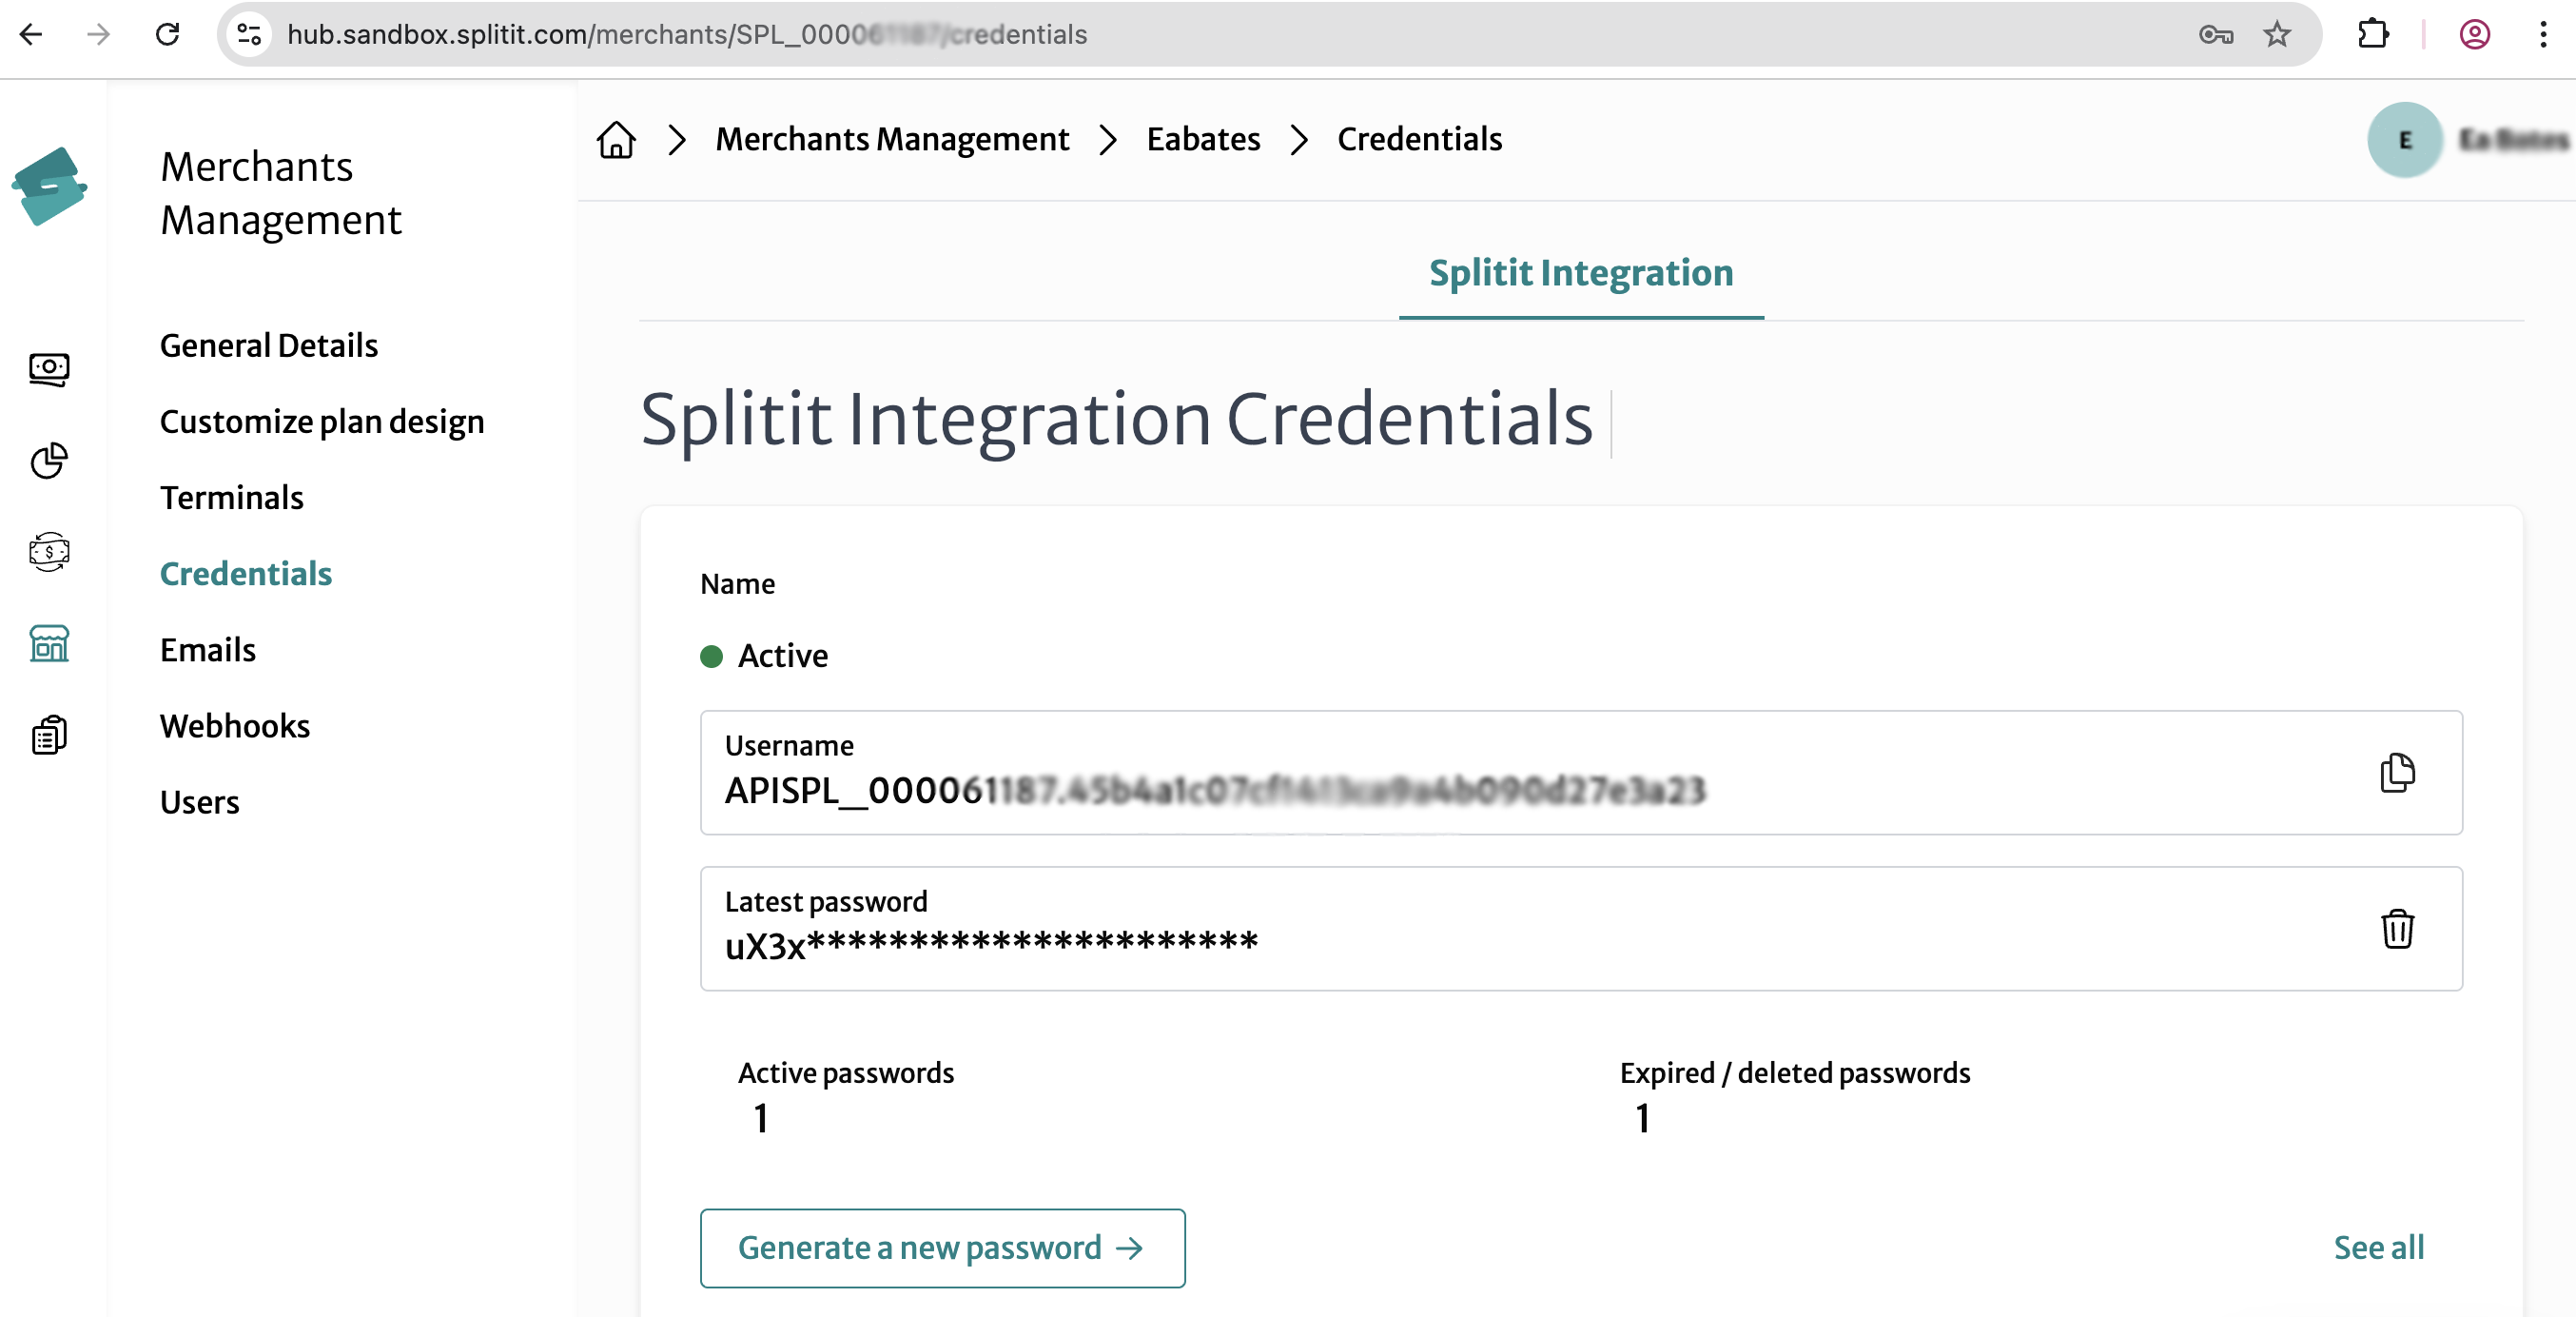
You'll need three items from your merchant hub to make Splitit API calls:
- An API Username, which you can find under Merchants Management-> Select Your Merchant-> Credentials. Copy the
Usernameparameter. - An API Password, which you can find under Merchants Management-> Select Your Merchant-> Credentials. Click Generate a new password.
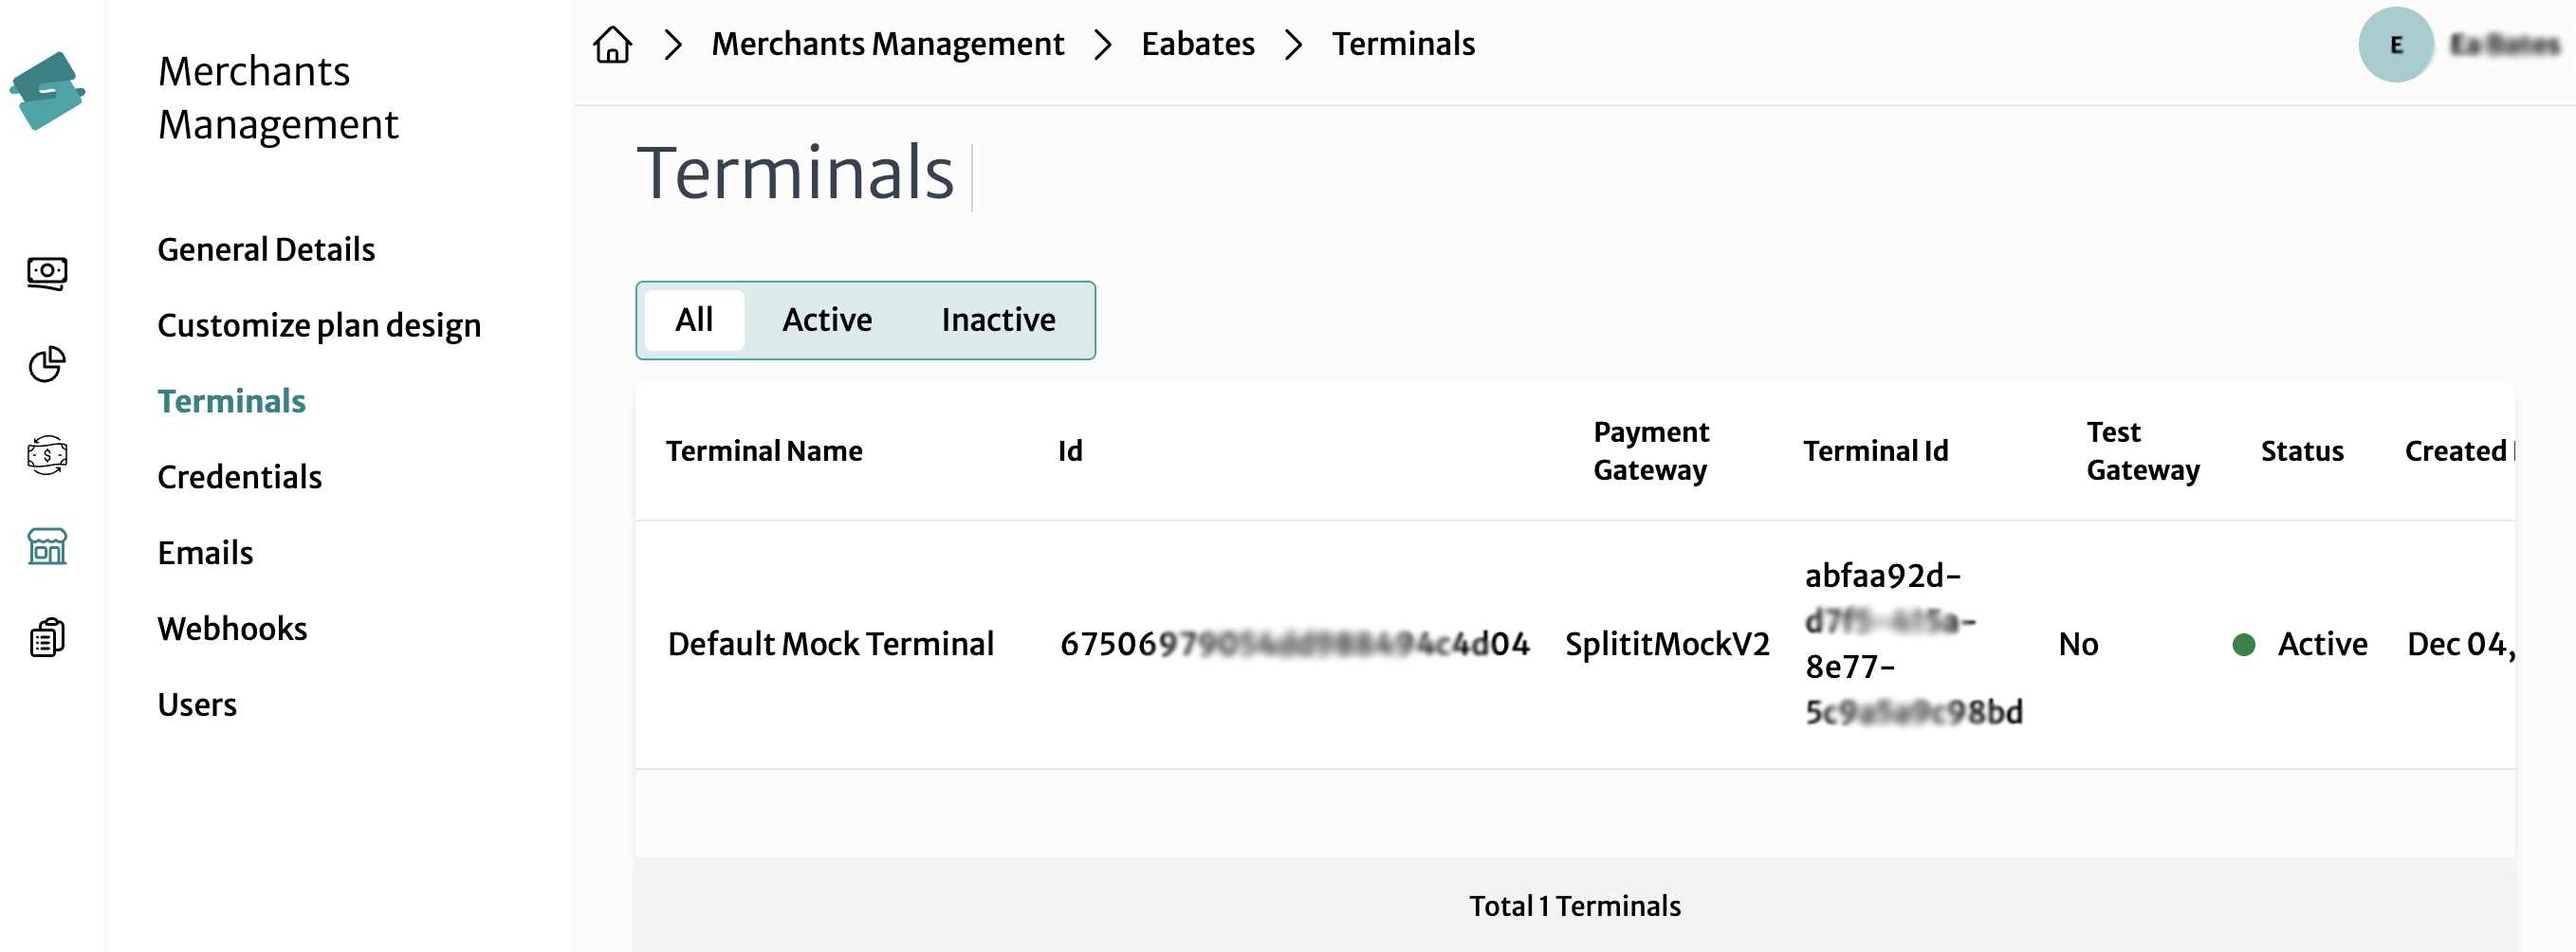
- A Terminal Id, which can be found under Merchants Management-> Select Your Merchant-> Terminals. Copy the
Terminal Idfor the terminal you'd like to use.
2. Choose an SDK or Use Postman or cURL
To call the Splitit APIs, you can use one of multiple SDKs, or Postman or cURL. All Splitit API requests are POSTs and must be made over HTTPS with the header parameter "Content-Type = application/json." Make sure that credentials are stored securely on your server and transmitted directly to the Splitit APIs.
3. Authenticate
Authenticate by POSTing your credentials to the Splitit sandbox or production ID server https://id.{environment}.splitit.com/connect/token according to these instructions. A 200 response will return a token you must add as a bearer header to all later calls.
4. Call Check Eligibility
Call the Check Eligibility endpoint as soon the shopper has entered any information, as well as throughout the process, in order to verify their overall eligibility for Splitit installment plans according to their credit card issuer.
5. Start a Plan by Following Steps for Your Payment Flow
- Basic
- Basic with 3DS
- Basic with AutoCapture=False
- Call the Create endpoint using the instructions here to establish a plan using your shopper's information.
- If all defaults are left (i.e., AutoCapture=true), and the operation is successful, authorization and capture of the first plan installment will be completed.
- Call the Create endpoint using the instructions here to establish a plan using your shopper's information. Make sure to set
"Attempt3dSecure": truein your request body. - You will receive a 400-641 error that contains a
ClientRedirectURLto send your shopper to for 3DS. - After the shopper has checked out with 3DS, call Verify Authorization using the instructions here to verify that the shopper successfully started a plan during the process.
(Use this flow if you need to authorize your shopper's card but charge it later; for example, if you are waiting to charge cards until shipment).
- Call the Create endpoint using the instructions here to establish a plan using your shopper's information. Make sure to set
"AutoCapture": falsein your request body. - Once you are ready to charge the shopper's card, call Update Plan by Number (link) or Update Plan by Alternate Field (link), setting
"Capture": truein your request body. - You may also wish to update
ShippingStatus.
6. Set Up On-Site Messaging
Now that you have successfully checked a customer out using the Splitit API, a next step you may want to take is to add Splitit visuals to your site using On-Site Messaging.