Merchant Portal Guide
Getting Started
You should have obtained your username and temporary password via email from Splitit in order to access the Merchant Portal.
If this is the first time you are logging in, you will be asked to reset your password. The system will then log you into the Merchant Portal. If you have not yet received this information, please reach out to support@splitit.com.
Logging into the Splitit Merchant Portal
- To log into your Merchant Portal, enter https://merchant.splitit.com (we recommend you save/bookmark this URL for easy access).
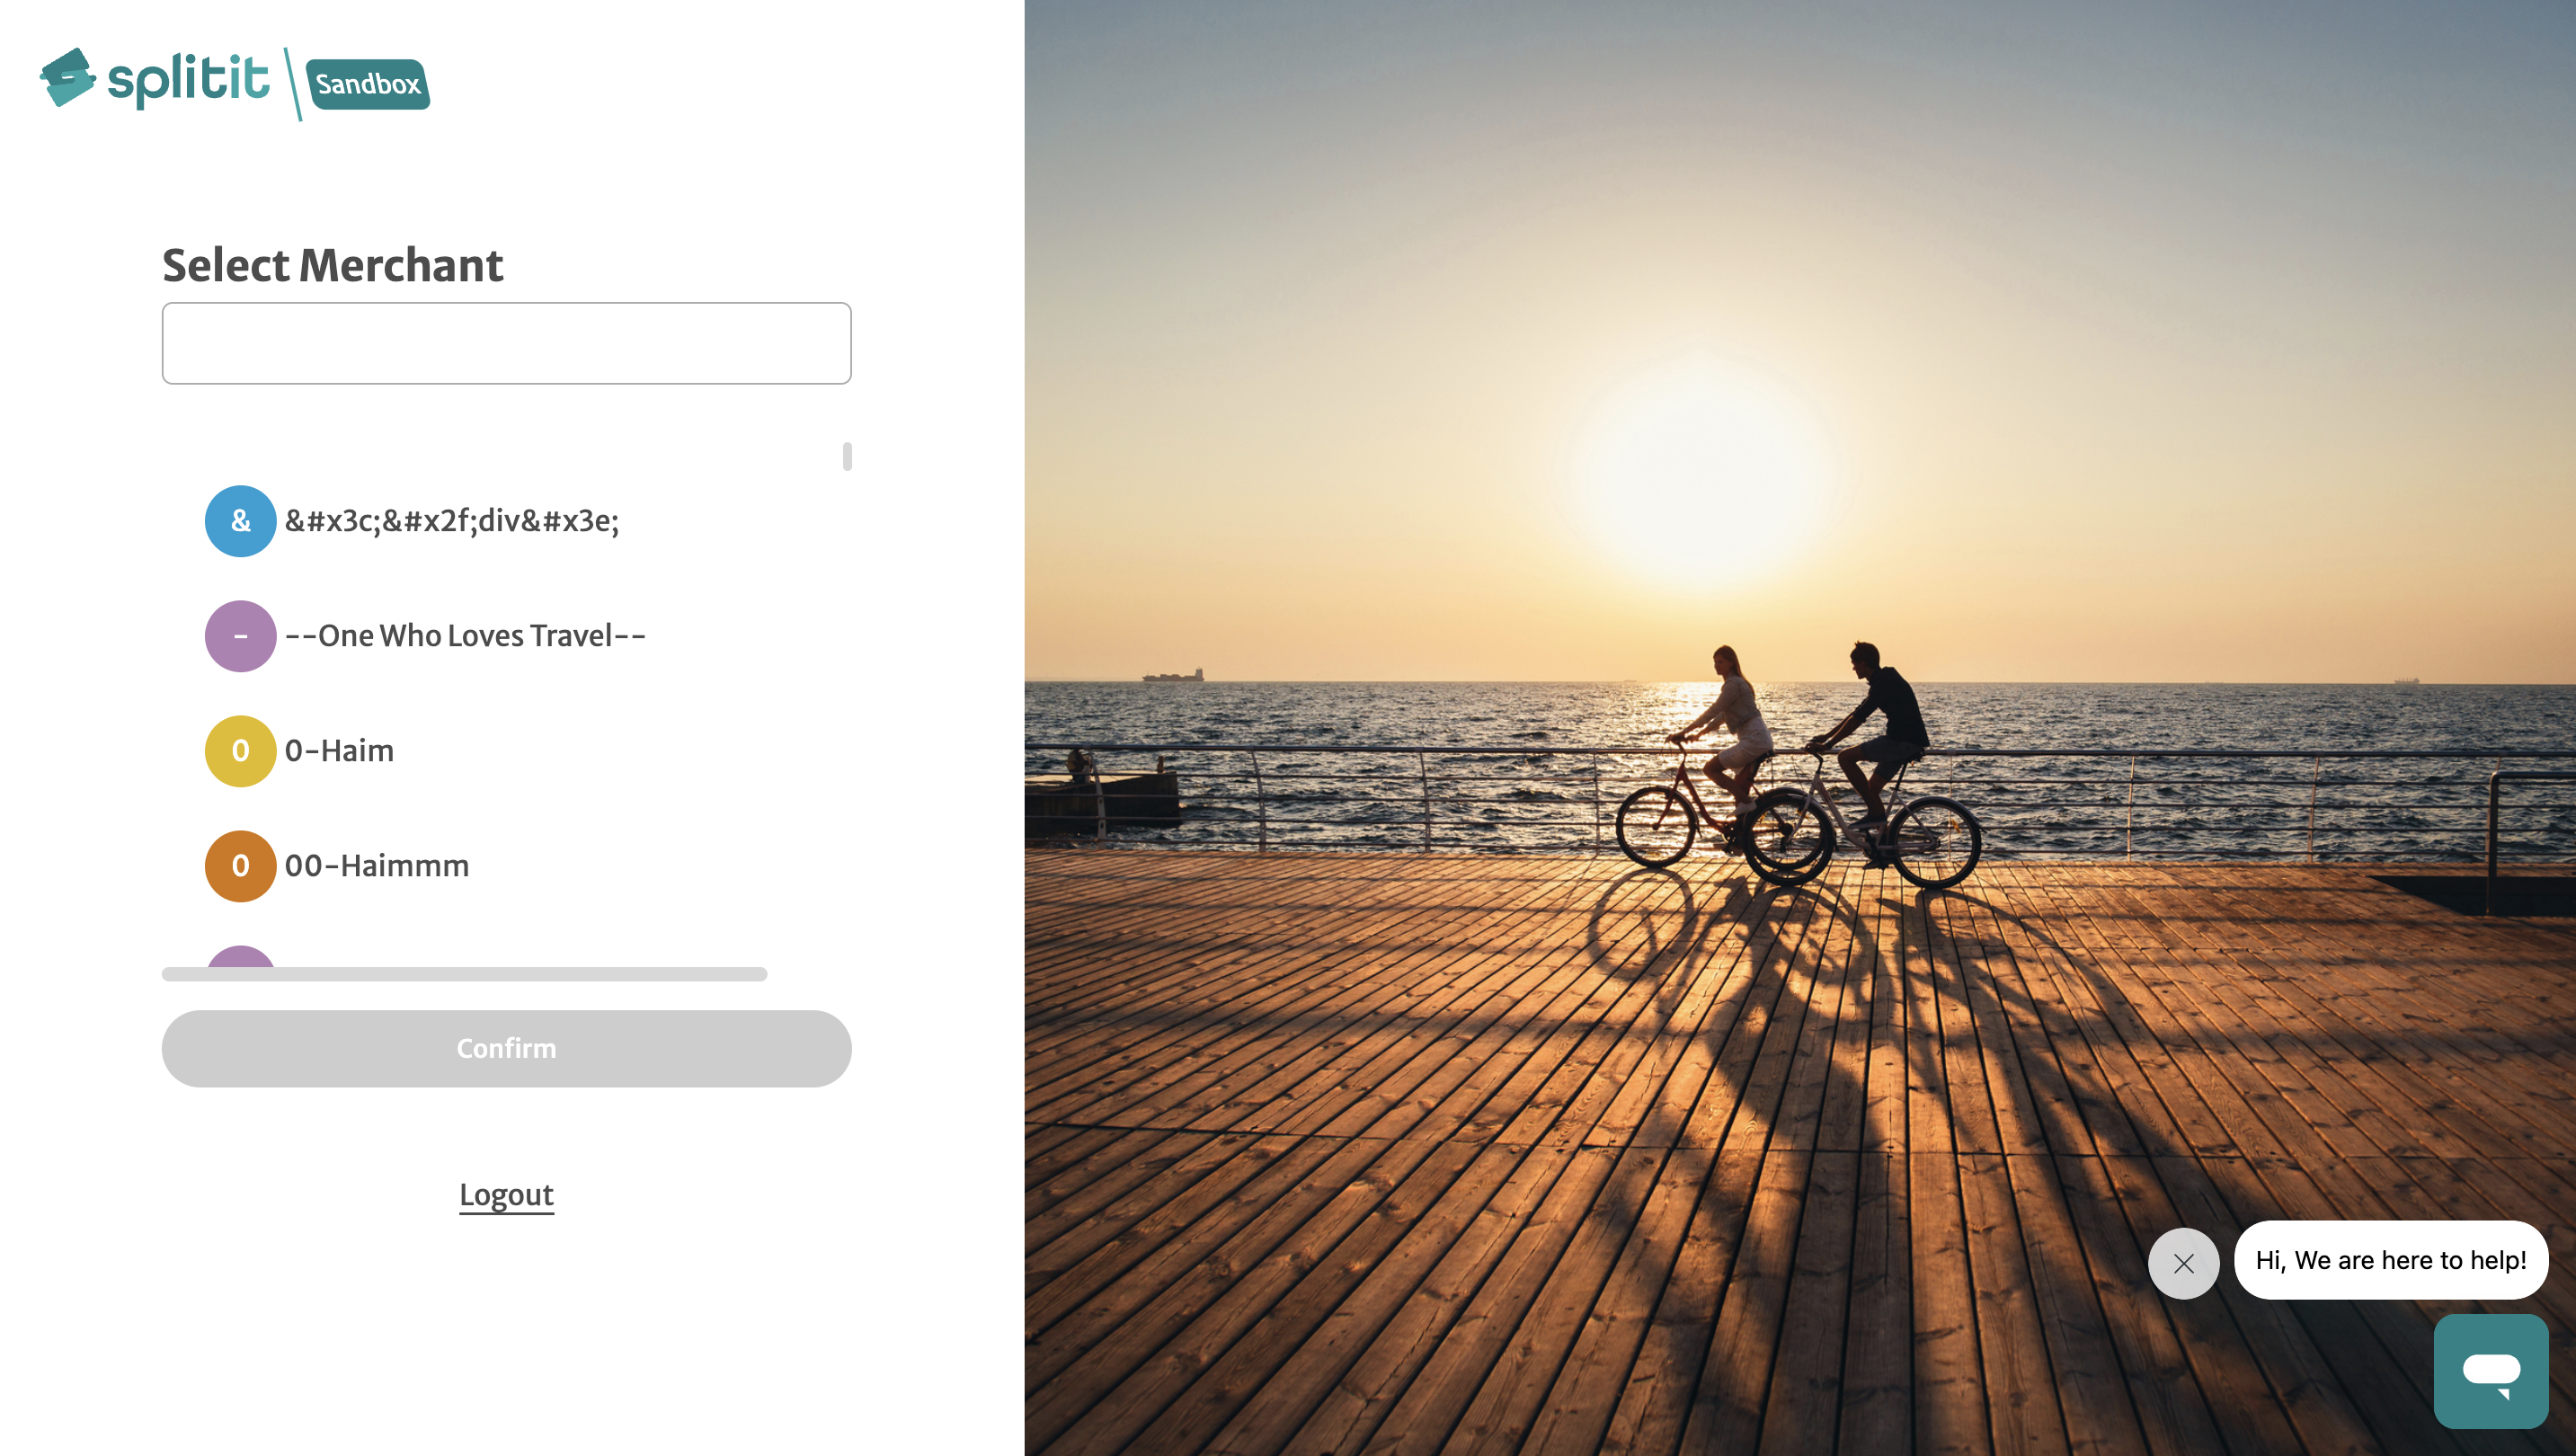
- Use your username and password, or your Google authorization to login.
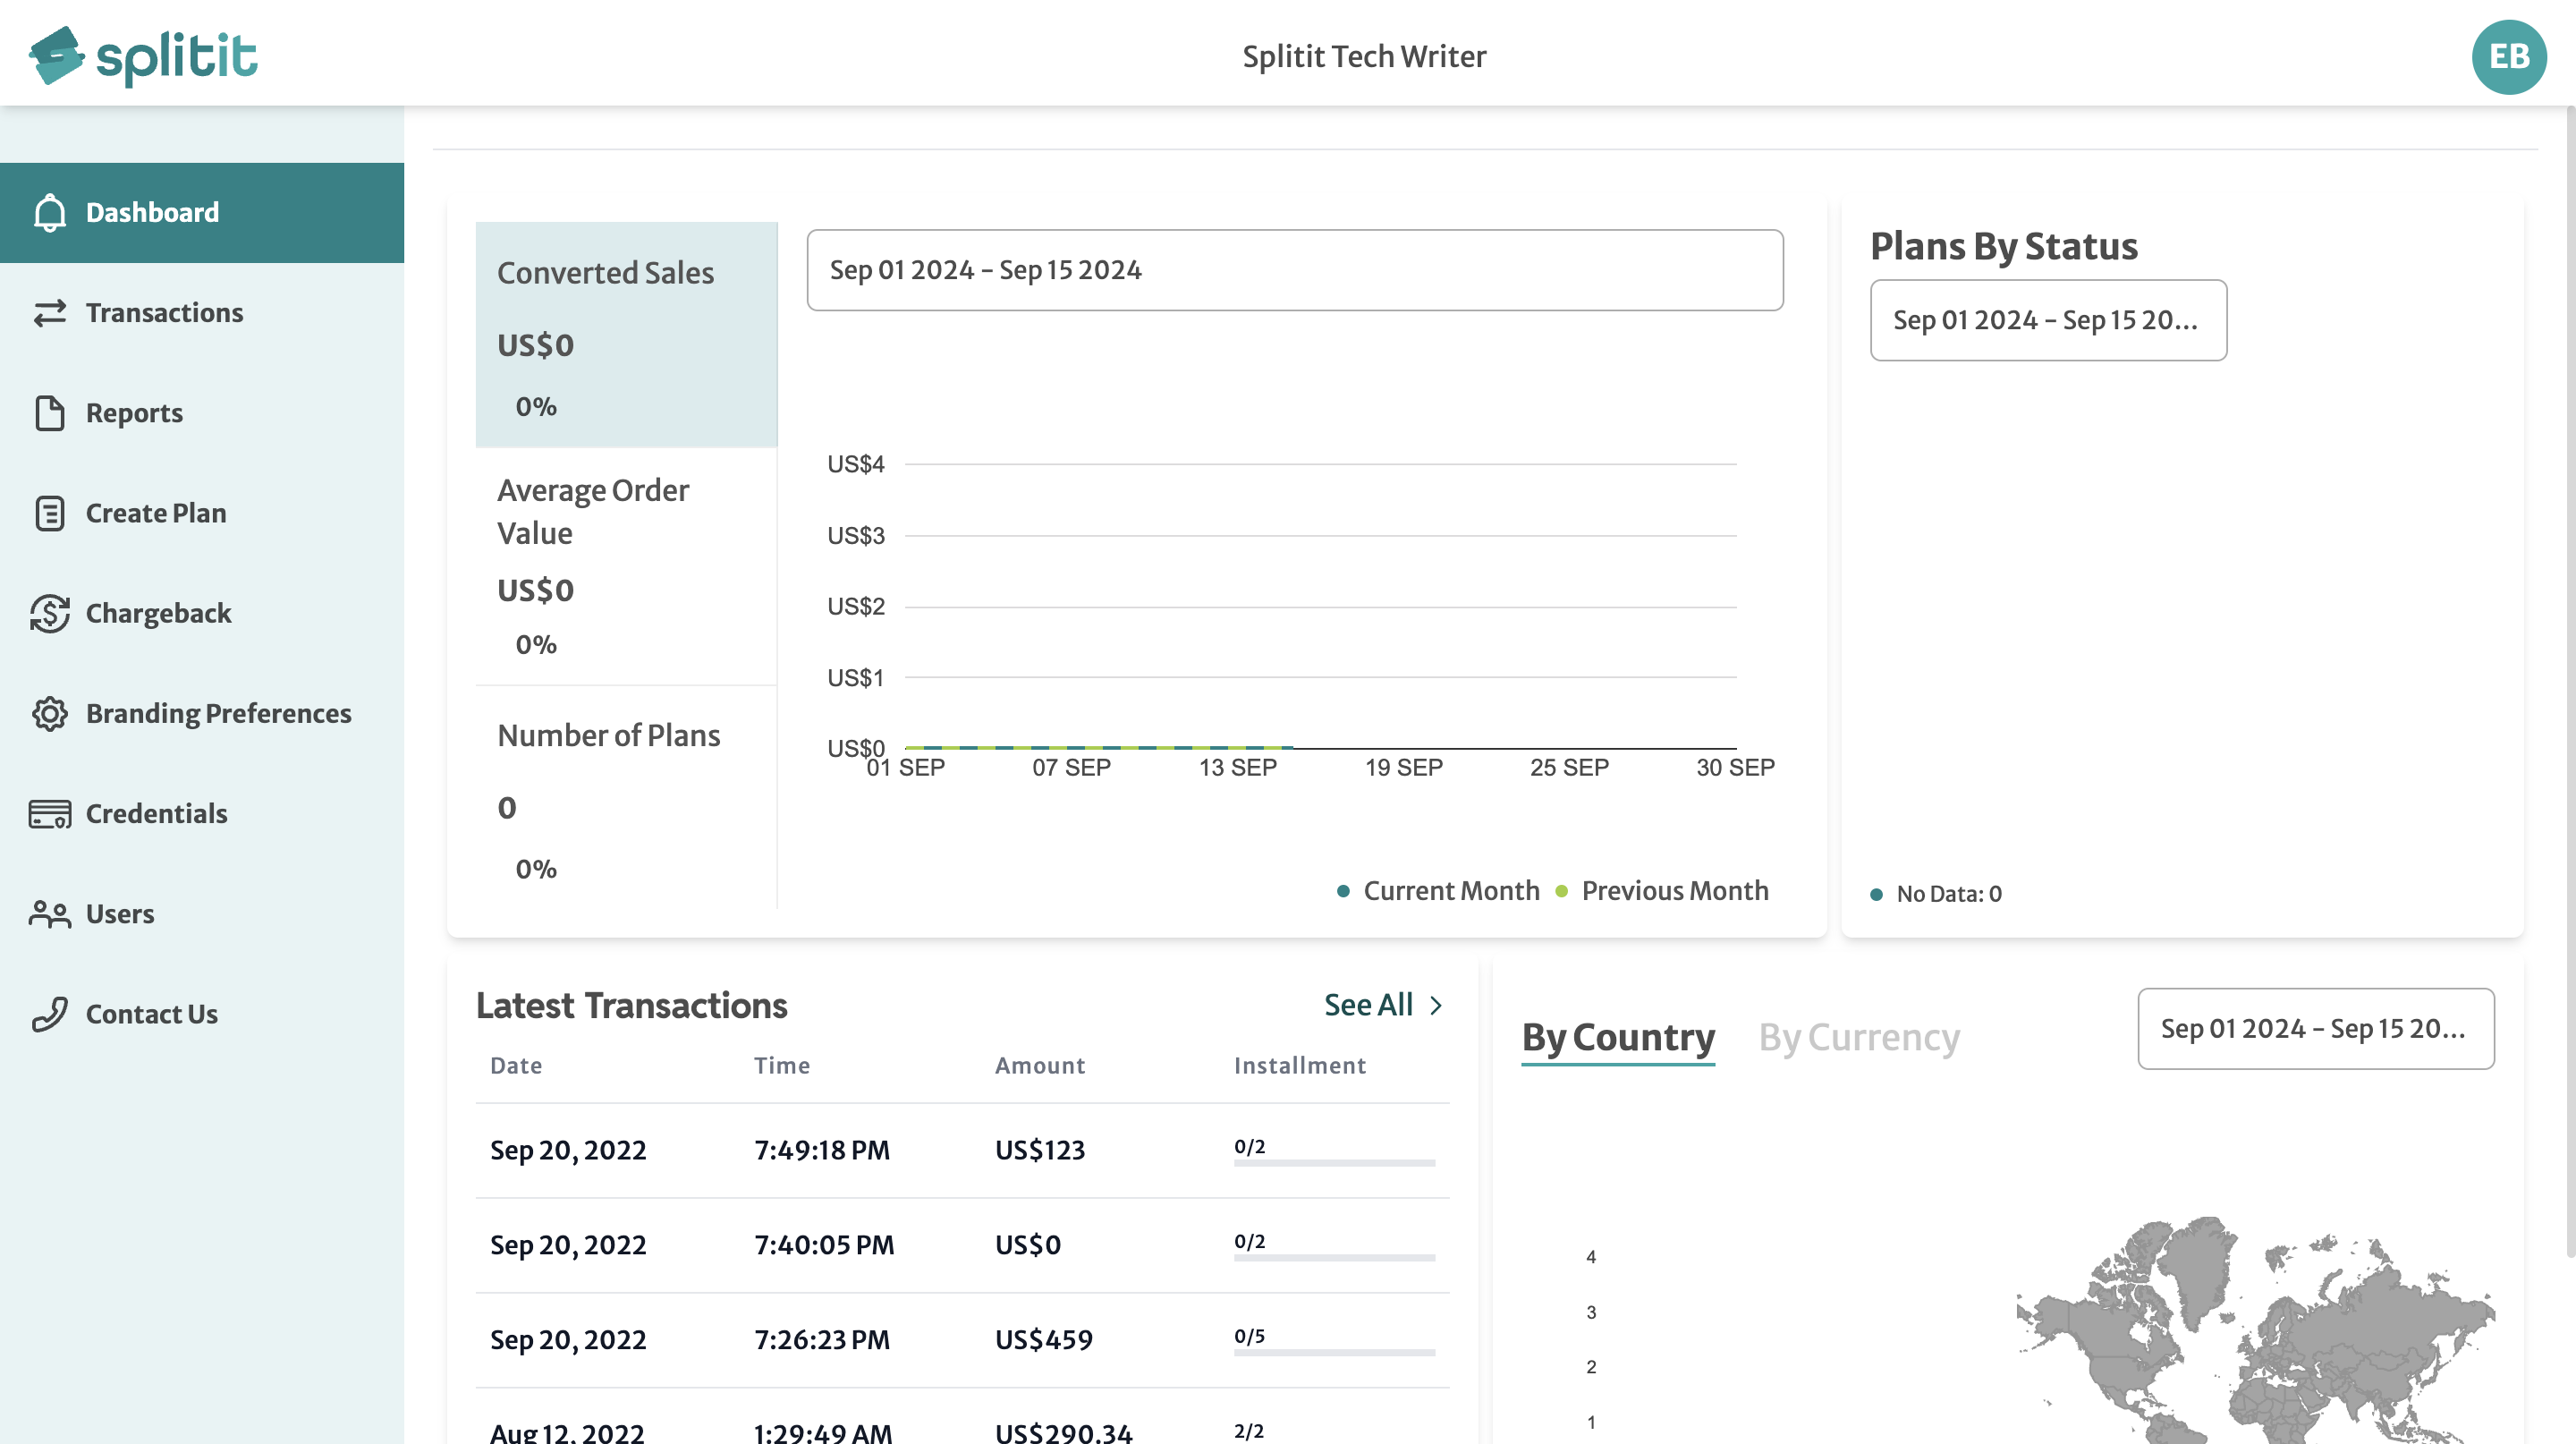
Dashboard
The dashboard provides an overview of Splitit activity during a specific time period. Examples of information the dashboard provides are:
- Converted Sales
- Average Order Value
- Number of Plans
- Plans by Status
- Latest Transactions
- Transactions by Country or Currency
You can access additional data for the various sections with a calendar option, by clicking on the date range box at middle top. In the popup UI, you can specify a new range or make preset selections (“previous” or “current”) by day, month, quarter, week or year.
Transactions
The Transactions window shows a chronological list of all transactions in your system, and includes the columns Date, Time, Store Name, Order ID, Splitit Plan ID, Amount, Installment (i.e.,”1 of 6”), Status, Shopper's Name, Fraud (status), Funded (status) and Method (of payment). Specify the number of results to show per page at the bottom right of the window.
Use the search bar to search by Order ID, Plan ID, Name, Email or other fields.
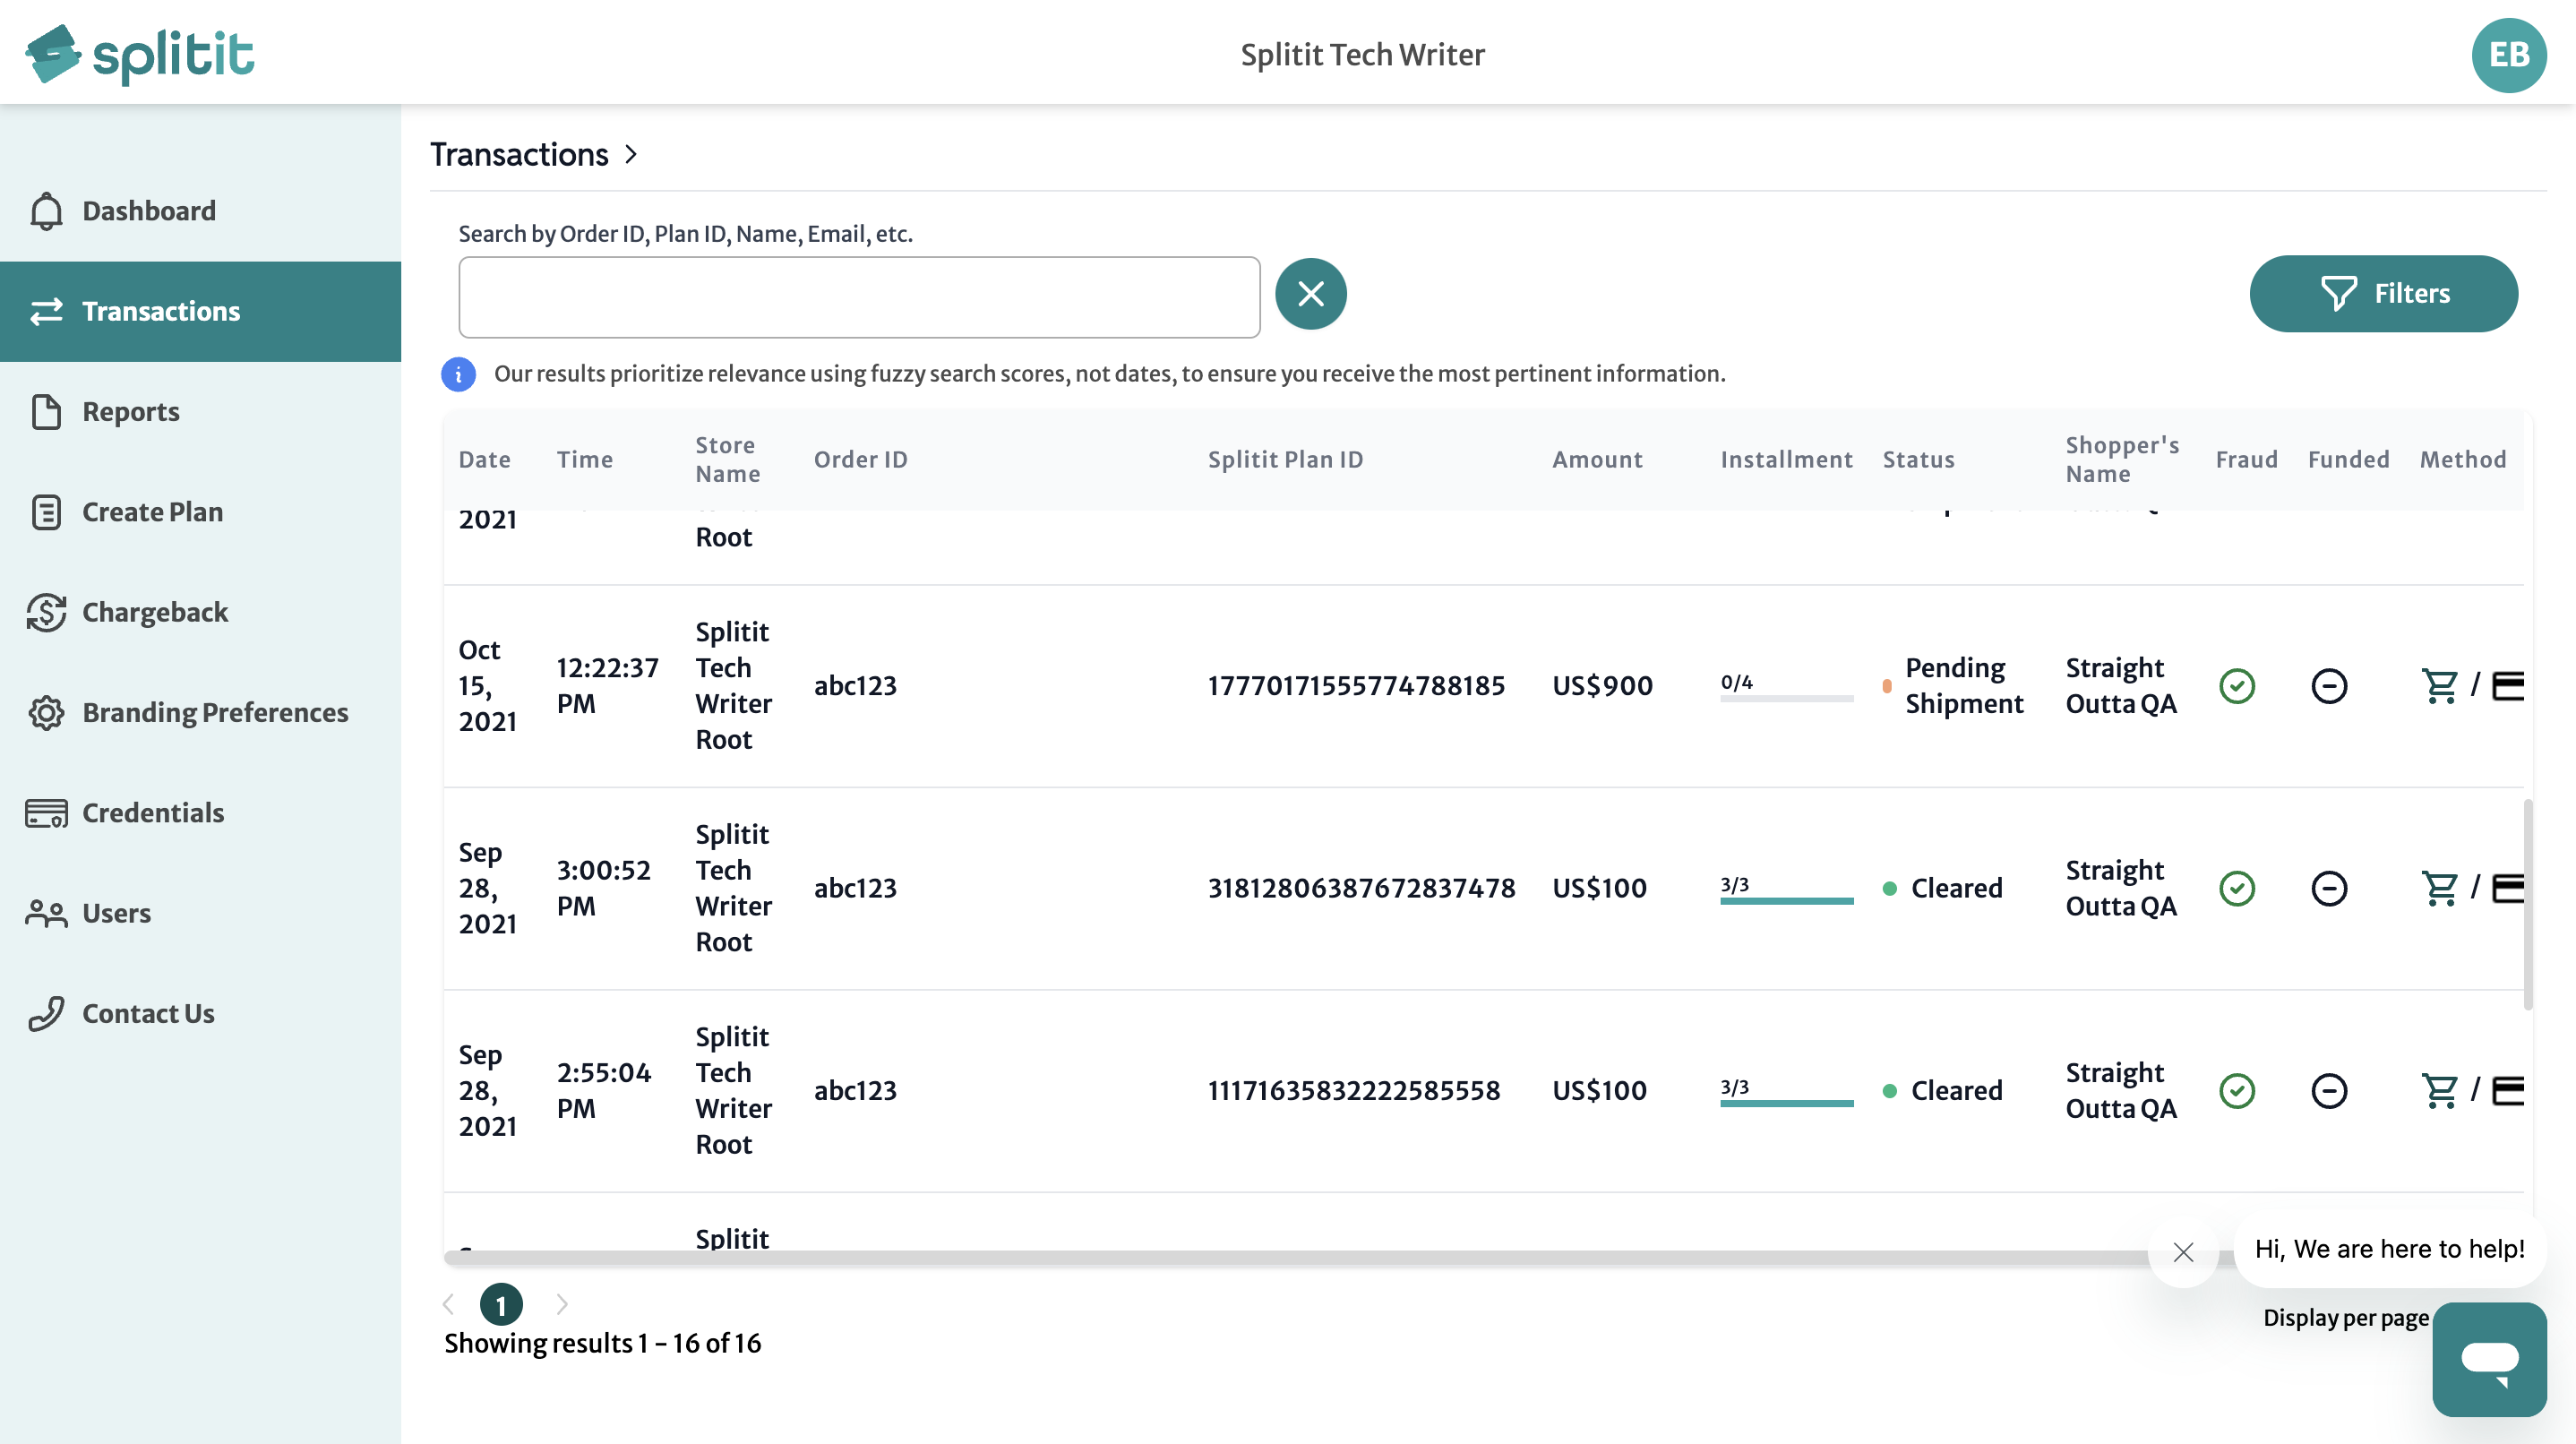
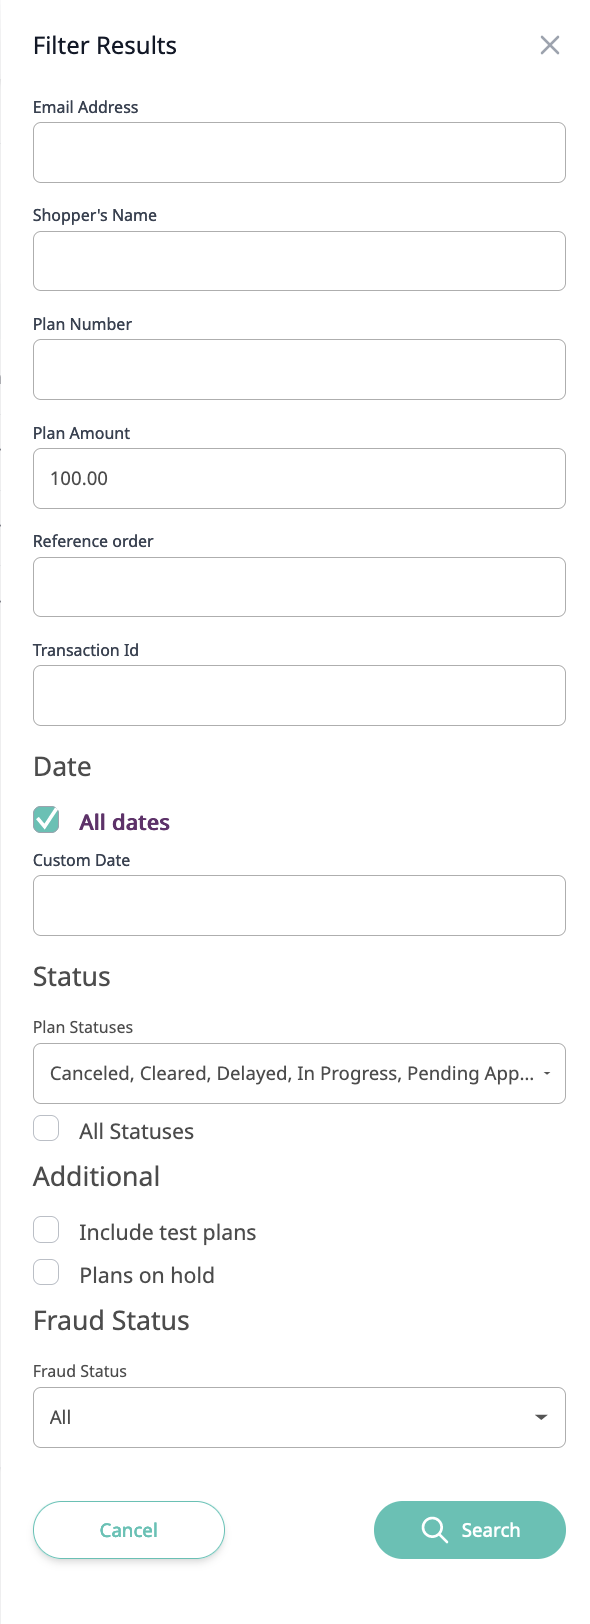
For more granular manipulation of your data, you can click on the Filters button. In the dialogue, you can isolate your results by specifying a combination of Email Address, Shopper's Name, Plan Number, Plan Amount, Reference order number, Transaction Id, Date (using a datepicker calendar), or Plan Status. Under Additional, you can check the box to include test plans and plans on hold in your filter. Finally you can specify Fraud Status at the bottom. Once you have made your selections, make sure to click the Search button at the bottom of the dialogue.
Status Definitions
Plans listed in the Transactions window can have the following statuses:
- Cleared - Plan is paid in full; all payments are cleared
- Delayed - Plan has been on “Pending CC (Credit Card) Update" for more than 90 days or there is a transactional issue
- Deleted - Pending approval/authorization that was deleted by the system, after expiring. These are most likely non-recent, abandoned carts
- Initializing - The plan is in process of being created: If payment is not authorized after several hours, the plan will turn into status “Deleted.” These are most likely recent abandoned carts
- In Progress- Active Plan with one or more installments charged
- Pending Approval - Email has been sent to the shopper to approve the plan (please keep in mind, this email will expire after a period of time)
- Pending CC Update - Plan was declined by gateway due to insufficient funds, expiration date, or other reasons. New card details need to be provided by the shopper, within seven days
- Pending Shipment - Plan is only authorized, not charged. Once the goods are marked as “shipped” in a plugin or in the portal, the first charge will begin
- Cancelled - The plan was cancelled (typically refunded as well), meaning no more installments are set to be collected
Detail View
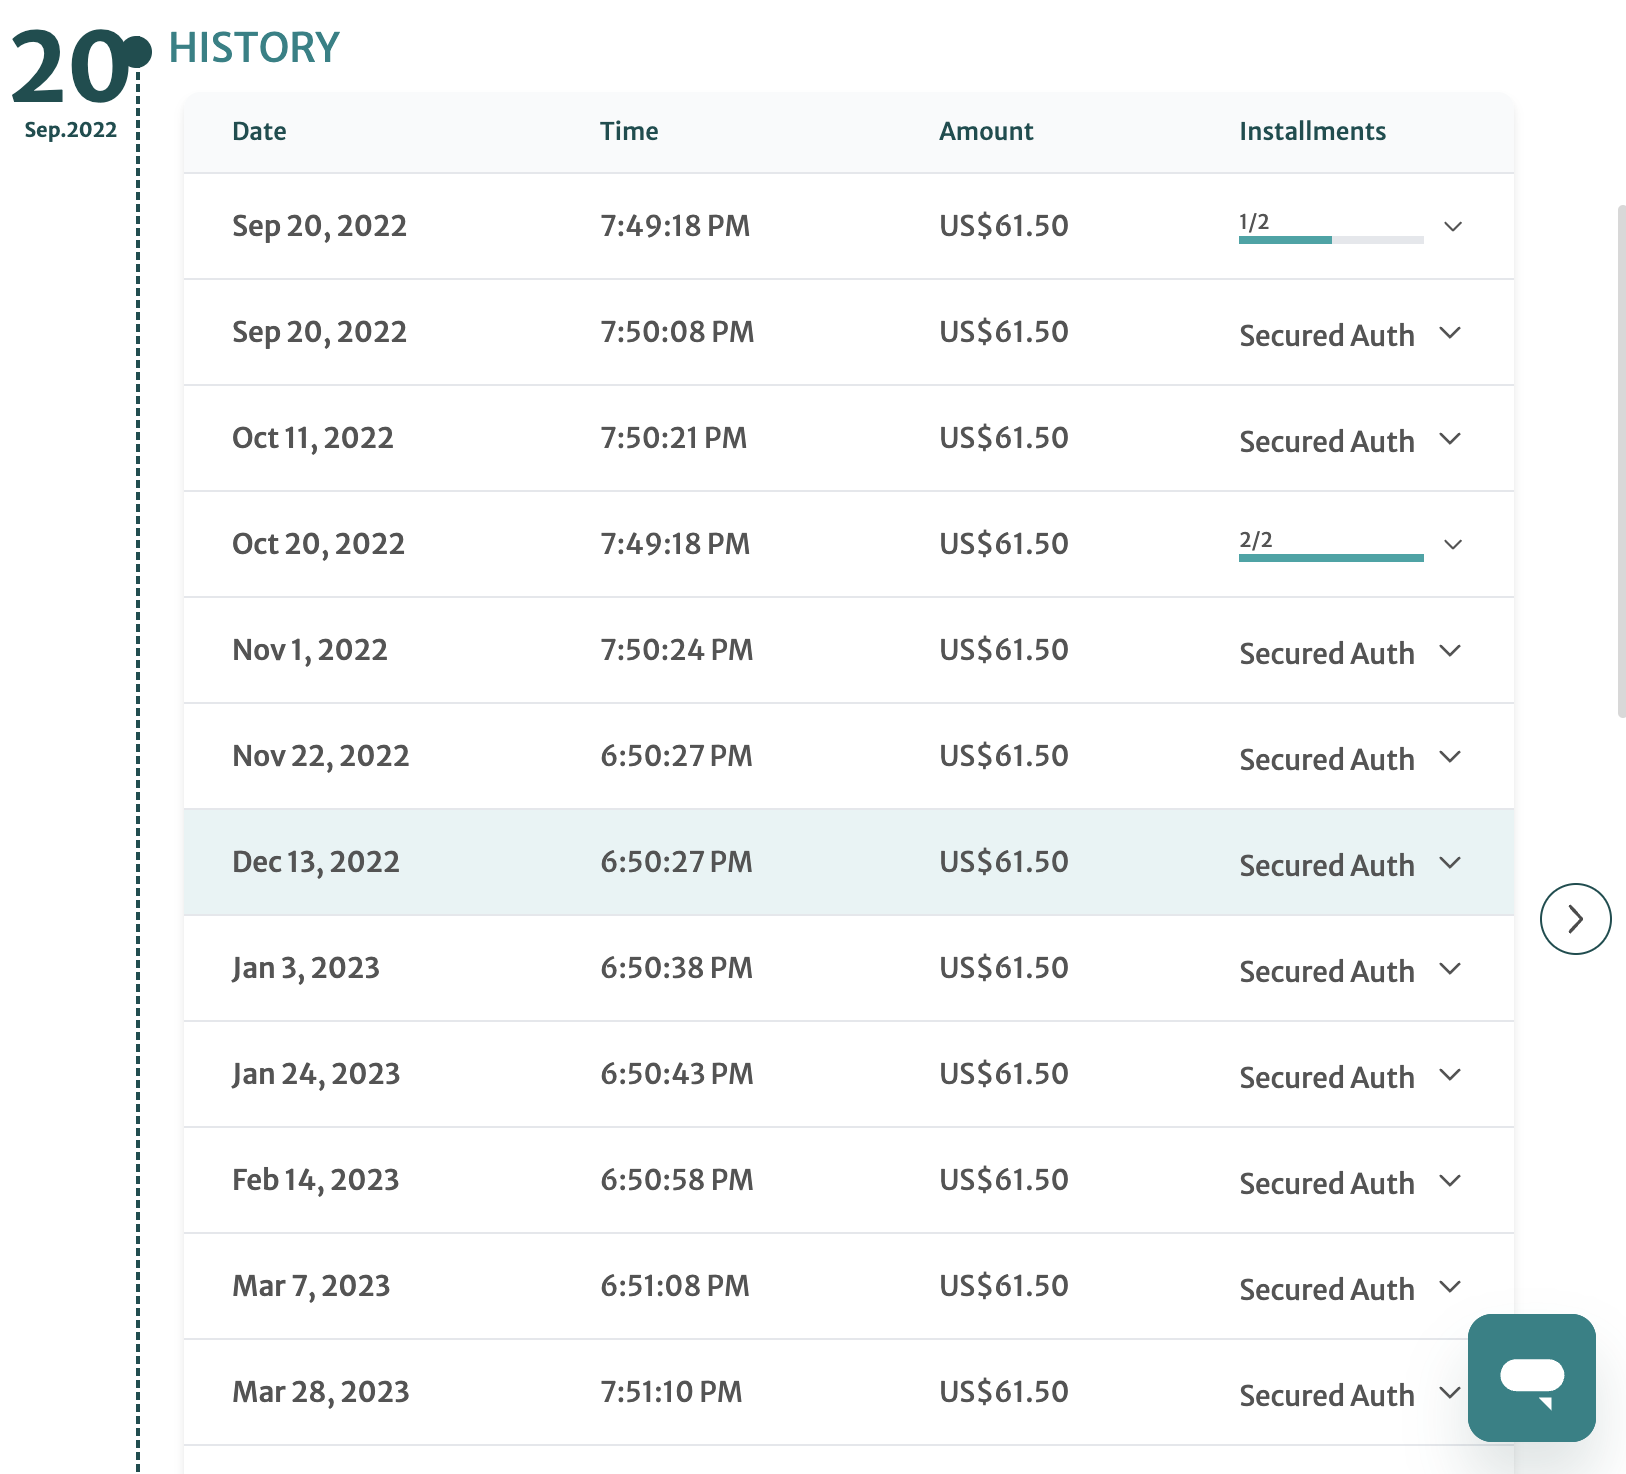
Clicking into a transaction opens up a detailed view of your shopper’s plan.
Plan Info Bar
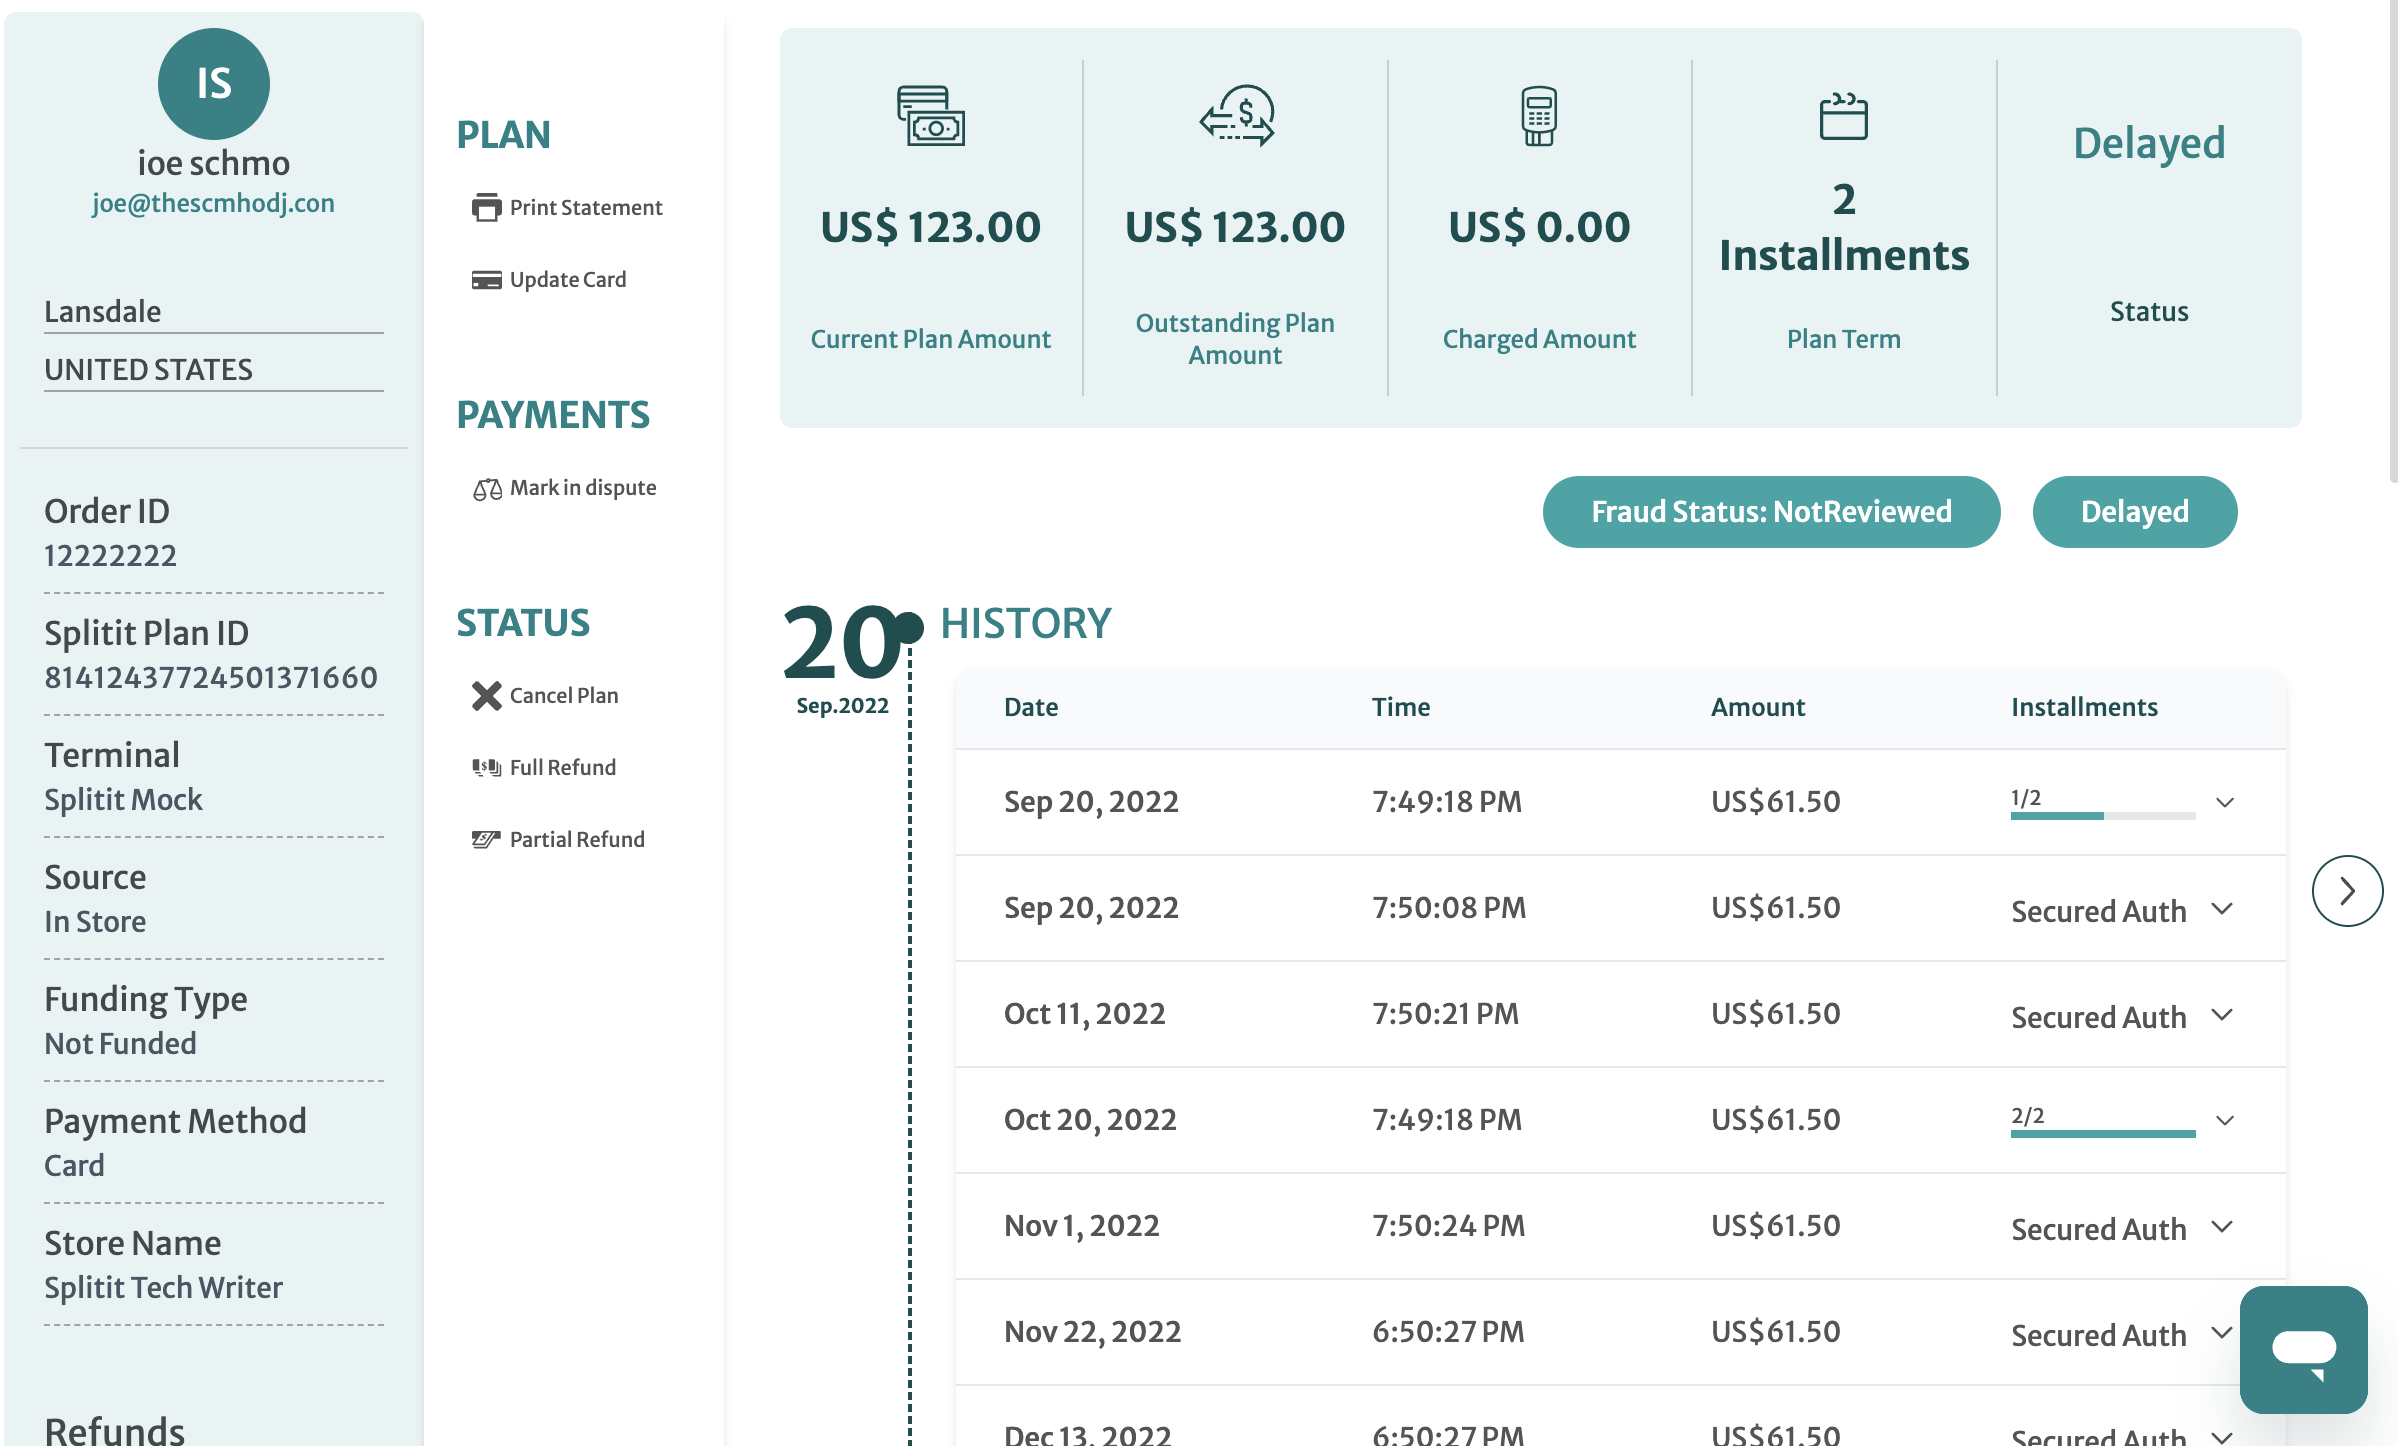
The horizontal bar at the top shows you the Current Plan Amount, Outstanding Plan Amount, Charged Amount, the Plan Term (number of installments), and Status. You can also see past and future installments, including dates, and how much was paid or will be paid on each installment.
Fraud Status Labels
Underneath the Plan Info bar, a label with fraud statuses is displayed (they also appear as symbols in the Transactions list):
-
Approved:
- Plan passed Forter fraud check
-

-
Not reviewed:
- Forter is not yet enabled on the account for transaction screening, or plan was a VPOS transaction that was ignored by Forter due to missing data (The missing data should be added.)
-

-
Rejected:
- Plan was rejected by Forter due to high-risk parameters
-

-
Failed:
- There was some sort of technical issue with screening the transaction (uncommon)
-

History Section
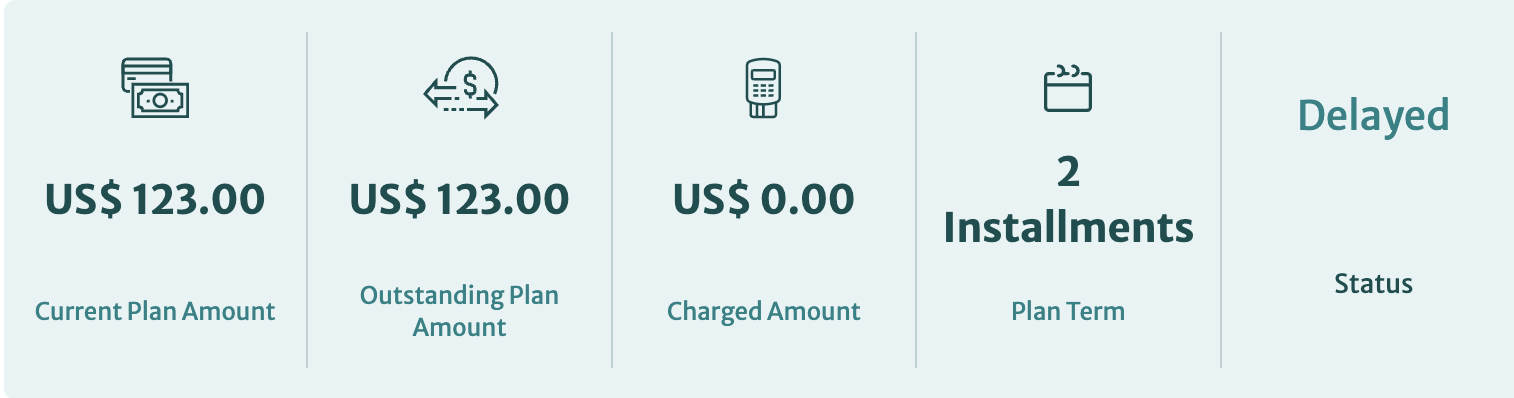
In the History section, you can see the date, time, amount and installment number for the installments in your plan. Clicking the down caret (⌄) next to an installment number opens up a detailed log related to the installment. For example, you can see whether a transaction was authorized only or captured as well. Clicking the arrow symbol on the right of the Plan History section will let you cycle through this view for each of your transactions.
Customer and Refunds Info Bar
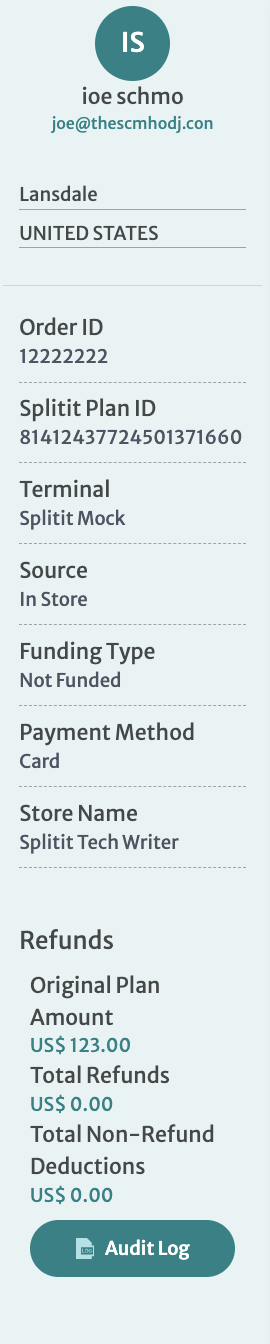
The vertical bar at the left shows Customer Address, Order ID, Plan ID, Terminal, Source, Funding Type, Payment Method, Store Name, and Refund information. Click the Audit Log button to get a downloadable list of all actions related to the plan.
Functions Panel
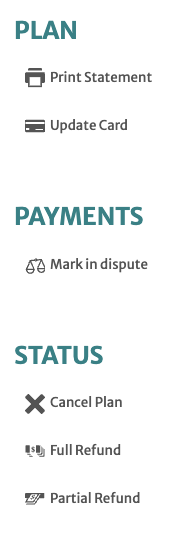
In the middle left vertical panel, there are a few important function areas:
- Plan
- Print Statement
- Print a statement with a summary of the plan, a payment schedule, and terms and conditions
- Update Card
- Update a card, which will cause an authorization (not a charge) for the full remaining amount of the plan to be placed on the new card
- Print Statement
- Status
- Ship (not pictured) lets you charge and start a plan that has only been authorized
- Hold Plan stops collecting payments
- Cancel Plan ends the installment plan without a refund; Note that Cancel Plan can only be used before the first installment is captured (but after authorization); otherwise you should use a refund option to end a plan
- Full Refund refunds all captured payments and cancels authorization
- Partial Refund refunds a set amount and cancels authorization (note that when a full refund is issued, a plan is canceled, but this is not the case with partial refunds)
Refund Options
When you proceed to partially refund a plan, you will be given three options to choose from, which are defined below:
Refund from outstanding balance first:
At first the customer isn’t refunded any installment money that they have already paid. Instead their refund lessens the amount of future installments for which they will be debited, beginning with the next installment that is due. However, if their refund exceeds the amount of money they have left to pay (all installments), only then is the refund taken out of the installment money they have already paid.
Refund from past charges first:
Customer is refunded beginning with the installment money they have already paid. If their refund amount exceeds the amount they have already paid, their amount of future installments due gets decreased, beginning with the next installment due and then proceeding to the later ones.
Refund from last installment:
This is the same as option 1 ("Refund from outstanding balance first"), except that the refund is credited starting with the last installment first (e.g., number 5 of 5, as opposed to number 3 of 5).
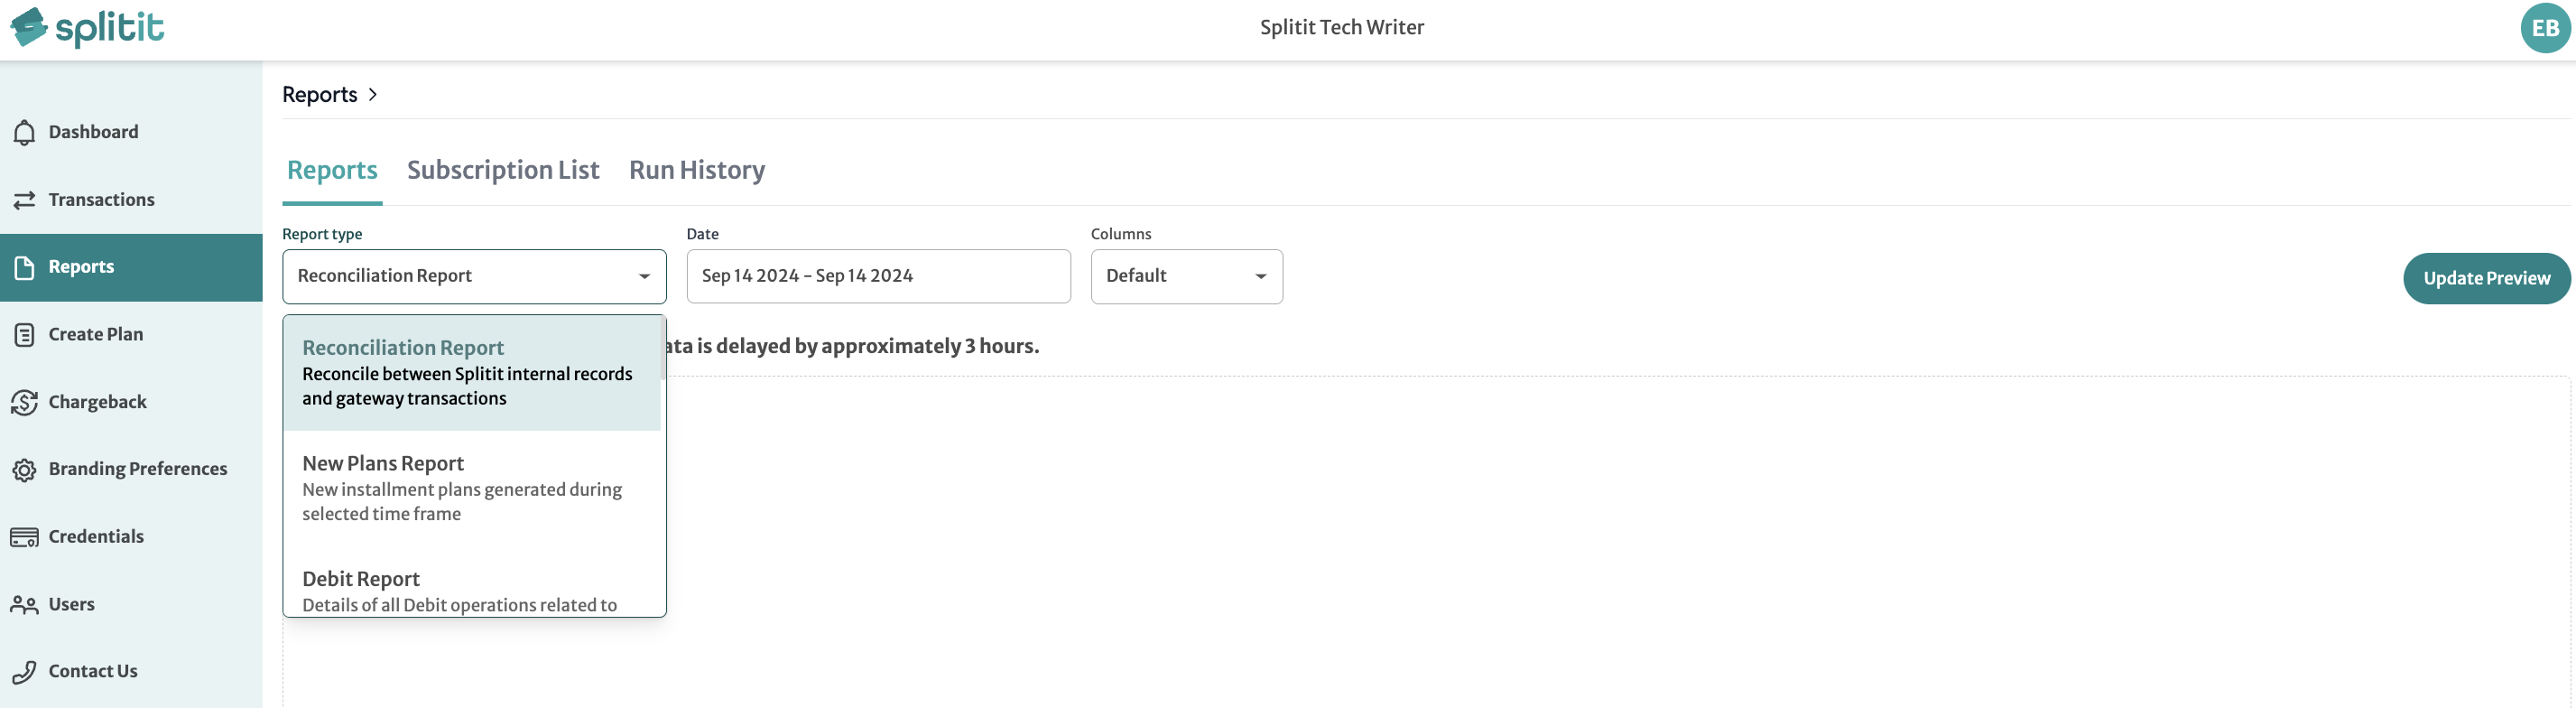
Reports
There are six reports available to you in your Merchant Portal:
- Reconciliation Report - Reconciles between Splitit internal records and gateway transactions
- Funding Report (pending deprecation) - Details of all credit operations related to merchant funding
- Debit Report (pending deprecation) - Details of all debit operations related to merchant funding
- New Plans Report - New installment plans generated during a selected time frame
- Outstanding Amount Report- Details of outstanding expected shopper amounts
- Shopper Outstanding Report - Additional details regarding outstanding amounts
- Settlement Report Summary - Highlights Net Settlement Amount, which corresponds to the actual funds deposited into your bank account
- Settlement Report Details - Transaction-level breakdown providing in-depth insights into your financial activity (new plans, refunds, chargeback resolutions)
Viewing Desired Report Data
You can add, organize, and remove fields from your report data previews based on your needs, by utilizing various wizards. Learn more in the Merchant Portal Reports: How to Use.
Report Subscription Tool
Subscribe to receive specific reports sent to your inbox daily or monthly. Learn more in Merchant Portal Reports: How to Use.
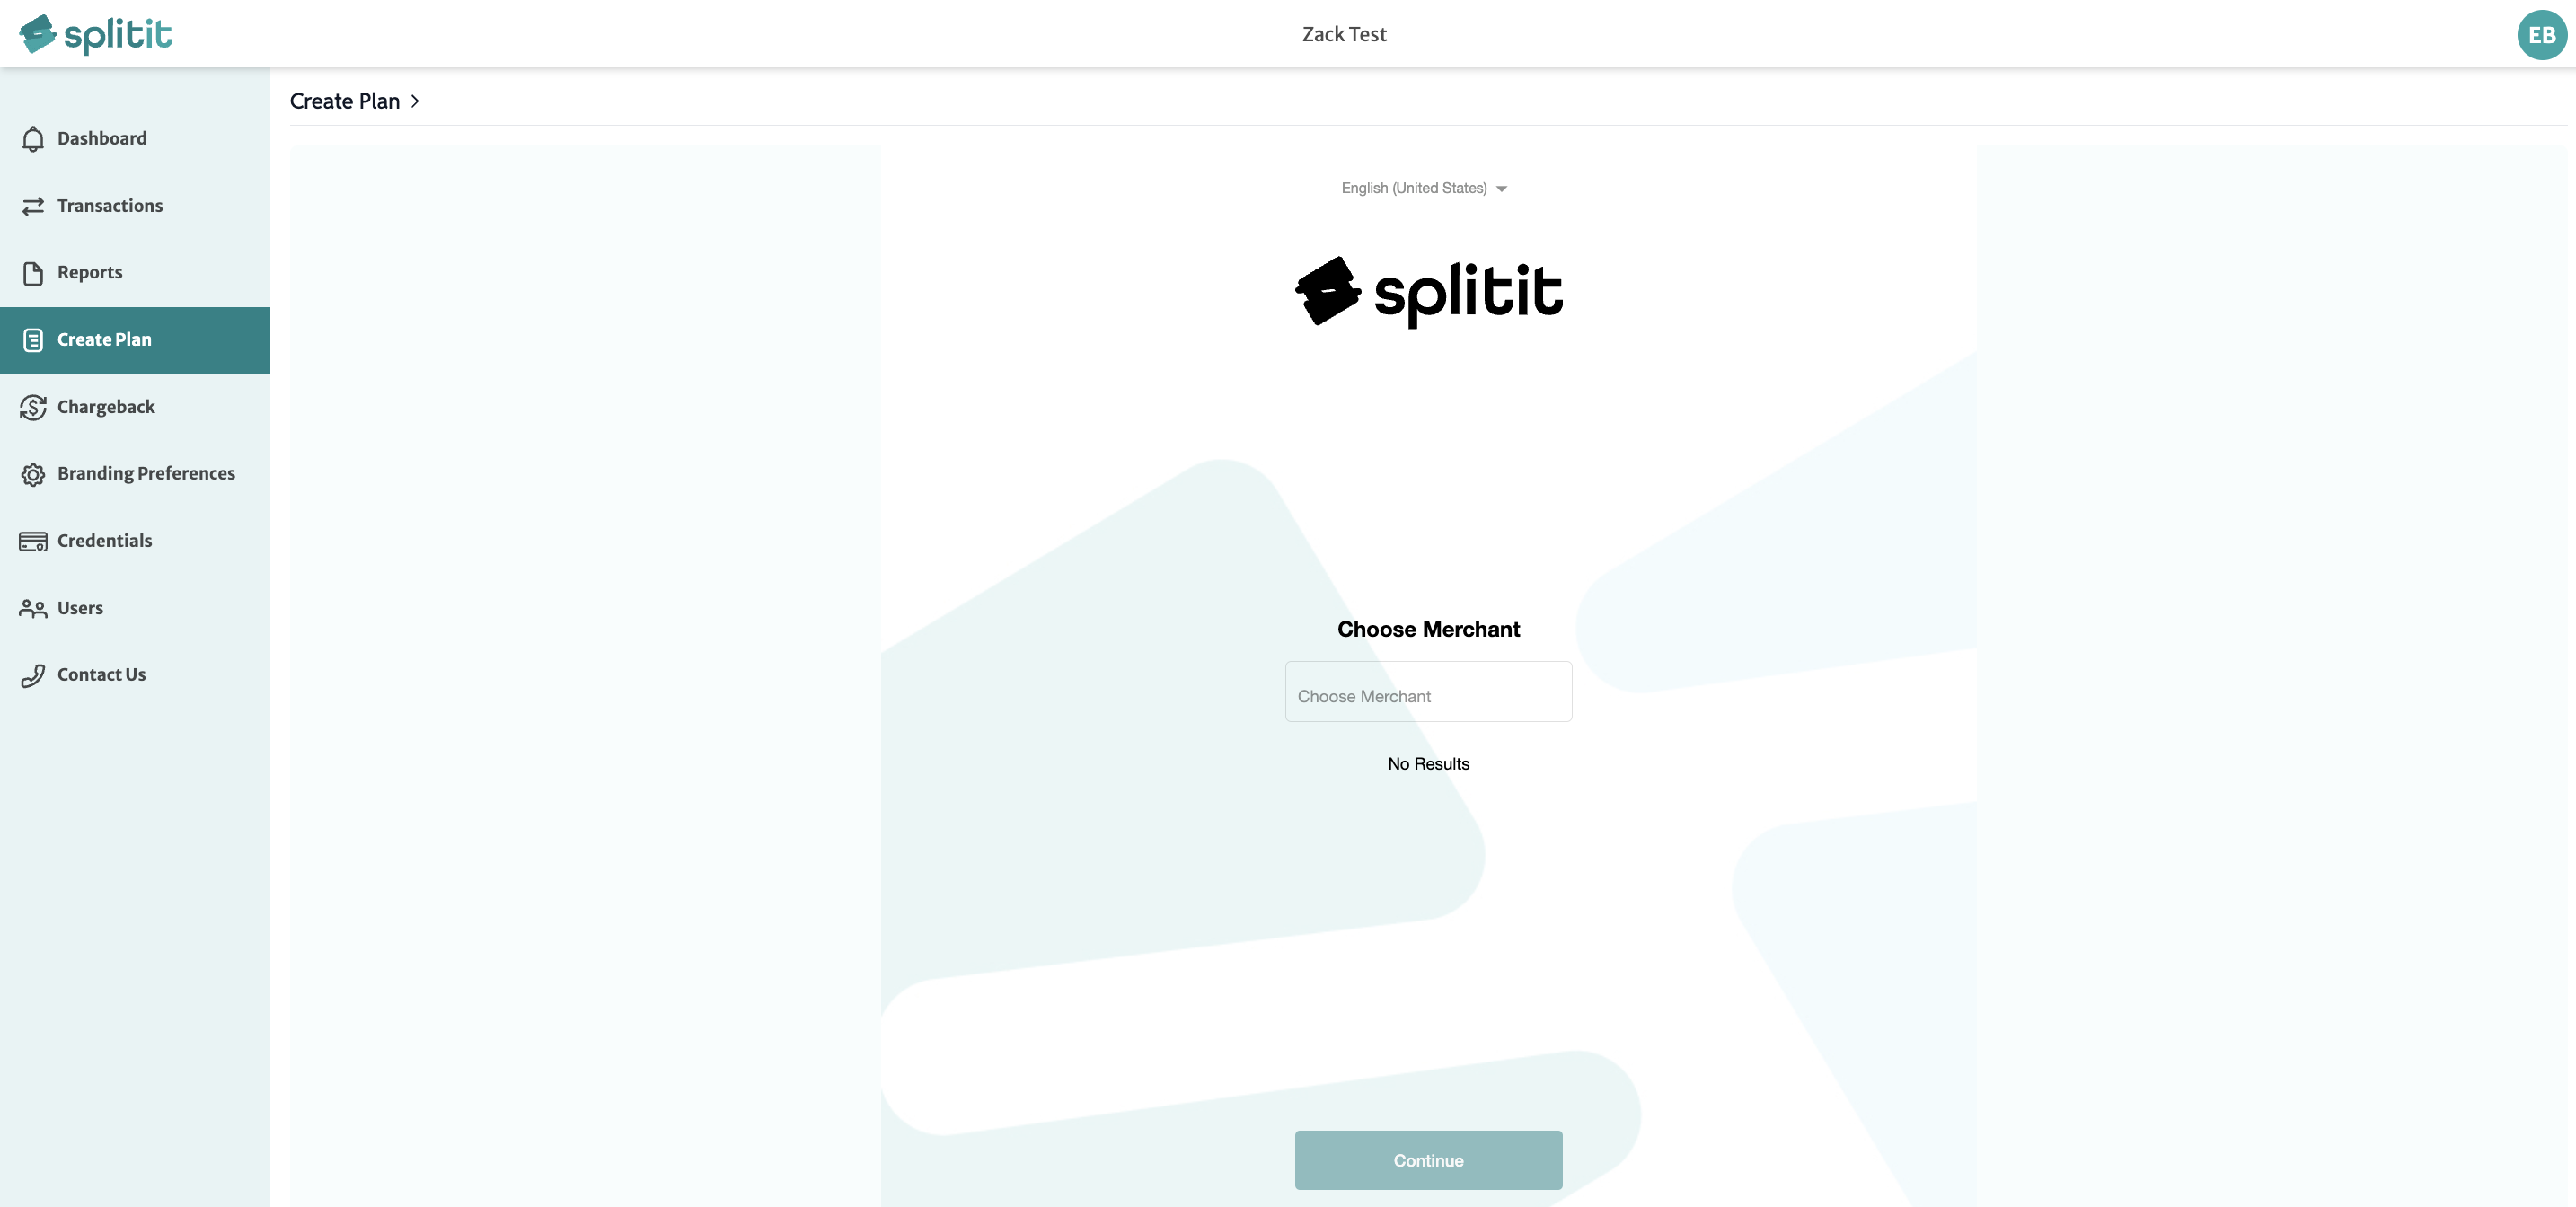
Creating a Plan
Creating a new payment plan is easy.
Step 1: Navigate to Create Plan on the sidebar and choose your store.
Step 2: Enter Order Details. The order number is optional (you could use, for example, invoice number, salesperson name, etc.).
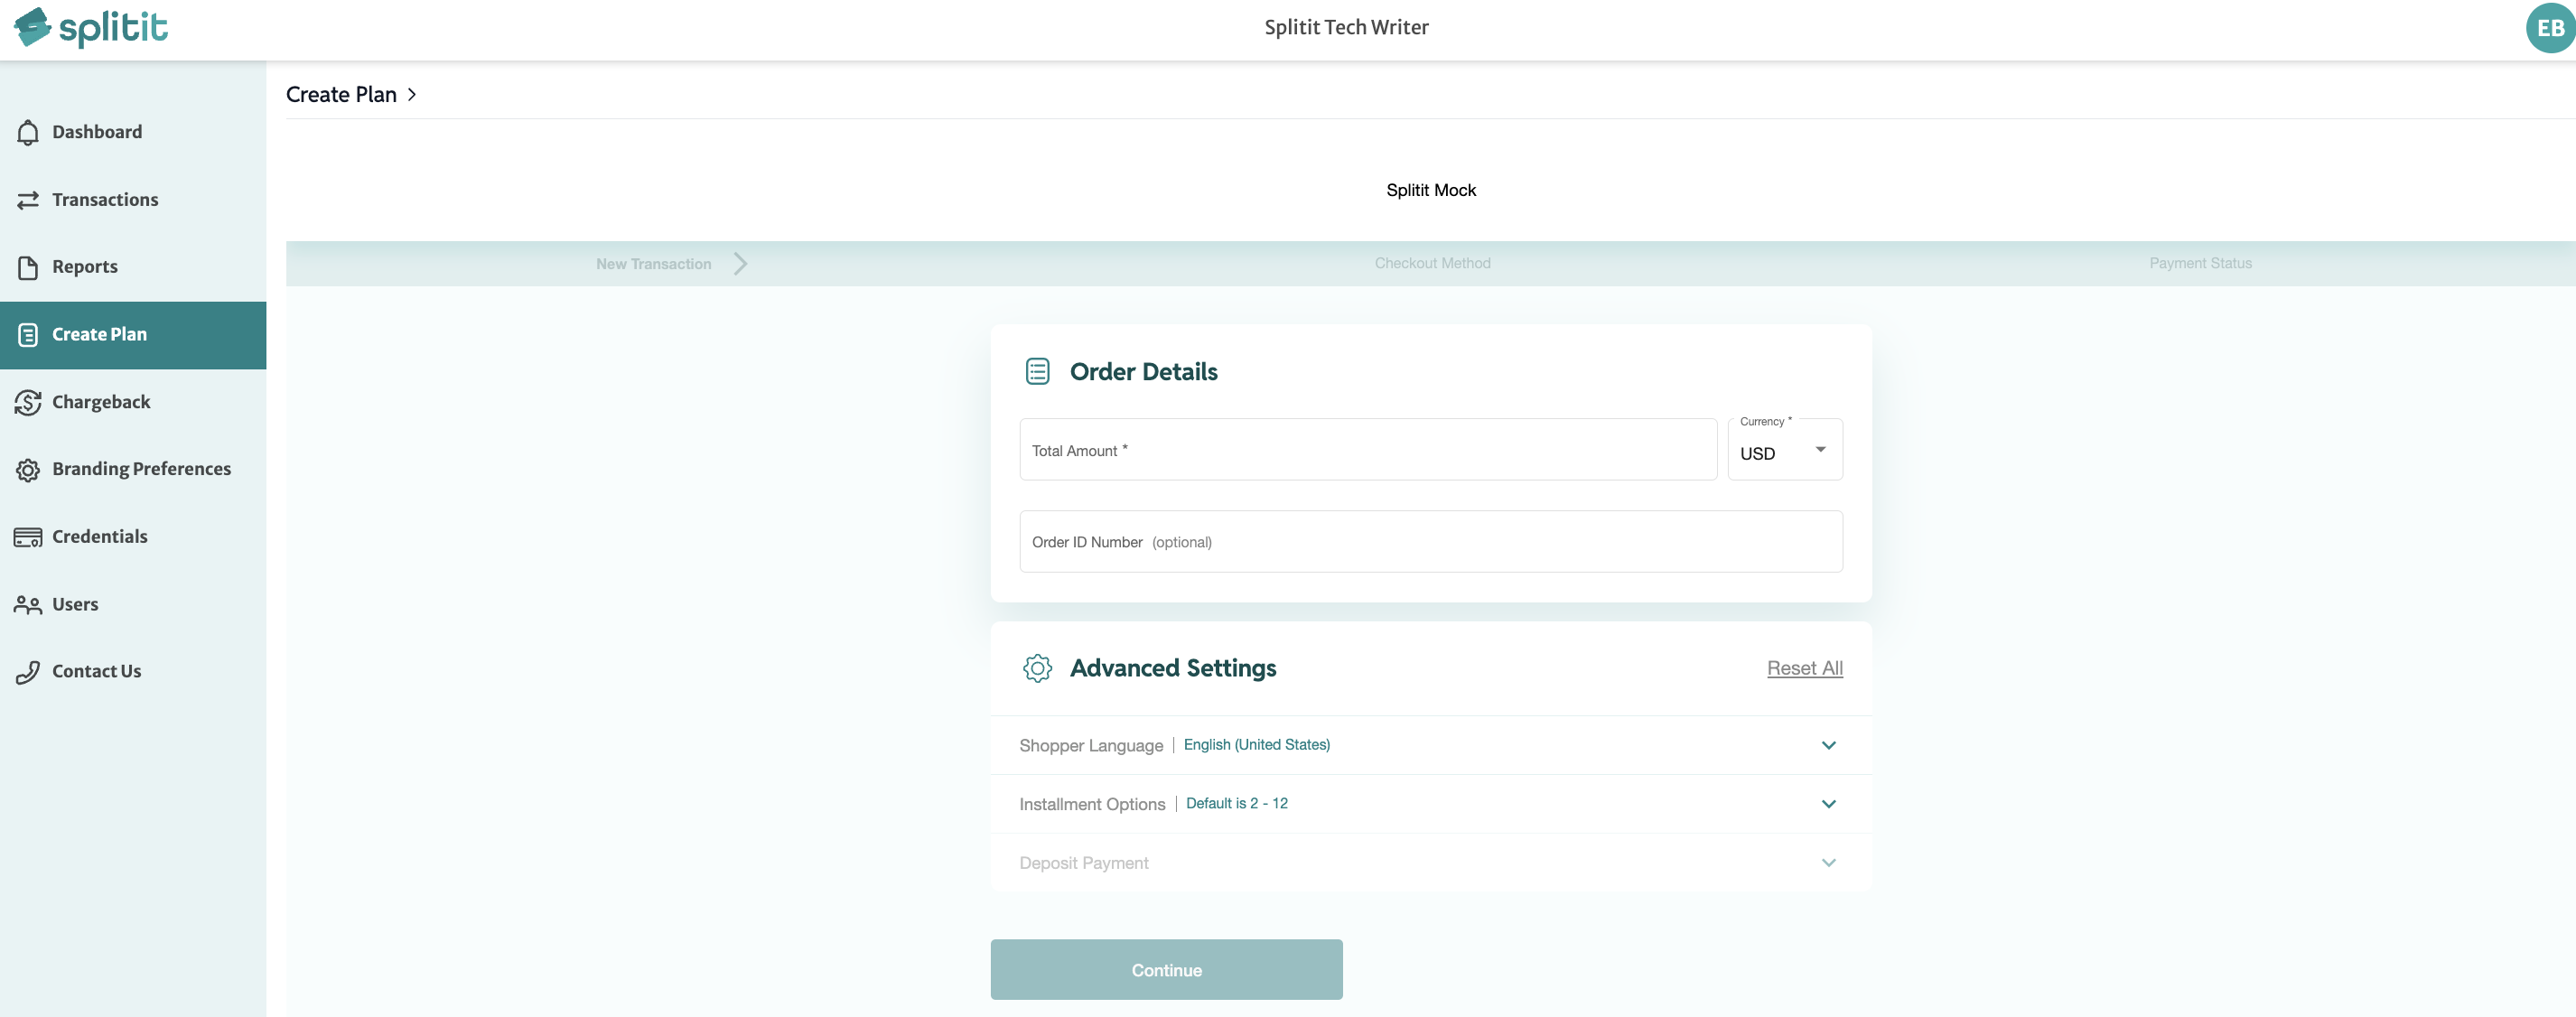
Optional Advanced Settings:
- Shopper Language: The language for shopper payment form/emails.
- Installment Options: Default shows the full range of installments, i.e., 2 through 12. Alternatively, you can select the installment options to show individually.
- Deposit Payment: Specify a custom amount for the first payment only. This amount needs to be more than what the first payment would normally be, i.e. when the total amount of the plan is divided equally by the number of installments. For example, if your plan is for $500 with five installments, the initial deposit payment should be set to be more than $100. The rest of the installments will be divided equally among the remaining plan amount.
Click Continue.
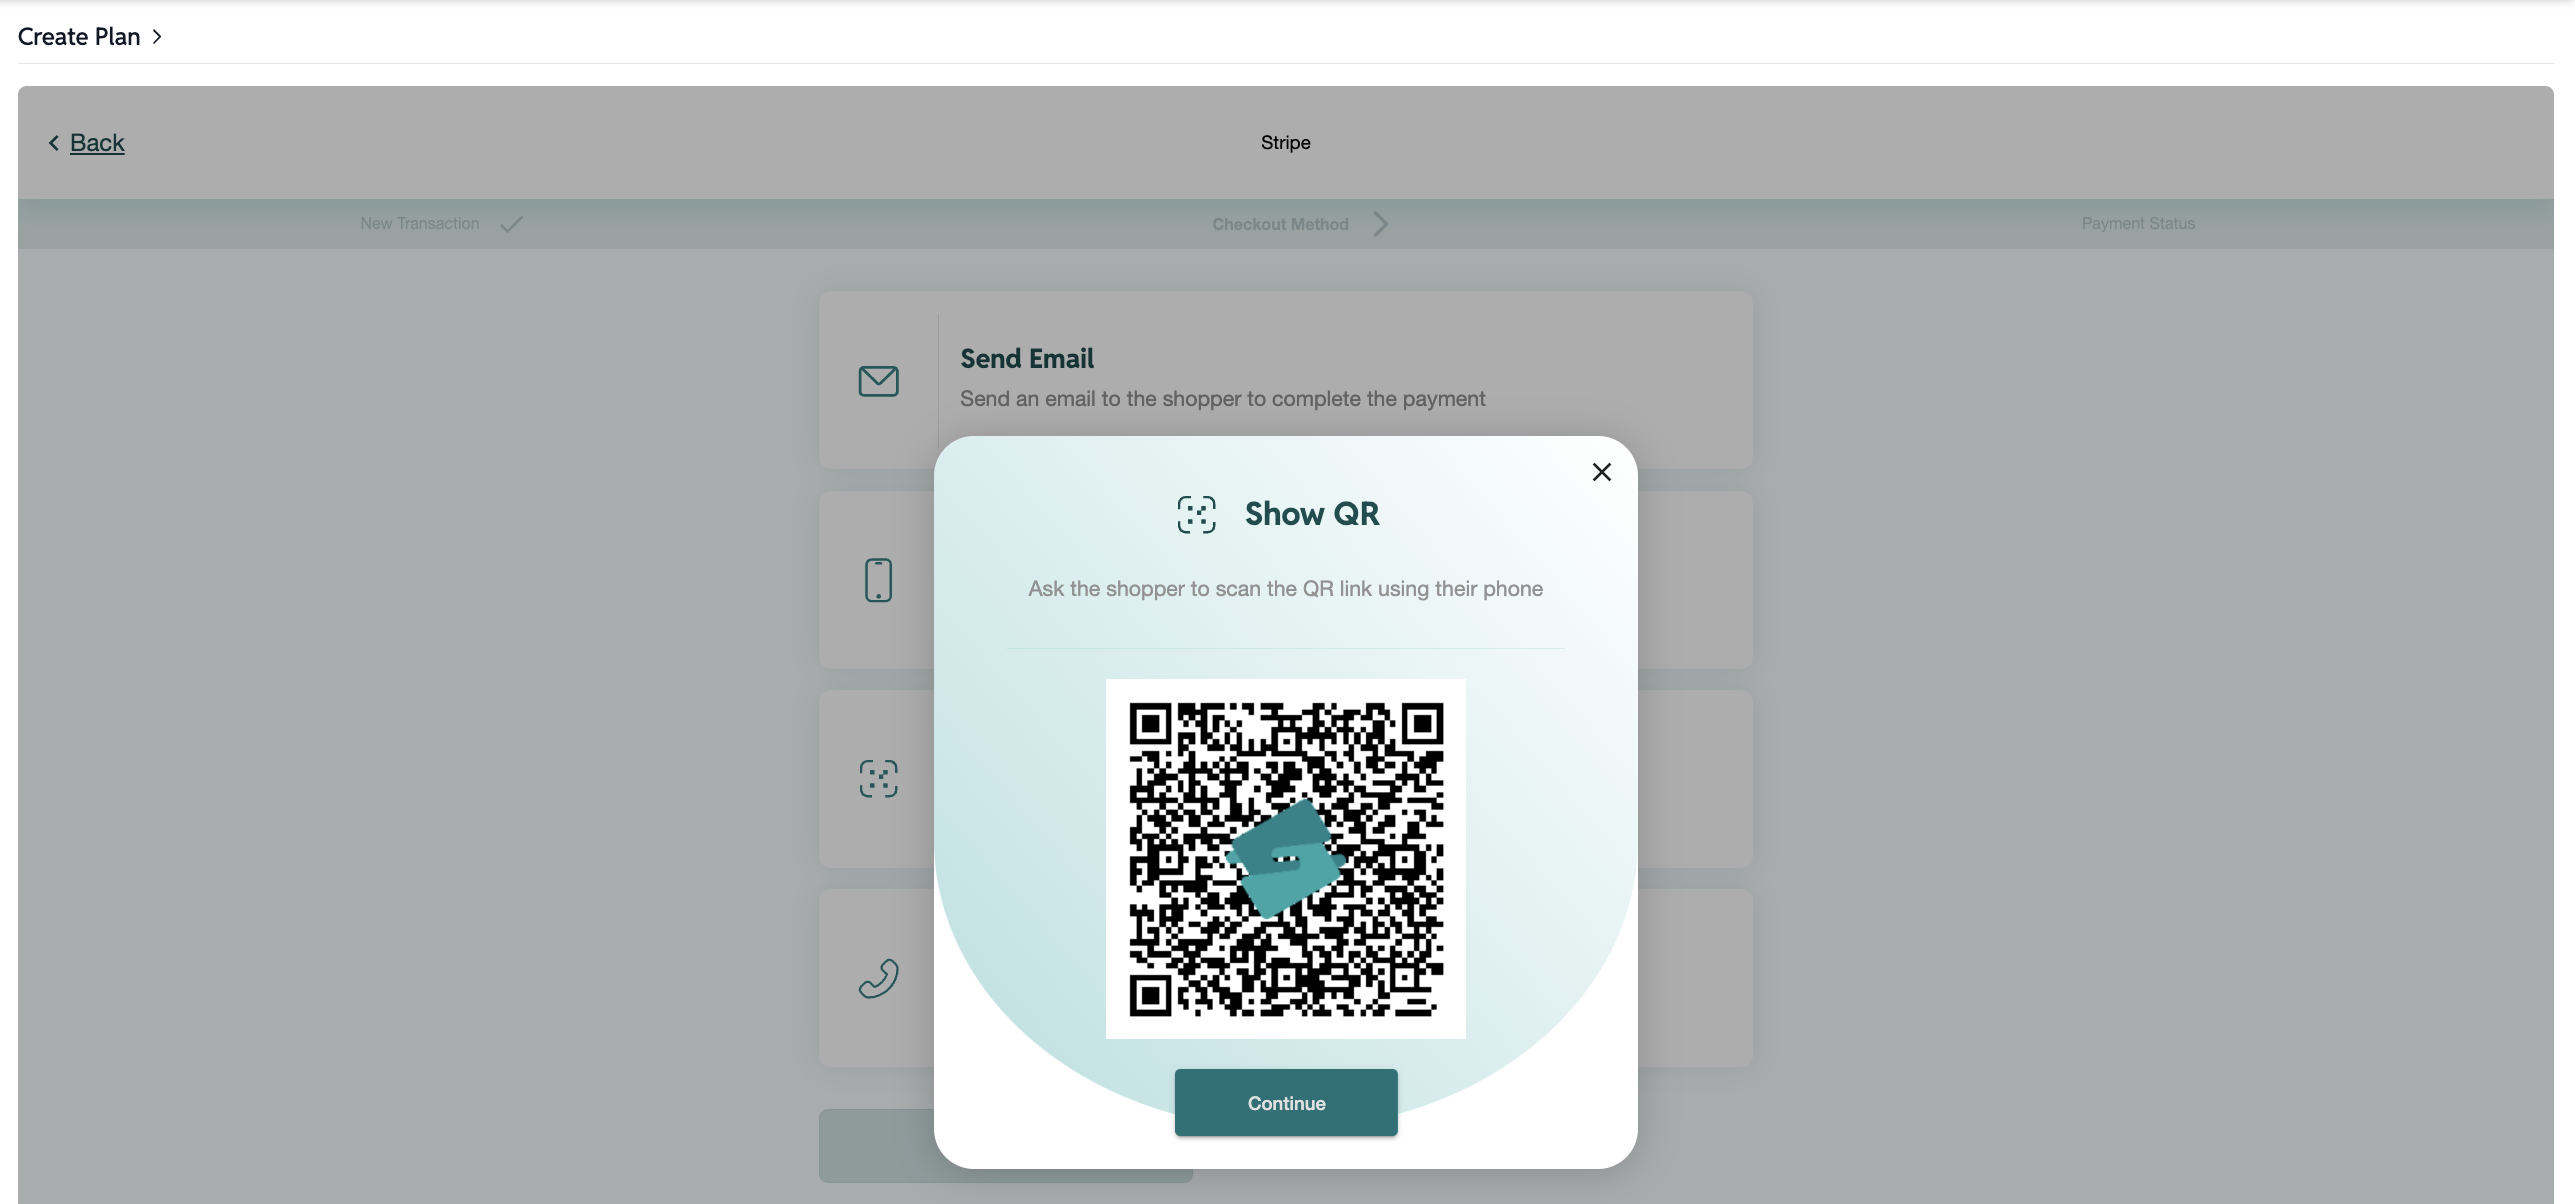
Step 3: Choose the checkout method (four options):
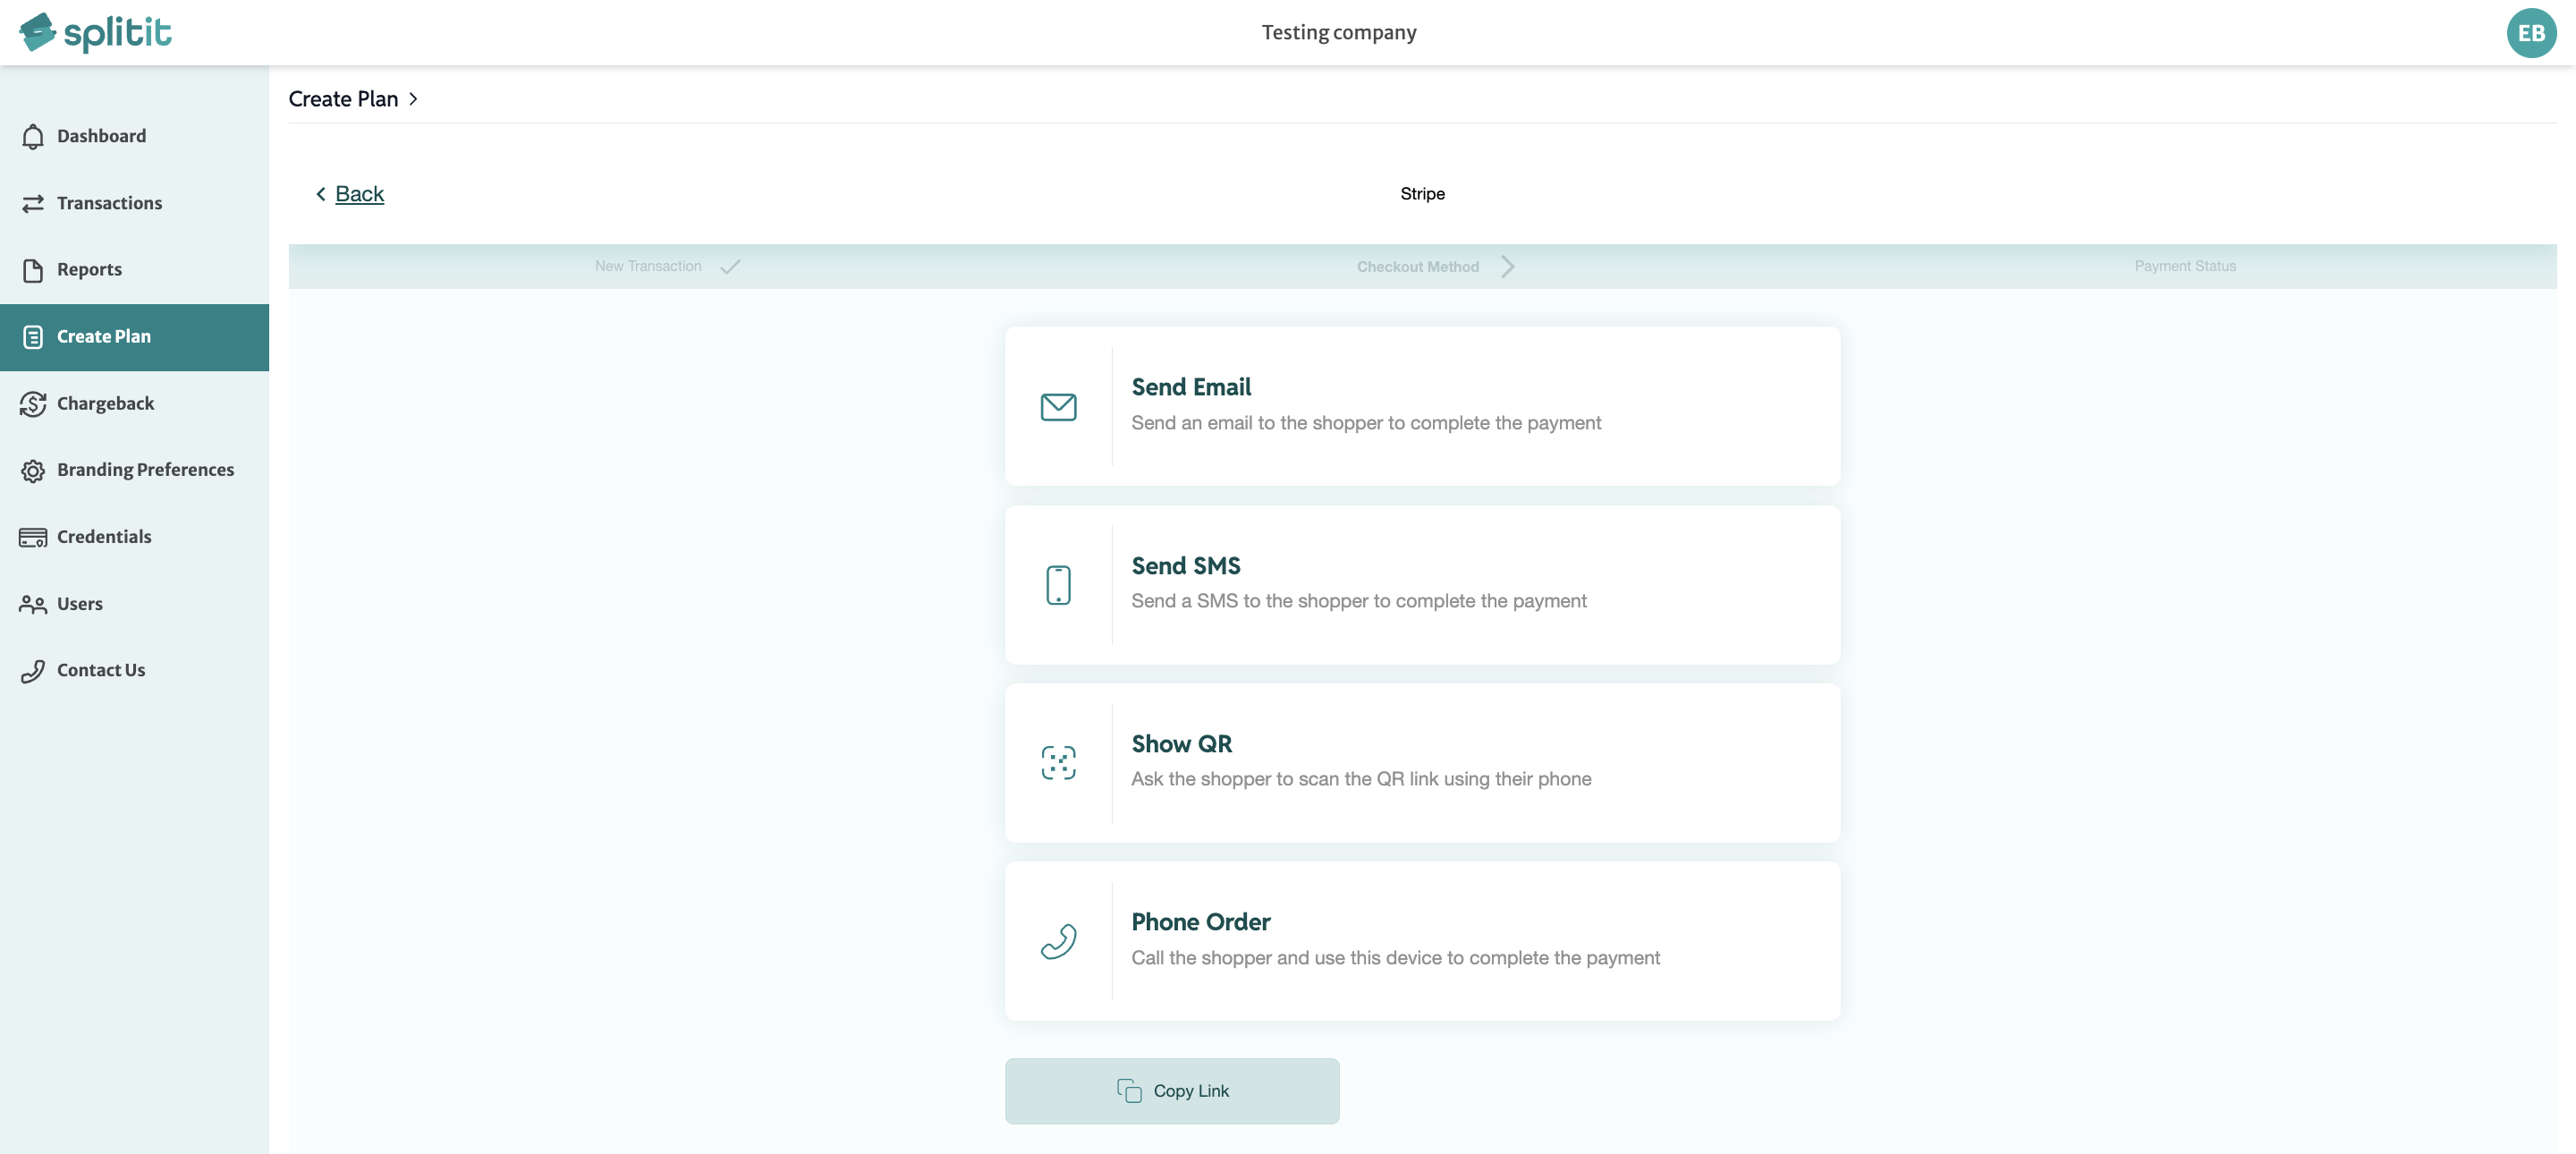
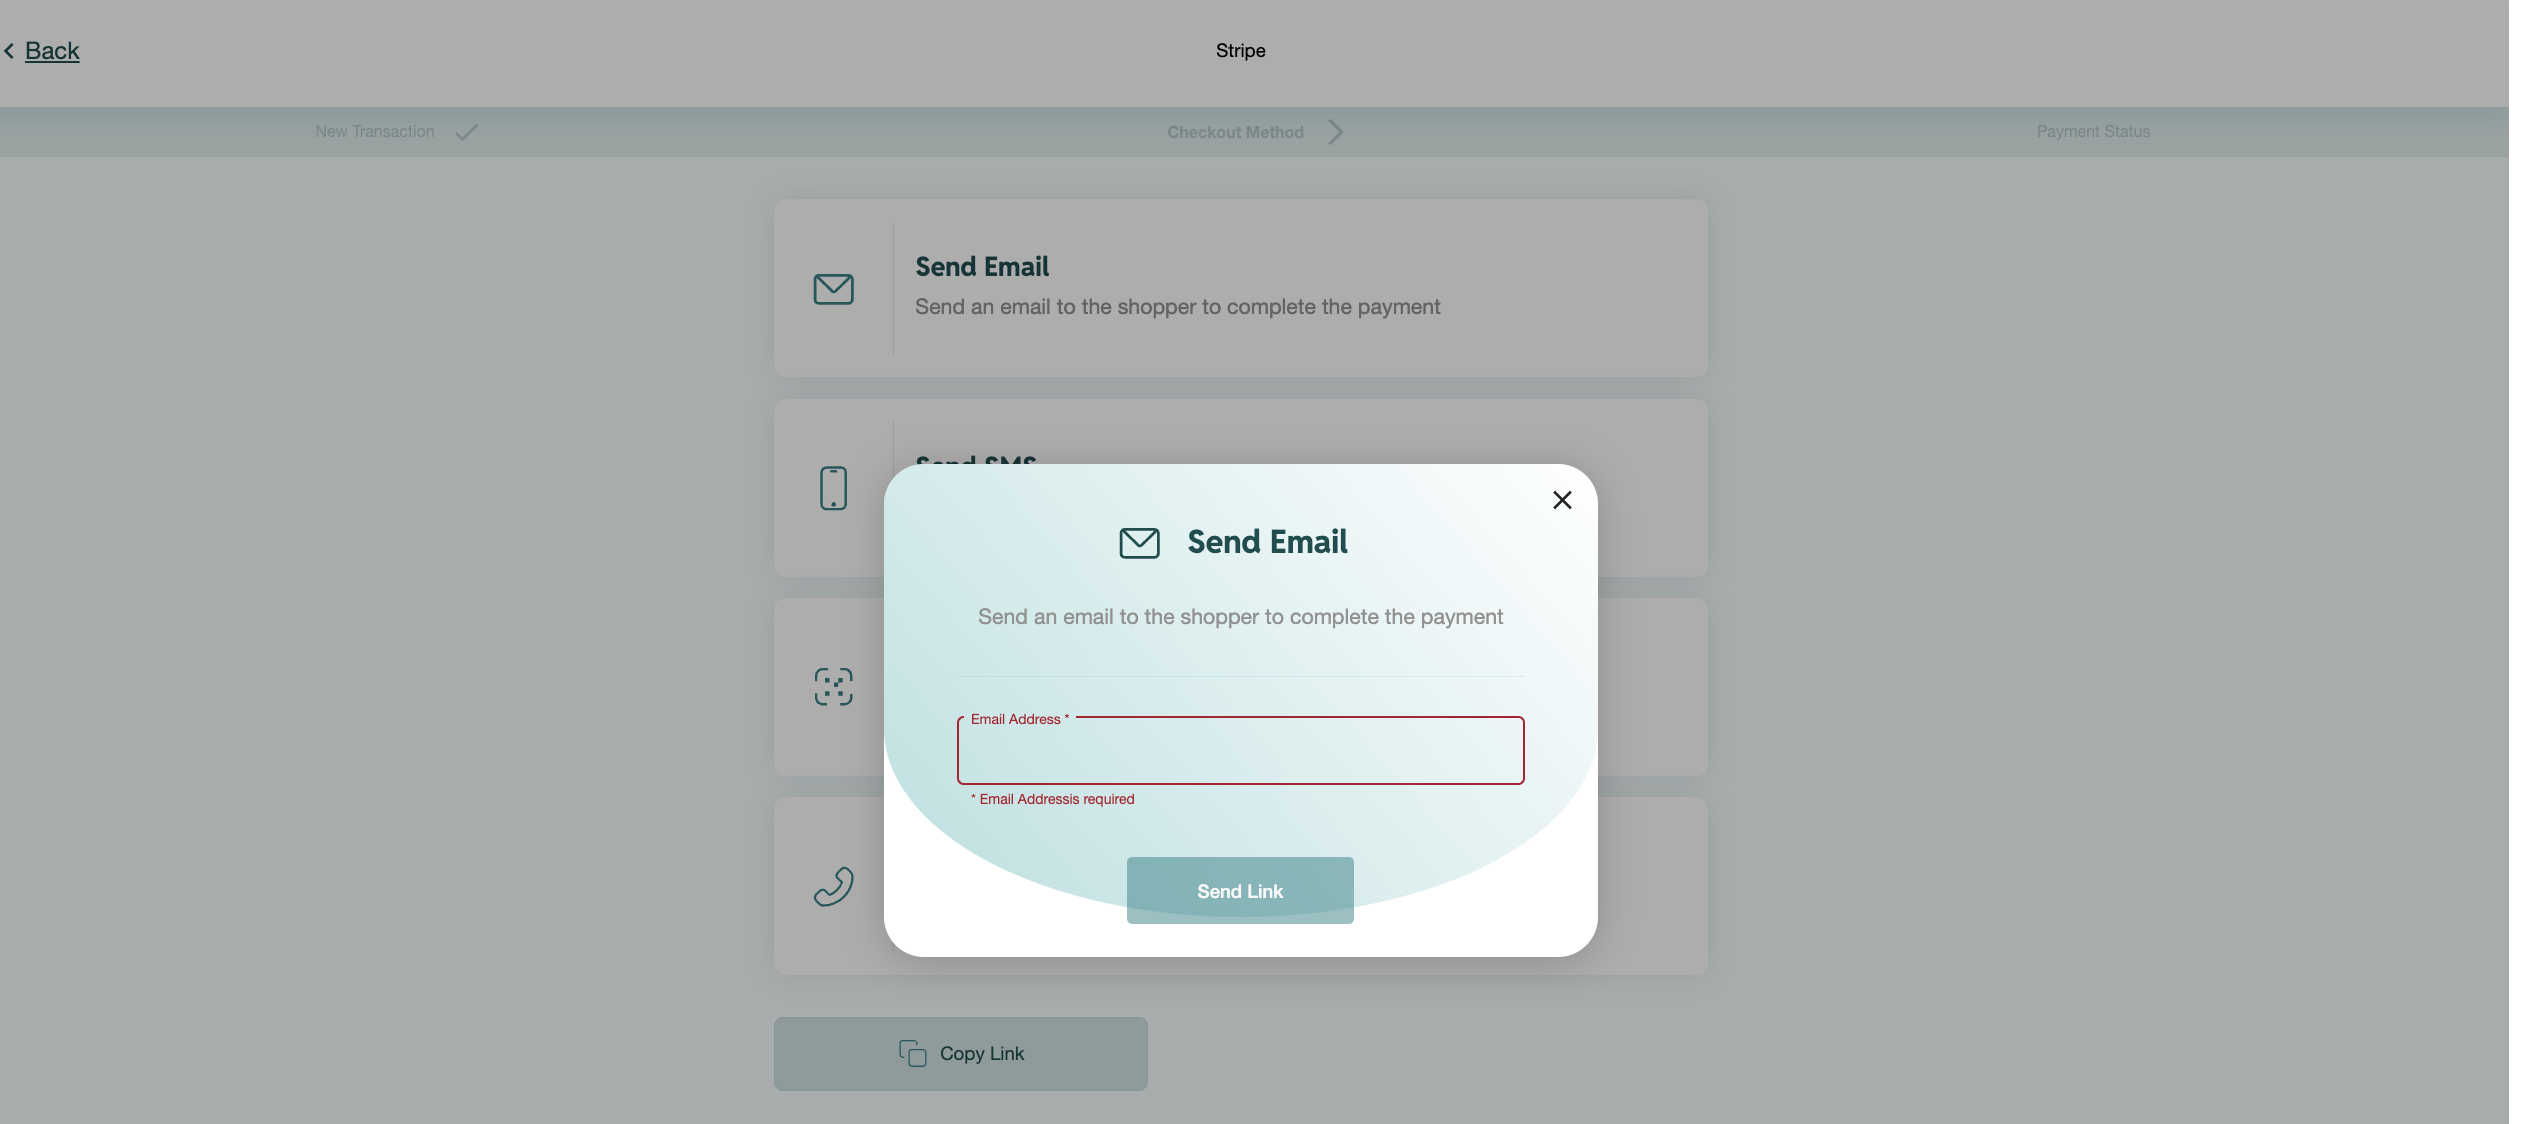
Option 1 - Email: Send an email to the shopper to open a form to complete payment

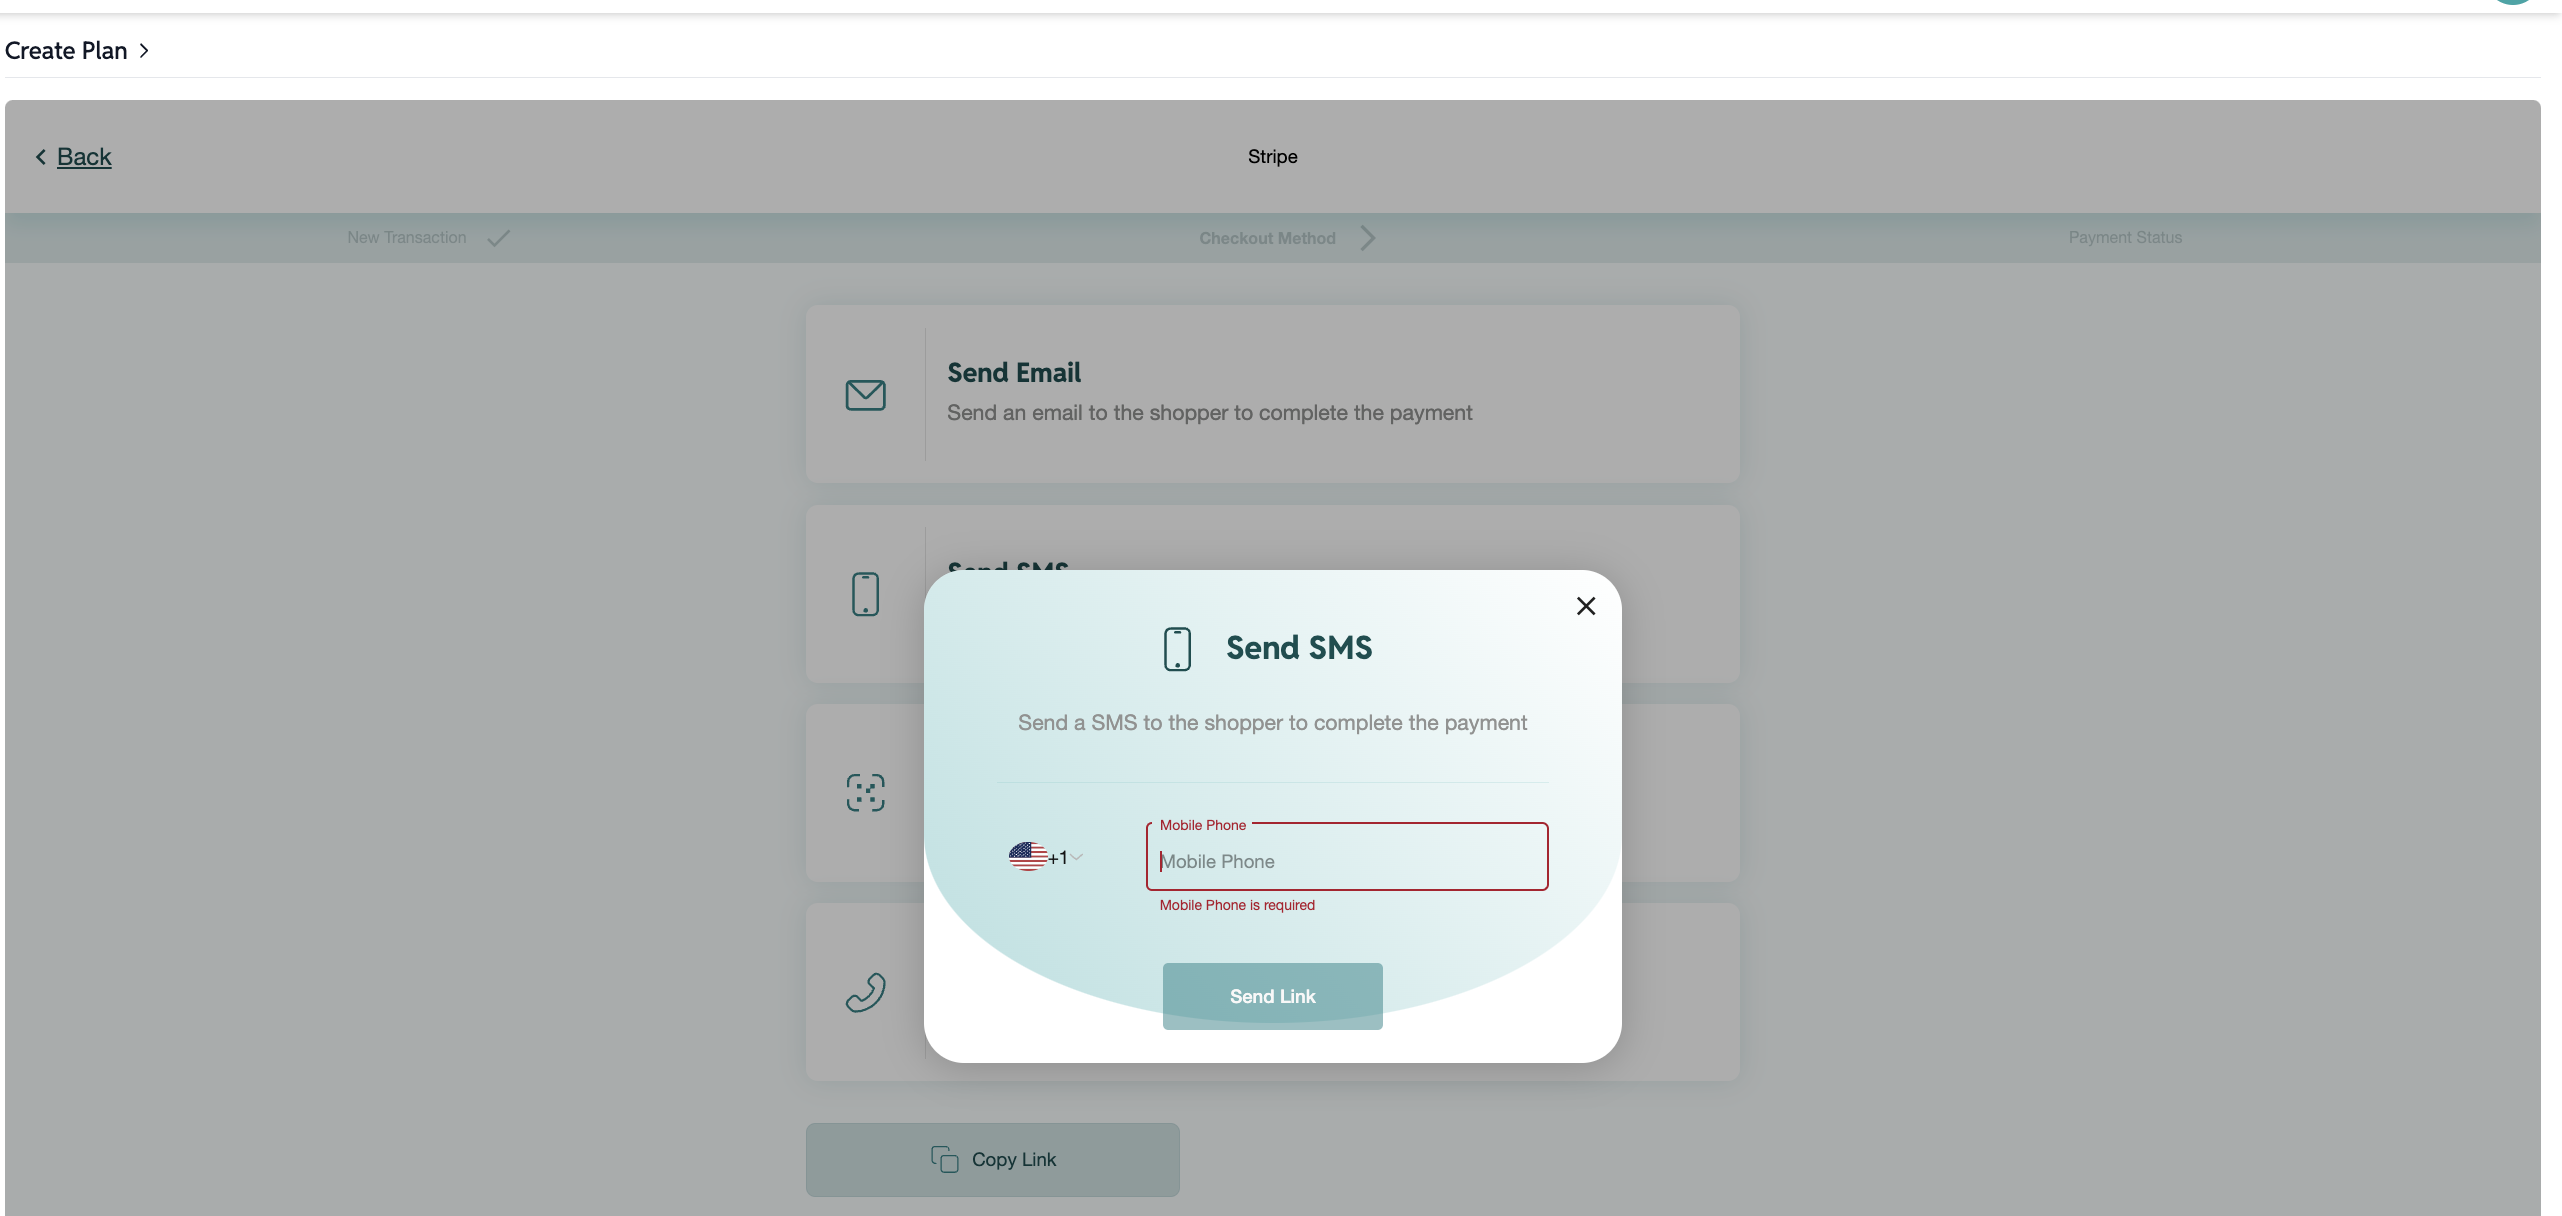
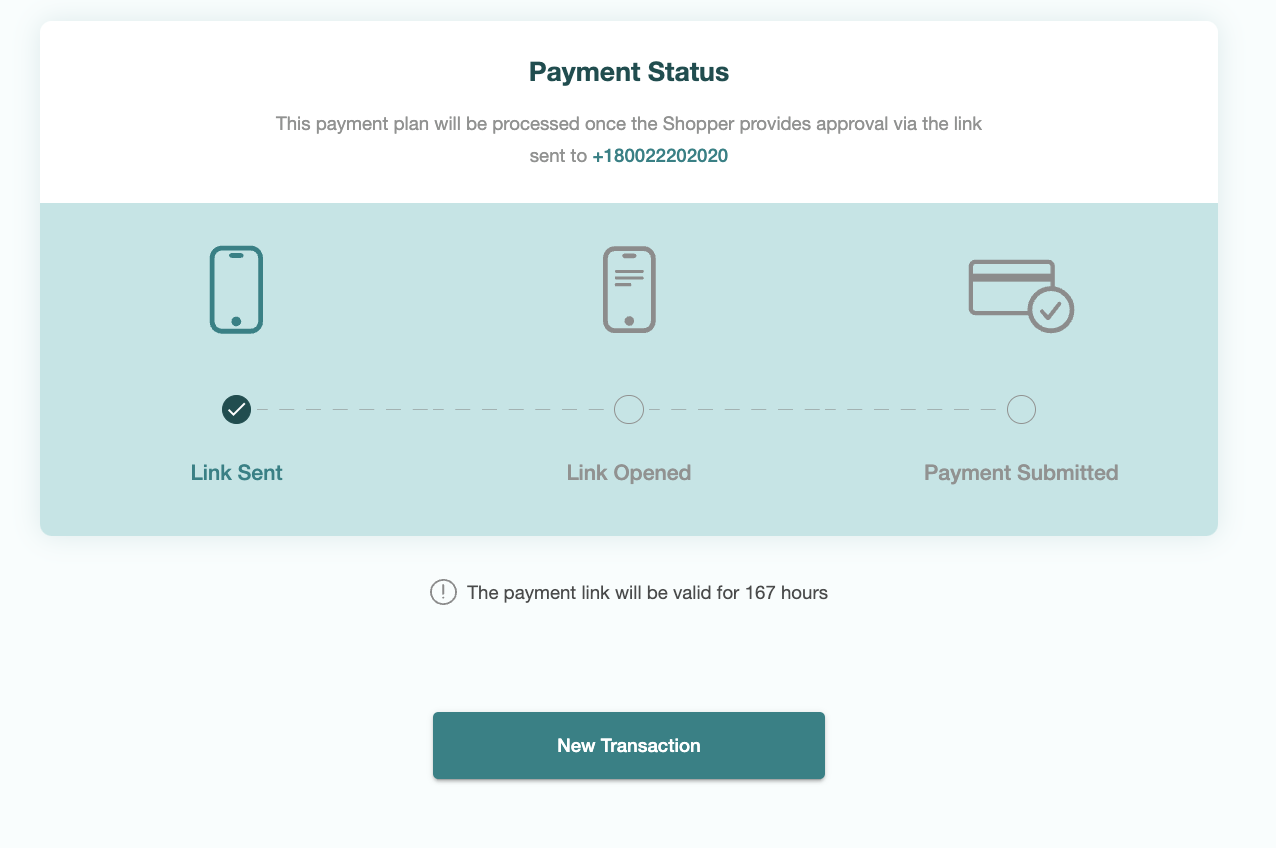
Option 2 - Send an SMS: Send a text message to the shopper to open a form to complete the payment
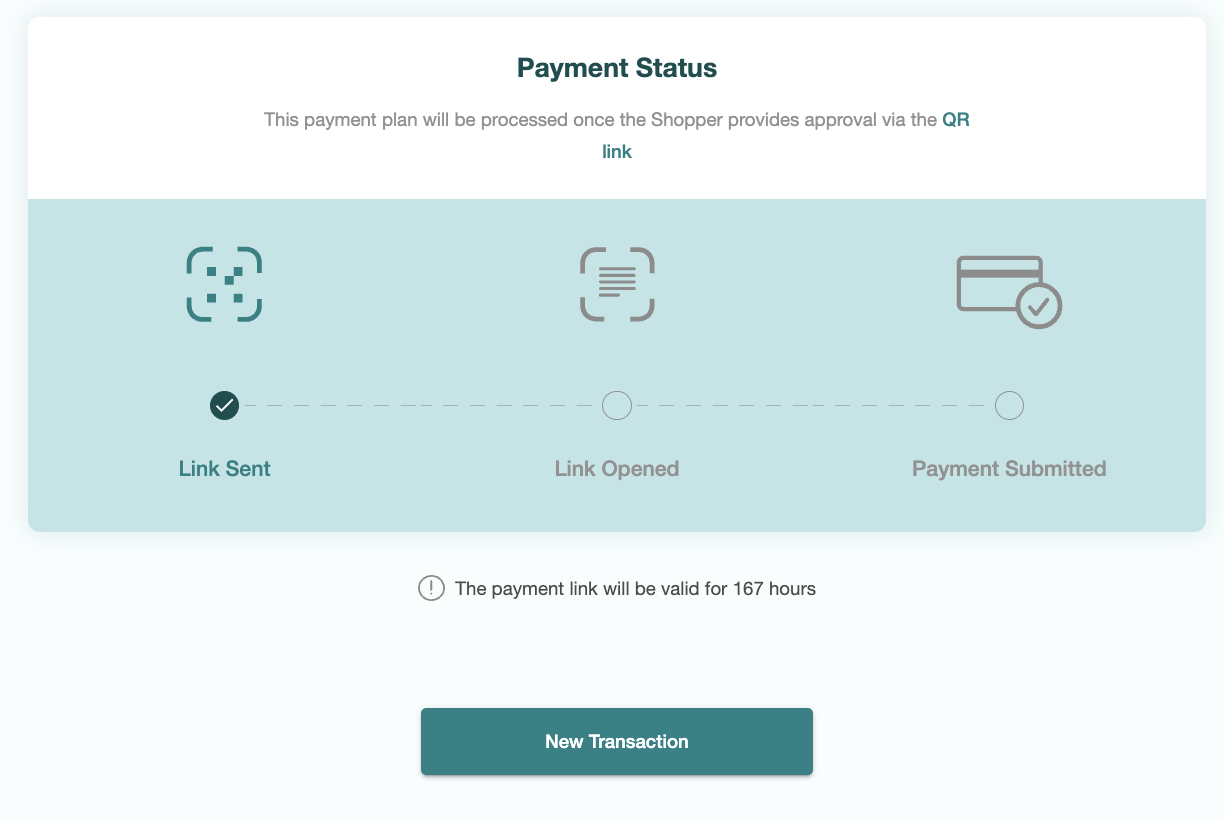
Option 3 - QR Link: Allow shoppers to scan a unique QR code that will direct them to a form to complete the payment
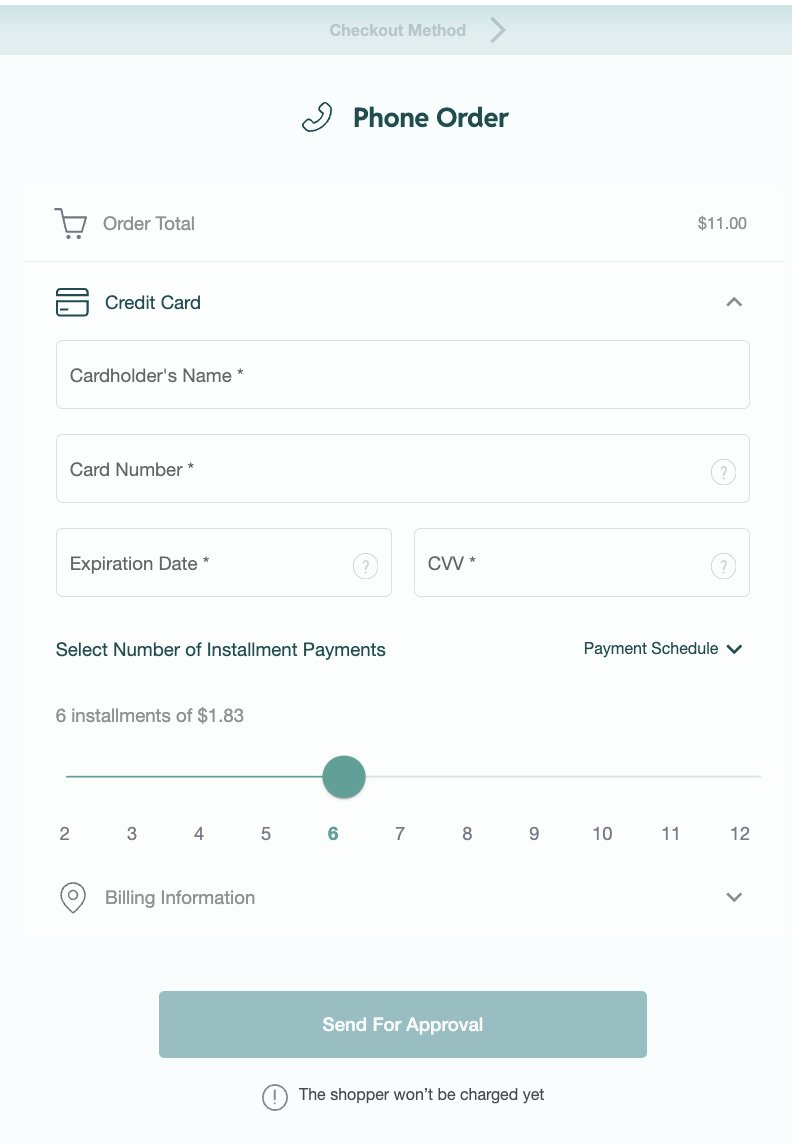
Option 4 - Phone Order: For phone orders, you enter the payment details and payment method when you are on the phone with your shopper. A confirmation link will be sent via email, which will allow the shopper to approve the plan with a single button press
Once your shopper has checked out, look under Transactions for the successful plan initiation.
Plan Link Expiry
The default expiration for plan links created using the options in this section is seven days, although this is configurable by Splitit support. You can just let links expire that you have issued and don't intend to use, but be careful not to mistakenly issue multiple unexpired links to the same customer.
Branding Preferences
Customize the look and feel of your checkout by adding your logo to your payment page. You can also add your logo to shopper notifications such as confirmation emails and cart abandonment reminders.
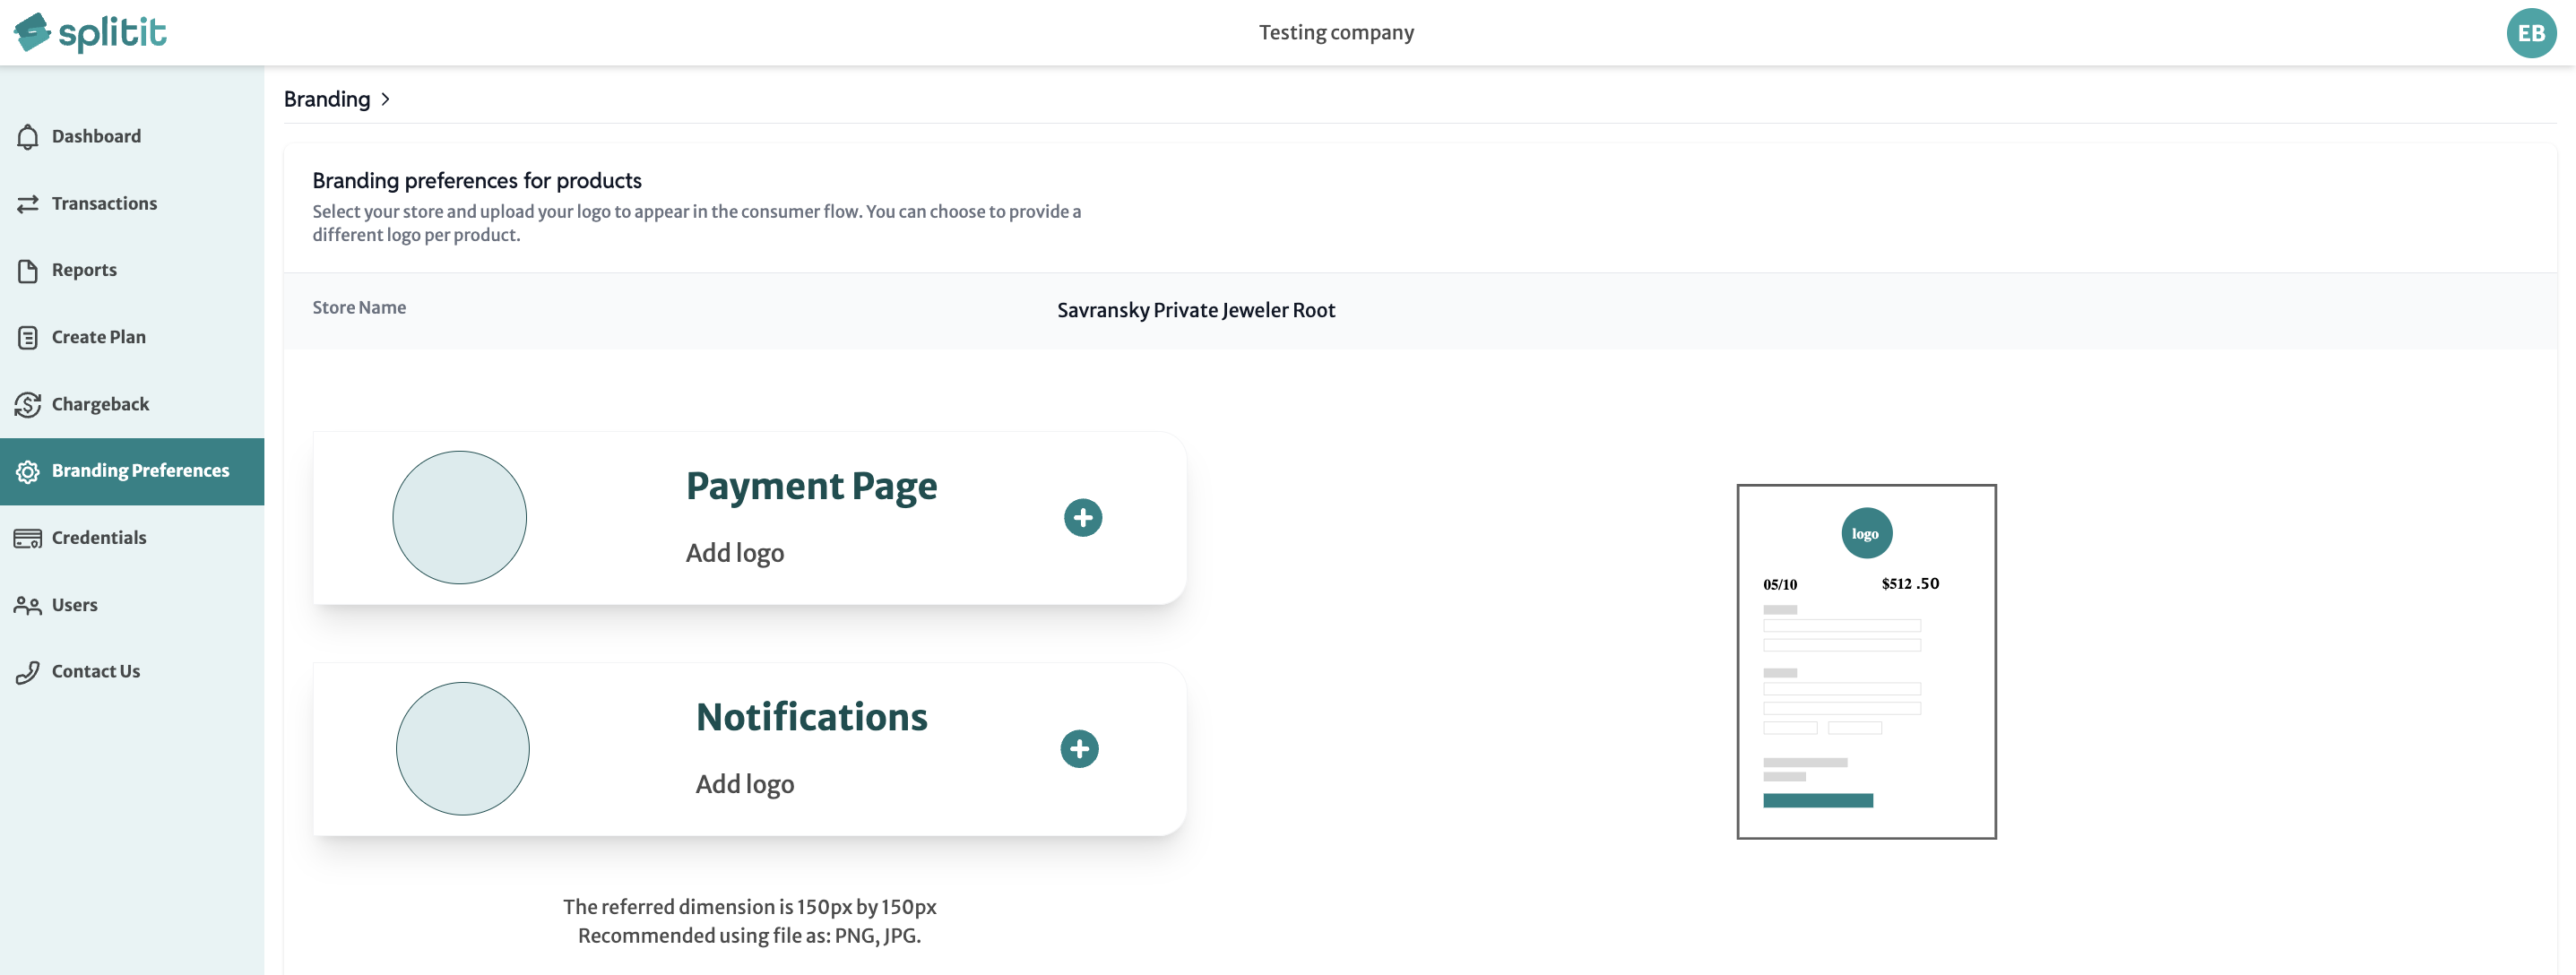
Note that if your business has multiple locations you will need to add logos for each.
Users
Anyone in your organization with user access can be found in this tab.
There are three Permission Groups for users:
- Account Owners have full permissions and can perform all actions
- Managers can perform all actions except for adding or managing users
- Cashiers can ONLY create plans and see transactions. They cannot change Installment Plans once they are created.
Add a new user by clicking the teal icon Create New User at upper right.
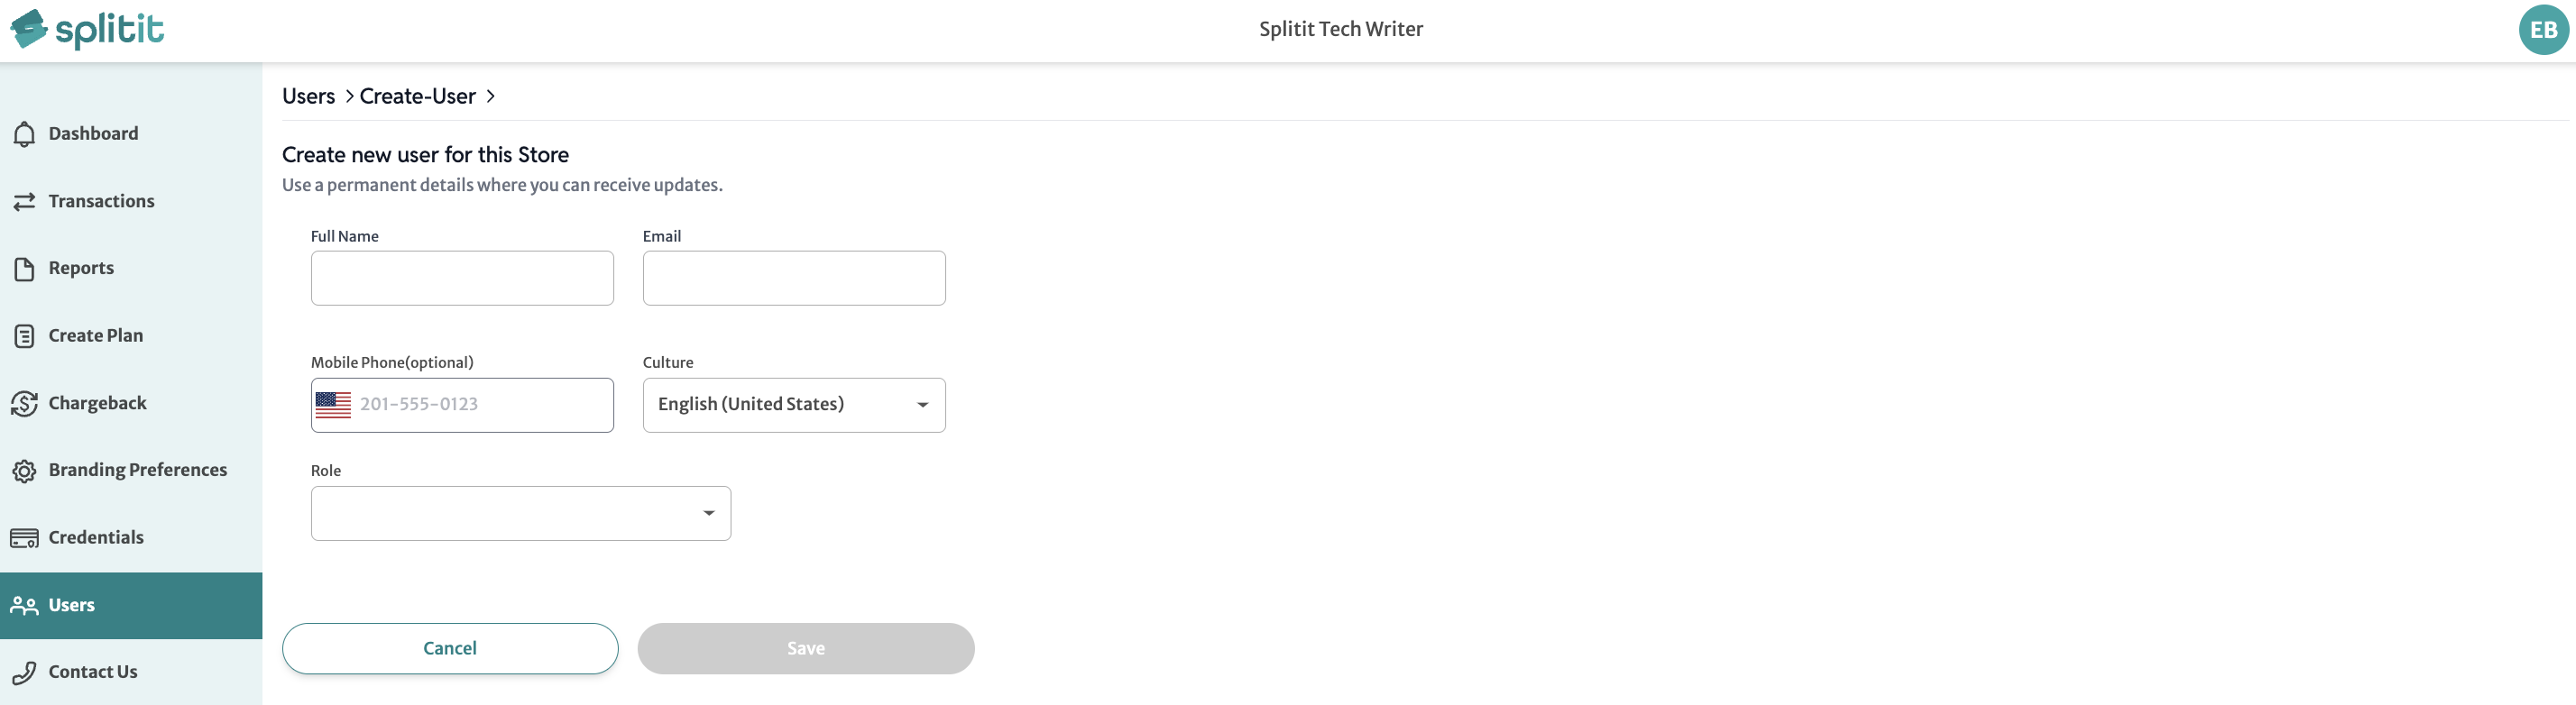
Edit or delete a user by simply clicking on the user. This lets you edit Name, Email, Phone, Culture (language) and Role (Permission Group).
Personal Details UI
The Personal Details UI can be found by clicking on your initials circle in the top-right corner, then selecting Personal Details. Here you can change your Name(s), Email, Culture (language), Phone Number and Password.

Reset Your Password
If you forget your username and/or password, follow the steps below:
Step 1: Go to https://merchant.splitit.com and click the Forgot password? link at lower right
Step 2: Enter your email address, complete the reCAPTCHA and click Send.
Step 3: Click the "Reset my password" link in the email you receive.
Step 4: After resetting your password, return to https://merchant.splitit.com to login.
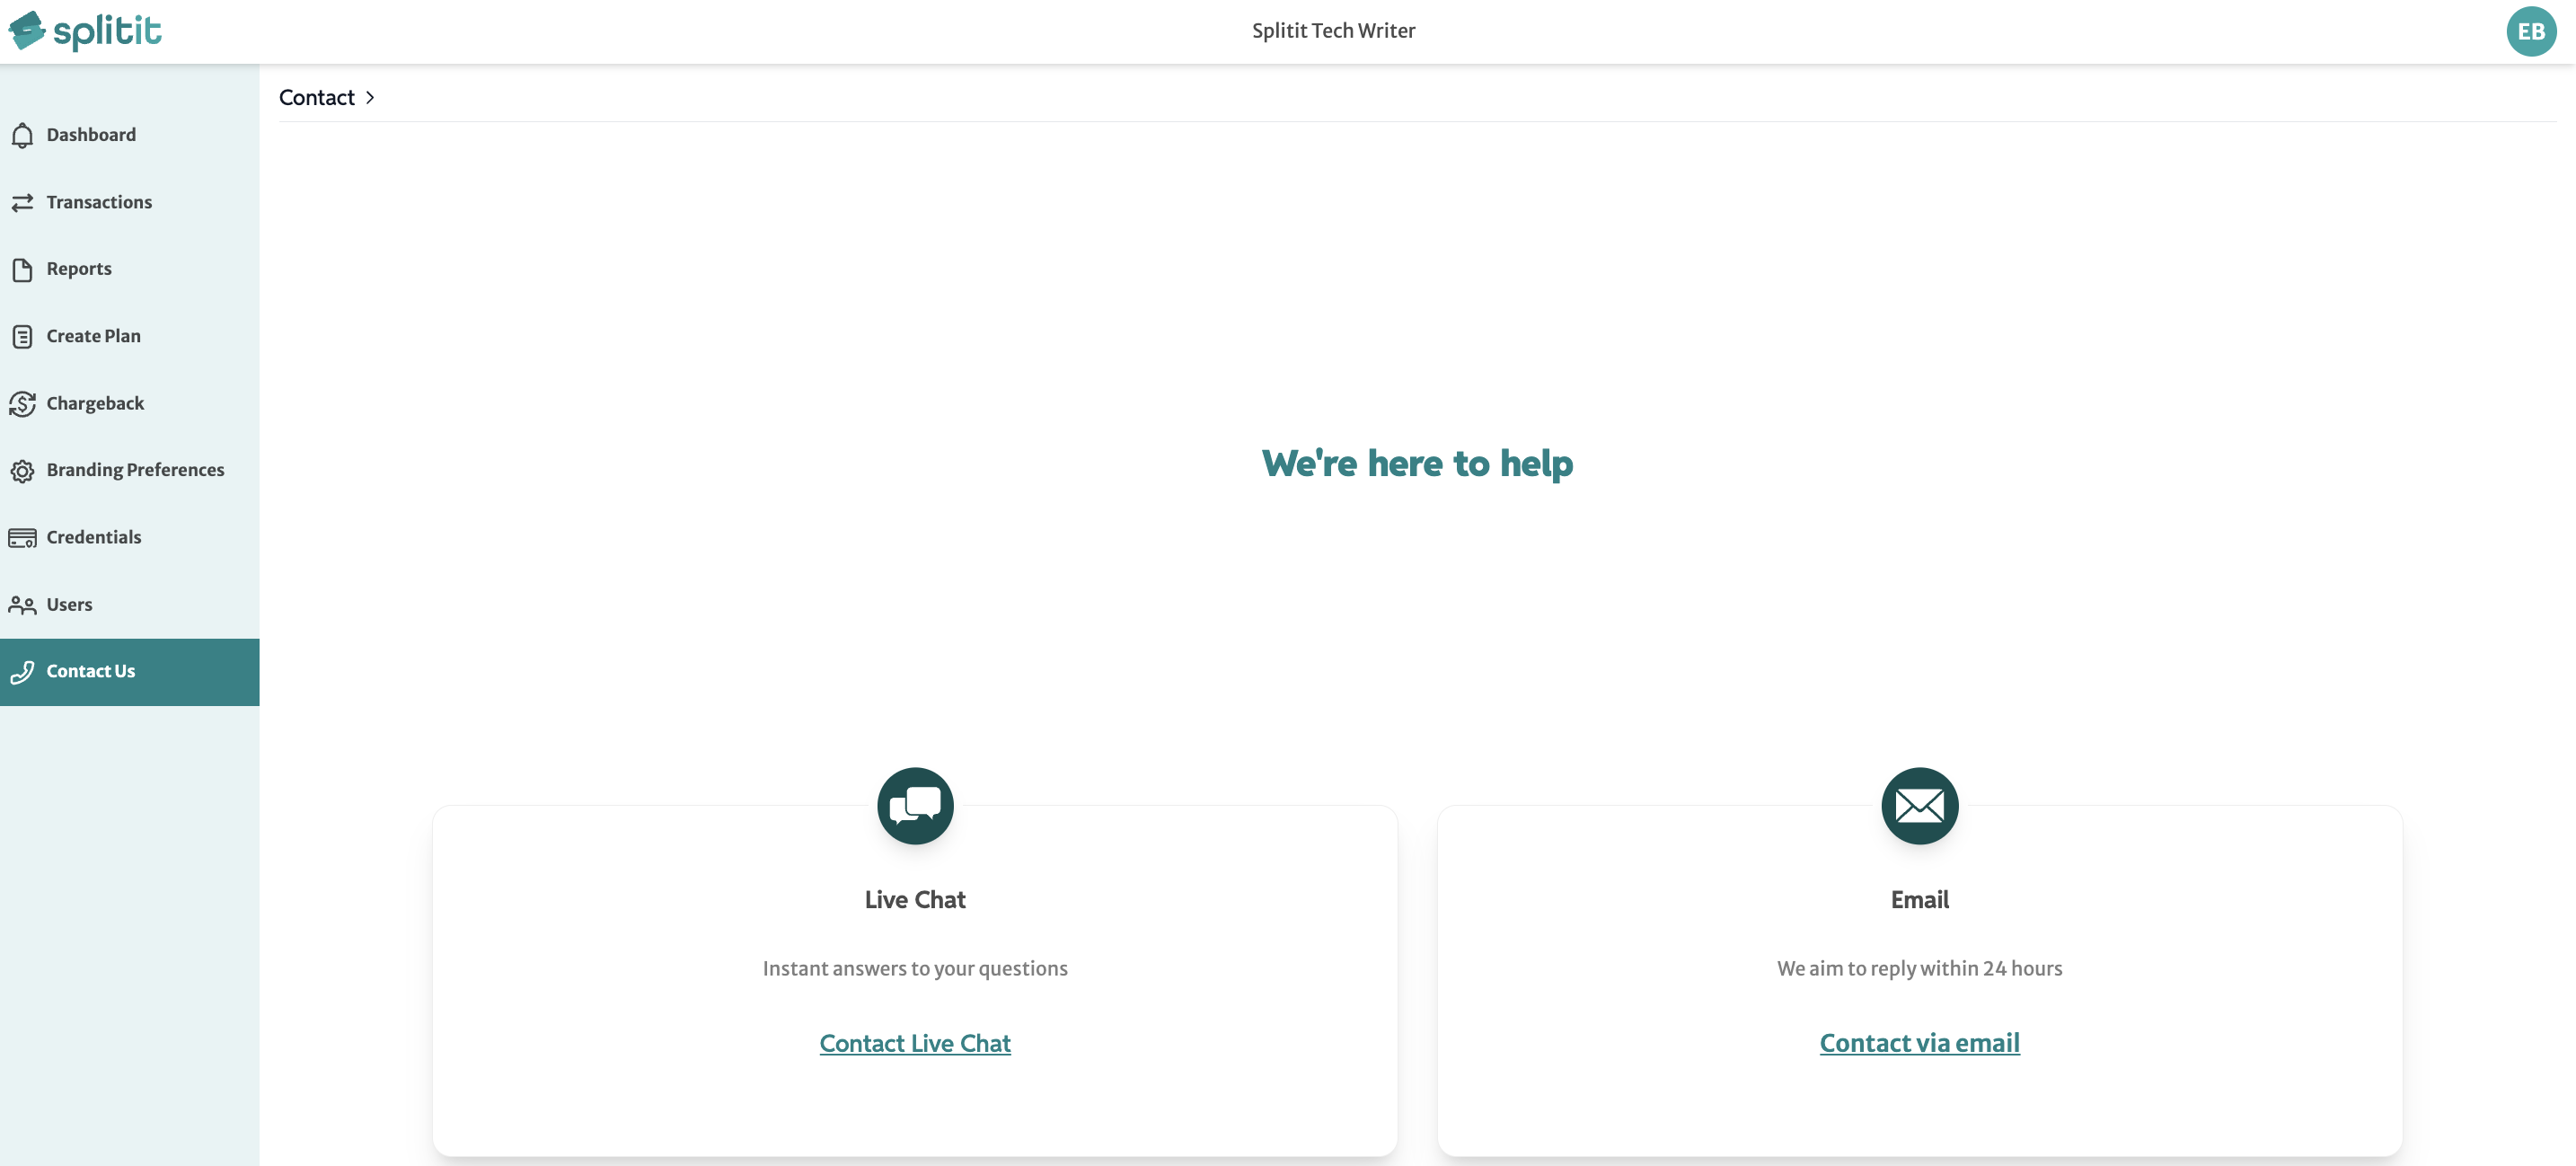
Contact Us
Support is available 24/7 to help you with:
- Questions about processing
- Questions about paying a plan
- Issues with your Splitit admin
Contact us using:
- Live chat or email through your Merchant Portal