Shopify On-Site Messaging — Installation Guide
Splitit's On-Site Messaging plugin provides you with customizable UI elements that you can use to inform your customers early on in their journey on your Shopify website that installments will be available at checkout. Available for you to add to your site are Strips and One Liners.
Installation
1. Go to the On-Site Messaging app's URL. Click Install (if you are already logged into your Shopify account), or click Log in to Install, then select your Shopify account.
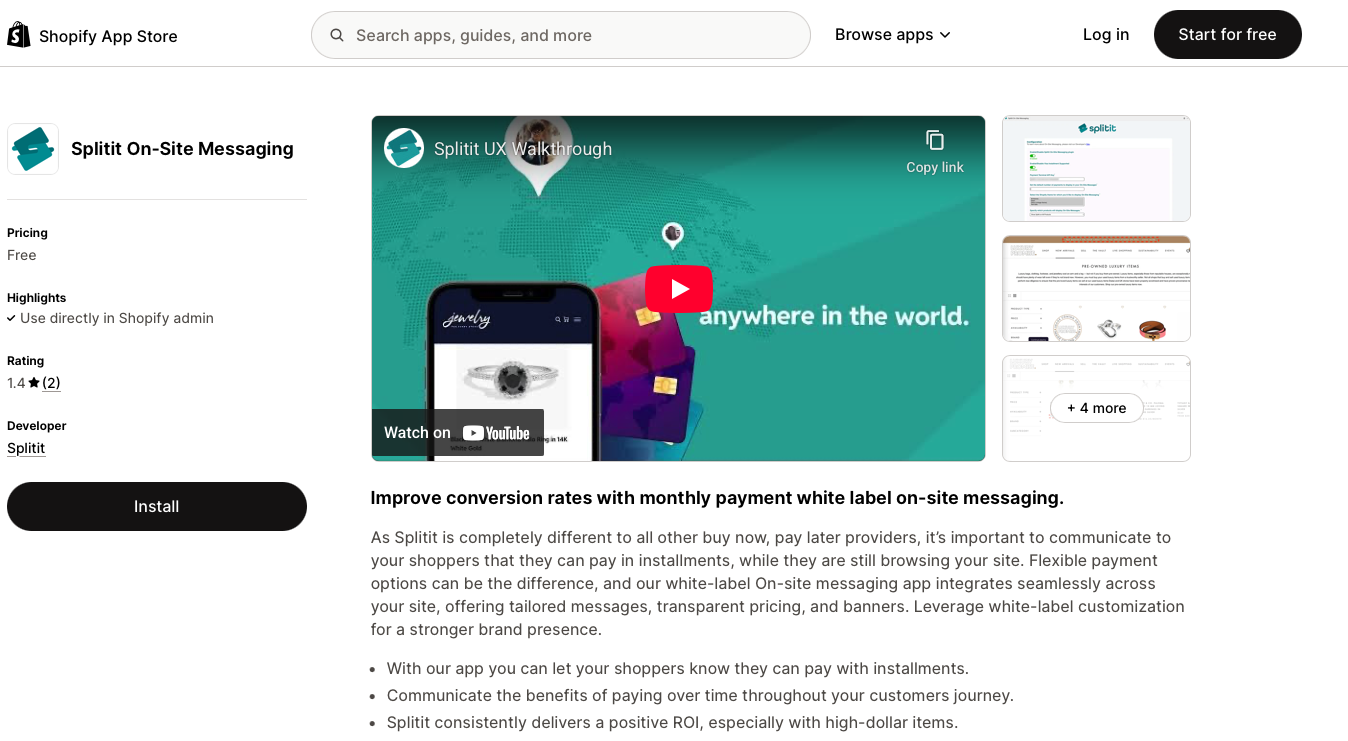
2. On the next page, click Install.
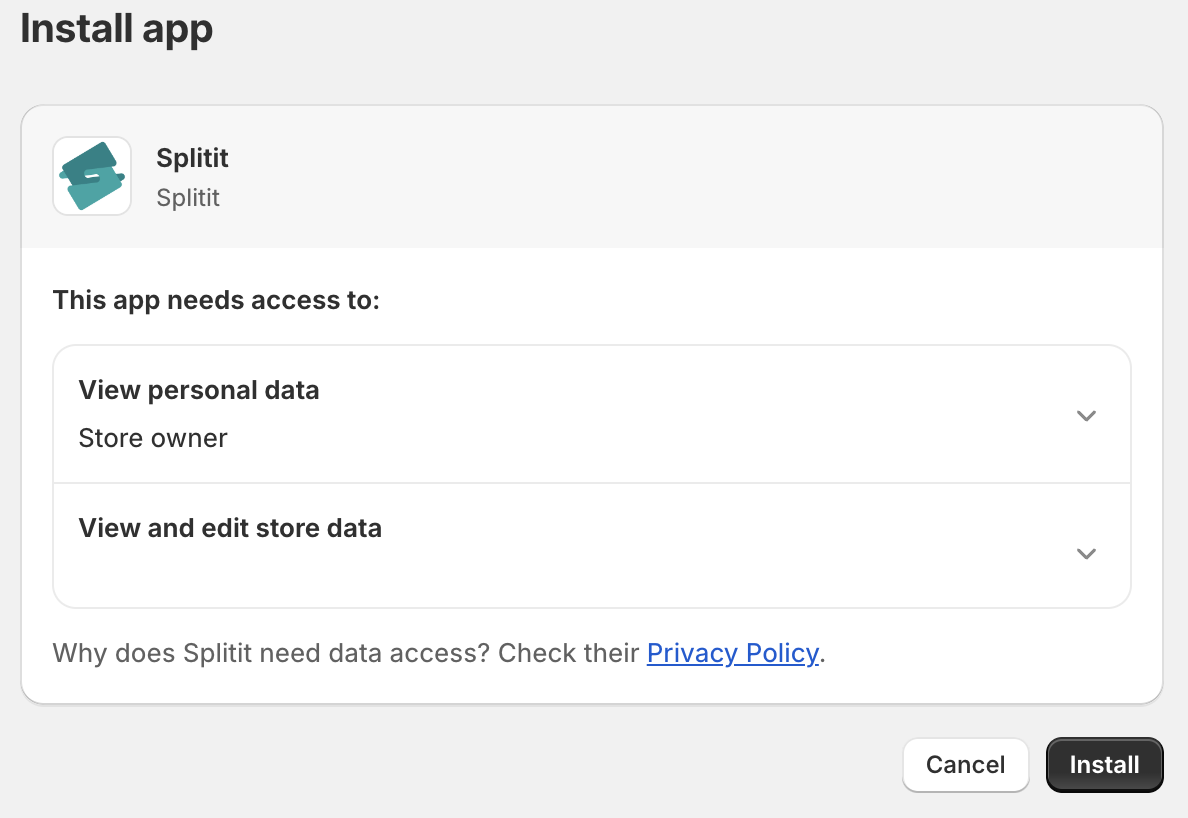
You will be taken to a configuration page.
Configuring the Plugin
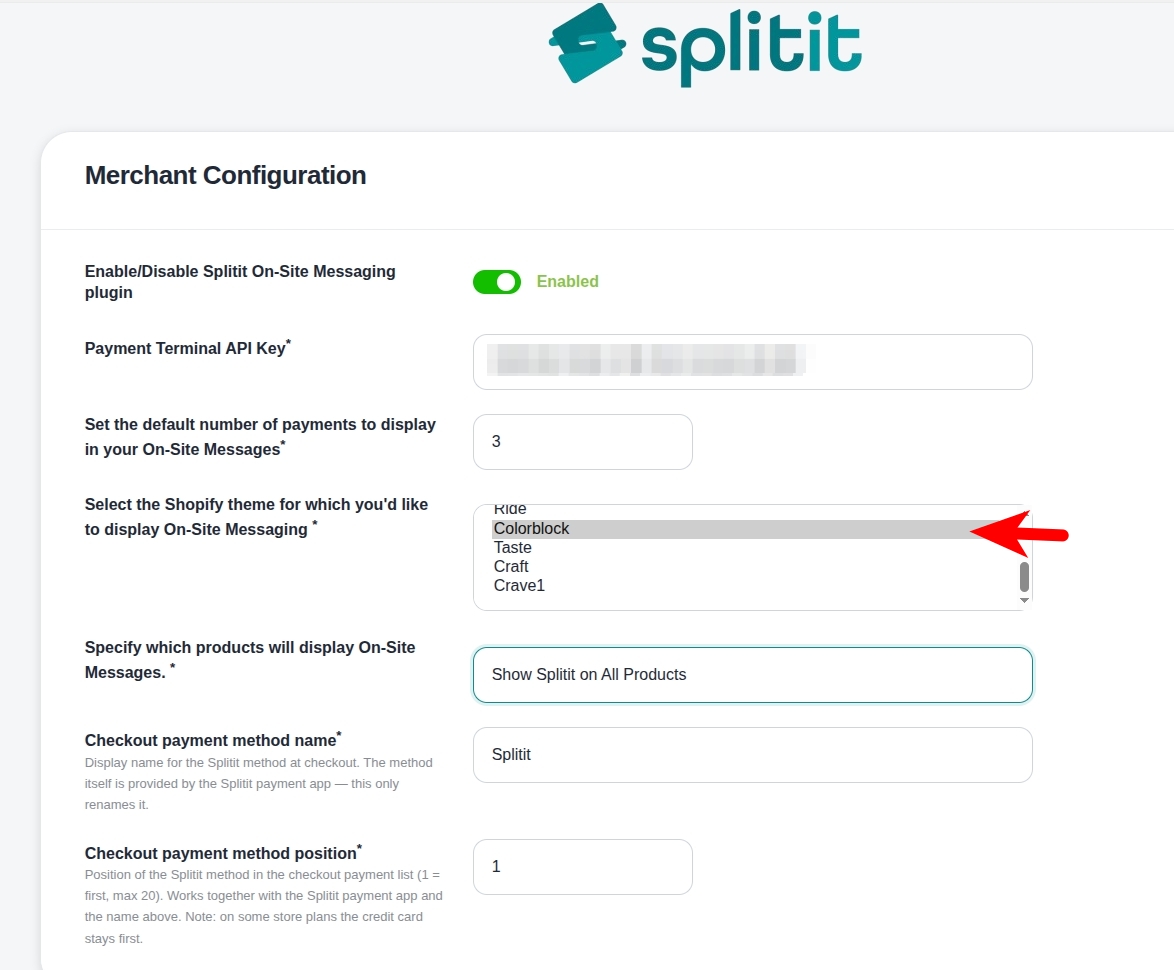
The configuration page has multiple settings, which you can see in the image below (descriptions underneath):
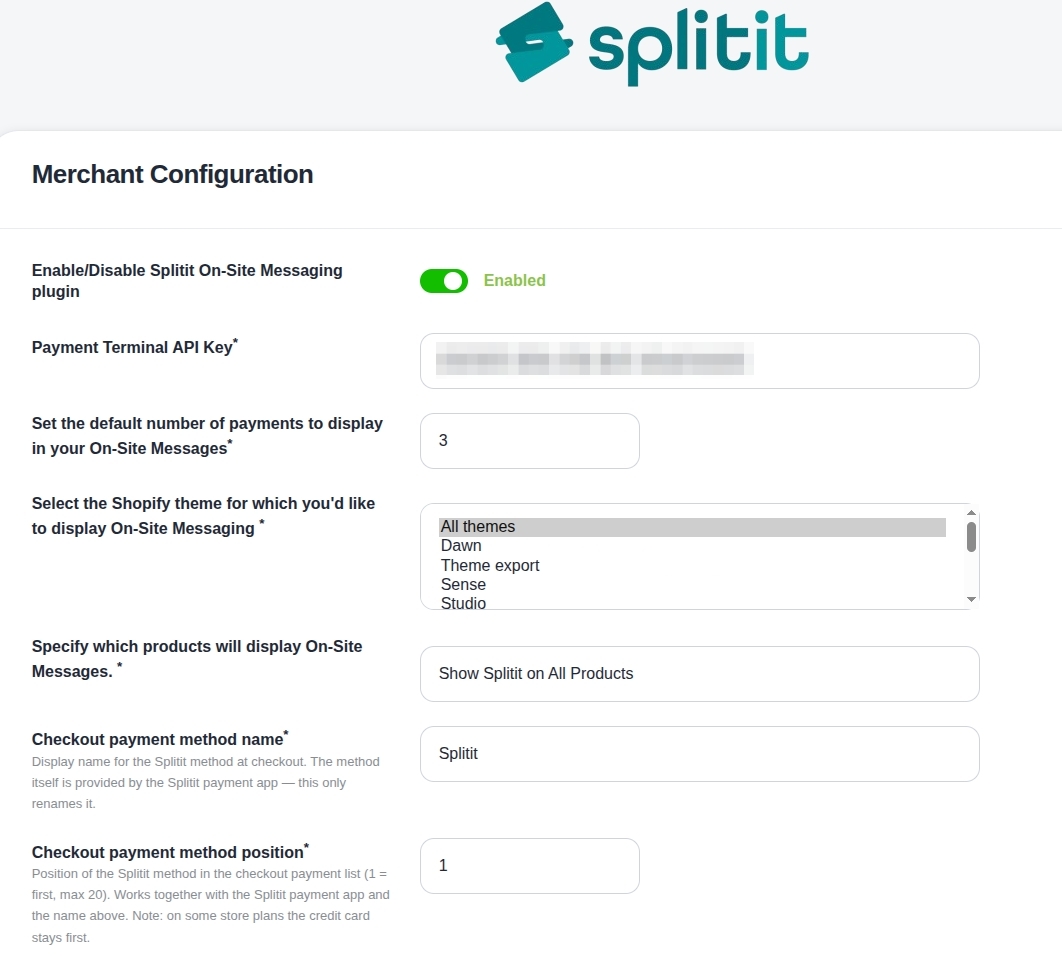
1. Begin by enabling (or disabling) the app using the switch at the top of the page: Enable/Disable Splitit On-Site Messaging Plugin.
2. Next, under Payment Terminal API Key, enter your Splitit Payment Terminal API Key, which you can get from your Splitit Hub (see the dropdown below if you need helping finding it; also make sure to Save at the bottom after you enter it if you aren't changing any other configurations.)
Finding Your API Key on Your Splitit Hub
In your Hub, go to Merchants Management on the left-hand side. Click on your merchant name, then in the new window, go to Terminals on the left-hand side. Finally copy the Terminal Id you'd like to use (this is the Payment Terminal API Key). Enter your key in the field Payment Terminal API Key.
3. In the box Set the default number of payments to display in your On-Site Messages, enter the default number of payments by which you'd like to divide a product's price. For example, this will display as "4 monthly payments of $25.00" for a $100 item.
4. In the box Select the Shopify theme for which you'd like to display On-Site Messaging, choose the theme for which you'd like to display On-Site Messaging (this allows you to enable the plugin for certain themes only).
5. Define which products will show Splitit messaging on your website using the dropdown Specify which products will display On-Site Messages:
-
Show Splitit on All Products is recommended and the default
-
Show Splitit Customer Journey per product's minimum amount lets you set a minimum product price for On-Site Messaging. If you select this, enter a minimum product amount.
6. In the box below, set Checkout payment method name, which is the label that will be shown for Splitit at checkout.
7. Finally, specify Checkout payment method position, which is where Splitit will appear in your list of payment options (specify a number between 1-20).
Make sure to click Save when you are finished with your configuration.
More info about checkout payment method name and position
- With respect to position, the native Shopify “credit card” stays pinned first on non-Plus US/Canada stores (a Shopify platform rule); other methods cannot move above it if you don't have Shopify Plus.
- On test/development stores, the payment position counts hidden test gateways (Bogus Gateway, Deferred, etc.) that shoppers never see, so if you choose a low number, it may resolve to the same slot as those. On a live store, the number maps directly to the shopper-visible position.
- The payment name and position are saved to a store metafield; a Shopify Function (payment customization) reads that metafield at checkout and renames/reorders the Splitit method. Because it runs on Shopify’s side, the Splitit payment app must be installed (it provides the method being reordered), and the store must have granted the write_payment_customizations scope (each merchant approves this on install/reinstall.
Choosing Your On-Site Messages
Your options for On-Site Messages include Strips and One Liners. Strips display across the top or bottom of your page and One Liners appear by the prices of individual products (e.g., "4 monthly payments of $25.00"). One Liners and Strips are configured separately for your home page, catalog page, product page, and cart page. For each page type, go to it using the dropdown icon, turn on its "Enabled" toggle, configure it, and finally save it. Refer below for more information about settings.
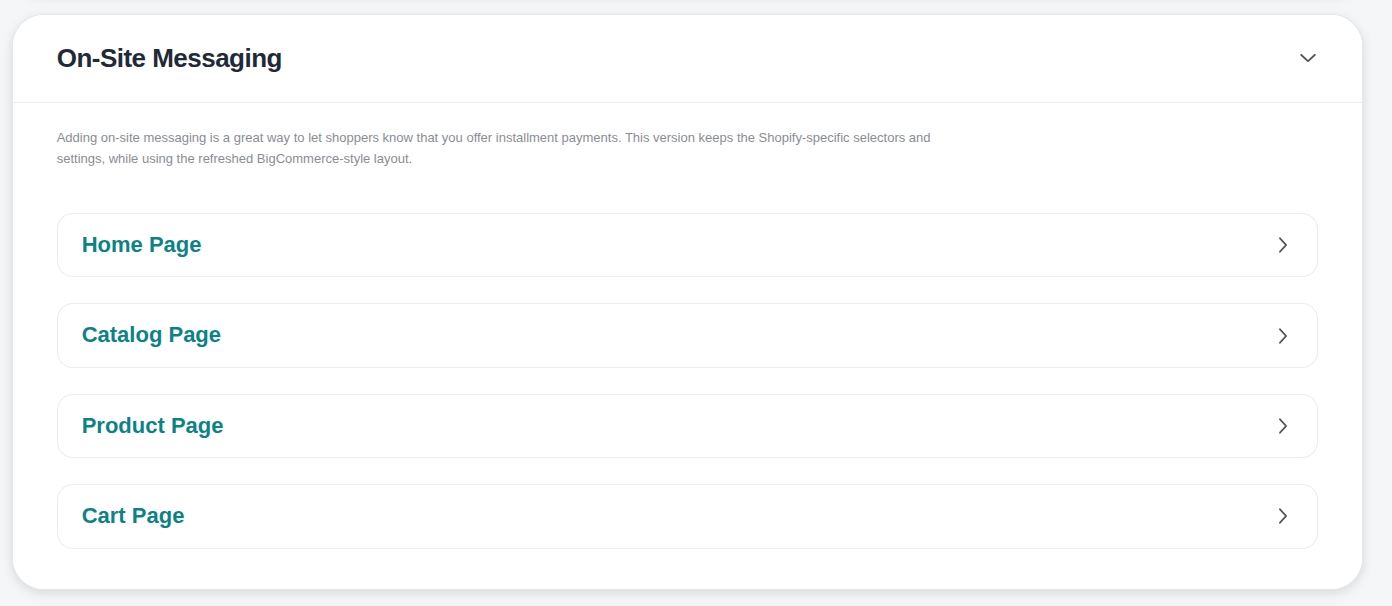
Strips
Strips display across the top or bottom of your page, letting your shoppers know that Splitit is an option.
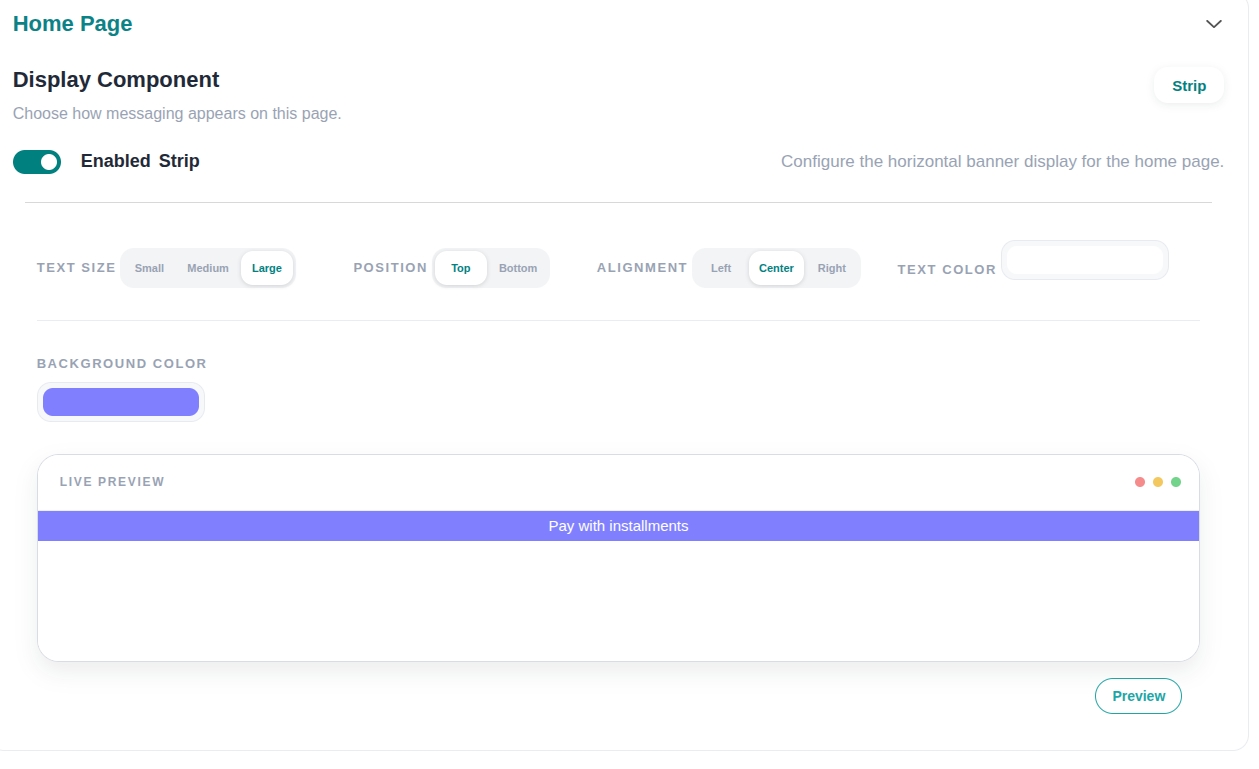
Settings:
Enabled Strip - This switch allows you to turn on or off Strips for the current page type. Only one message type can be enabled for the current page type.
Text Size - Set small, medium, or large.
Position (Strip) - Set top or bottom.
Alignment (Text) - Set left, center, or right.
Text Color - Set the color of the main text. It can be selected by colorpicking or by entering RGB, HSL, or HEX values. To switch from RGB to any other mode, click on the letters "RGB".
Background Color - Set the color of the Strip. It can be selected by colorpicking or by entering RGB, HSL, or HEX values. To switch from RGB to any other mode, click on the letters "RGB".
The Preview button applies the changes to the message example that can be seen on the page (in the Live Preview box)
Make sure to click Save when you are finished with your configuration.
One Liners
One Liners are small messages that appear near the prices of your individual products (e.g., "4 monthly payments of $25.00"). They include an optional link to a Learn More popup.
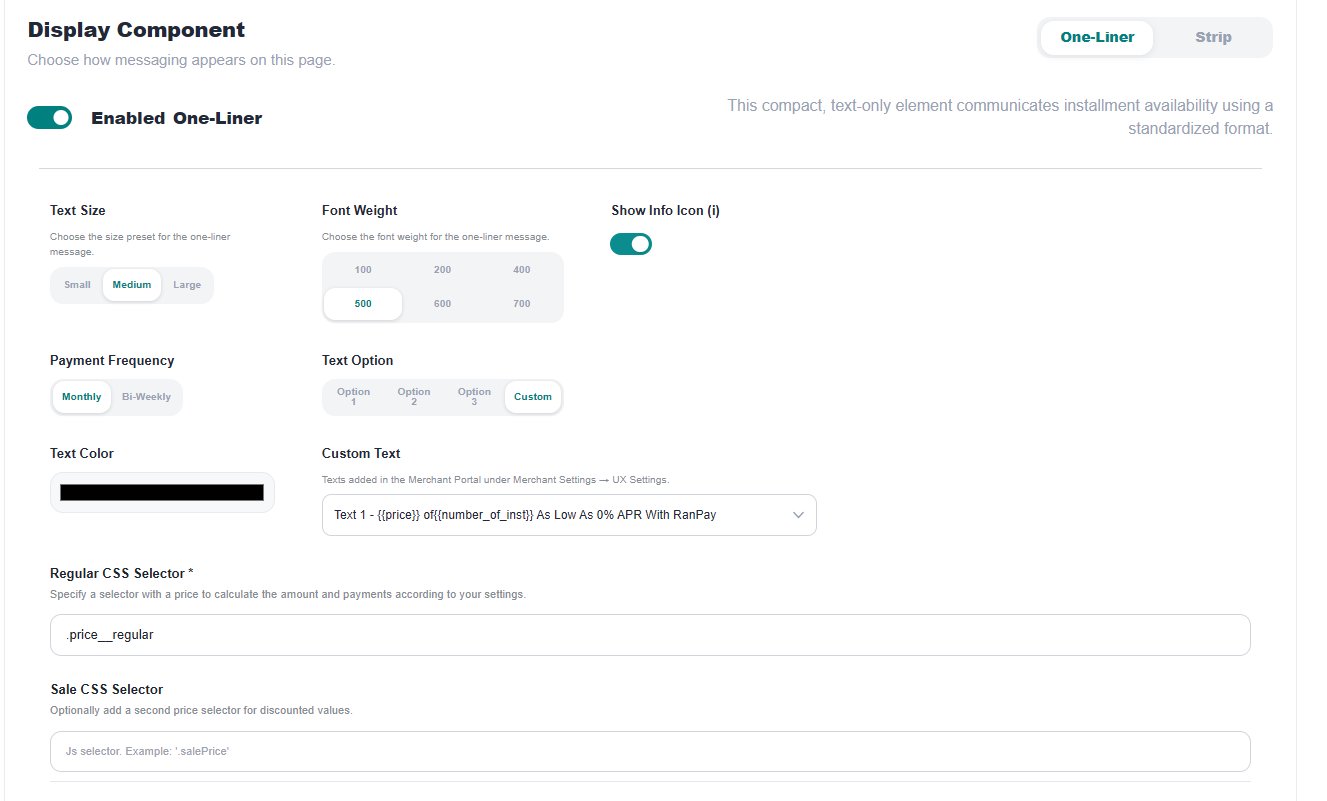
Settings:
Enabled One Liner - This switch allows you to turn on or off One Liners for the current page type. Only one message type can be enabled for the current page type.
Text Size - Set small, medium, or large.
Font Weight - Choose 100, 200, 400, 500, 600, 700.
Show Info Icon - Shows the (?) tooltip icon, which opens a Learn More popup.
Payment Frequency - Display calculations for monthly or biweekly payment options.
Text Option - Choose one of three built-in texts you'd like to use for your One Liner, or select Custom to use a text that you defined with Splitit support.
Text Color - Set the color of the main text. It can be selected by colorpicking or by entering RGB, HSL, or HEX values. To switch from RGB to any other mode, click on the letters "RGB".
Custom Text - This box appears if "Custom" is set under "Text Option". Choose an option from the available.
Regular CSS Selector/Primary CSS Selector - See dropdown at bottom Configuring CSS Selectors for One Liners
Sale CSS Selector/Additional CSS Selector - See drowdown at bottom Configuring CSS Selectors for One Liners
The Preview button applies the changes to the message example that can be seen on this page (in the Live Preview box).
Make sure to click Save when you are finished with your configuration.
Configuring CSS Selectors for One Liners
One Liners are attached to your page with CSS selectors. Each page type is different:
-
Catalog page - The On-Site configuration has inputs for Regular CSS Selector (required) and Sale CSS Selector (optional). The selectors must be for elements that contain a price, which the Splitit app uses to calculate the installment amounts.
-
Product and Cart pages - The On-Site configuration has inputs for Primary CSS Selector (required) and Additional CSS Selector (optional). The primary selector is the anchor where the message is displayed; the additional selector is a fallback used if the primary element is missing. The selectors must contain a price.
You can use your web browser's built-in developer tools to find the selector where you want to add your One Liner. Here's how to do it:
-
Right-click on the element you want to select.
-
Click "Inspect" or "Inspect Element".
-
The developer tools will open with the selected element's HTML code highlighted.
-
Look at the highlighted code for the element's tag name, class, or ID.
-
Use the corresponding CSS selector syntax to select the element in the extension. For example, if the element has a class of "my-class", use the selector ".my-class".
-
Additionally, in many browsers, once the developer's console is open, you can use the element inspector to find the most appropriate element by clicking on the element inspector then running your mouse over UI elements on the page on the left (when you hover over an element, its corresponding code is highlighted in the console).
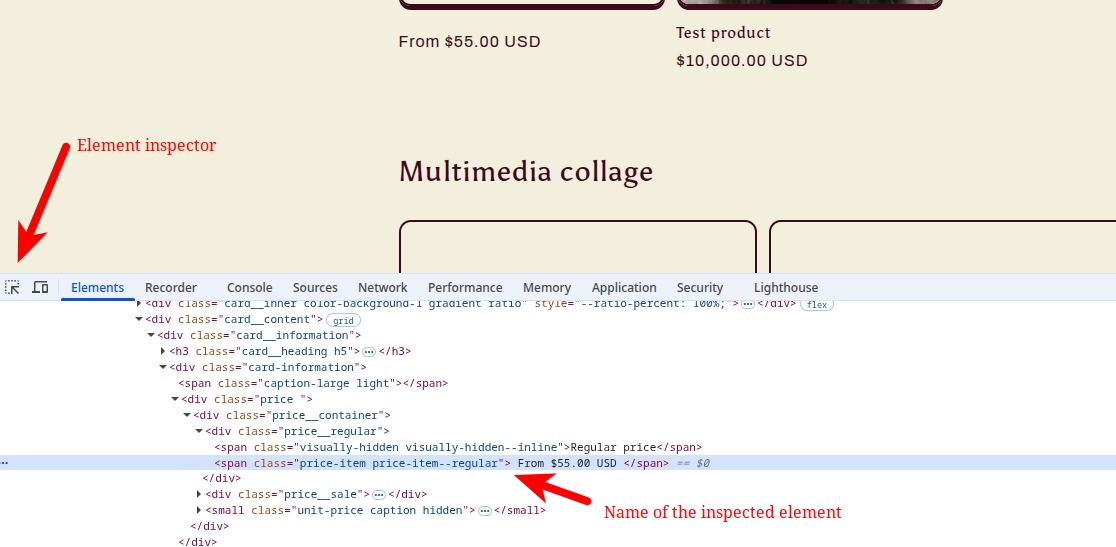
Don't forget that One Liners use price information to calculate payment offers. Thus you need to pick a selector that contains a product price.
Selector Examples:
Improper Selector
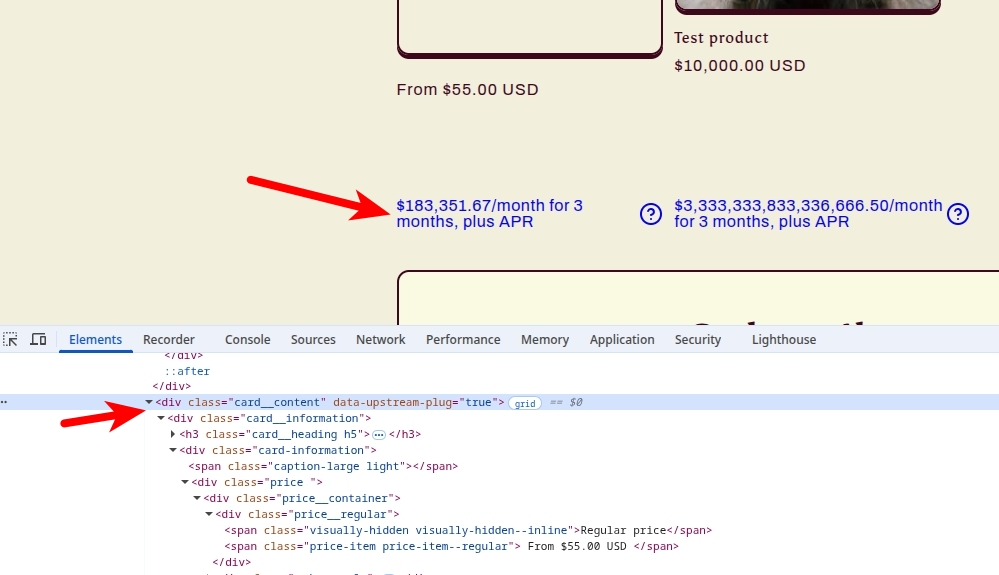
An improper selector was used for the One Liner. This HTML element contains a lot of other elements inside, so the extension read some unrelated data instead of the price, and thus is providing an incorrect payments calculation.
Proper Selector
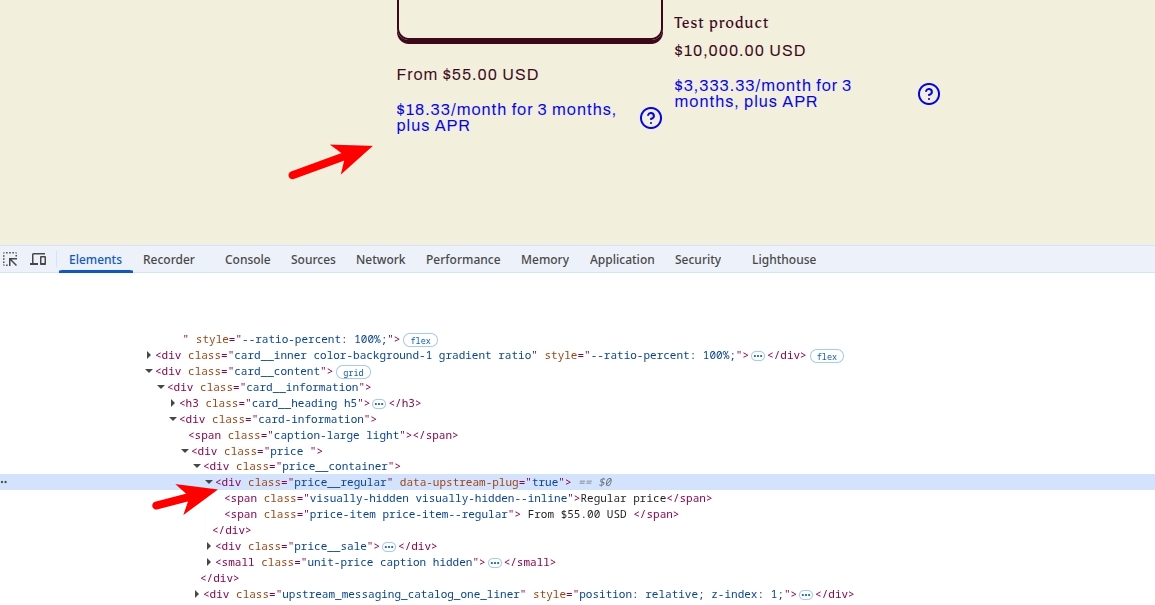
Proper selector “price-item price-item--regular” that contains the price was picked. The extension can find the price and calculate payments accurately.
If a One Liner does not appear on the storefront, an empty or incorrect CSS selector is the most common cause.
Custom CSS
The On-Site Messaging CSS block lets you add custom CSS code to modify the style of your On-Site Messages.
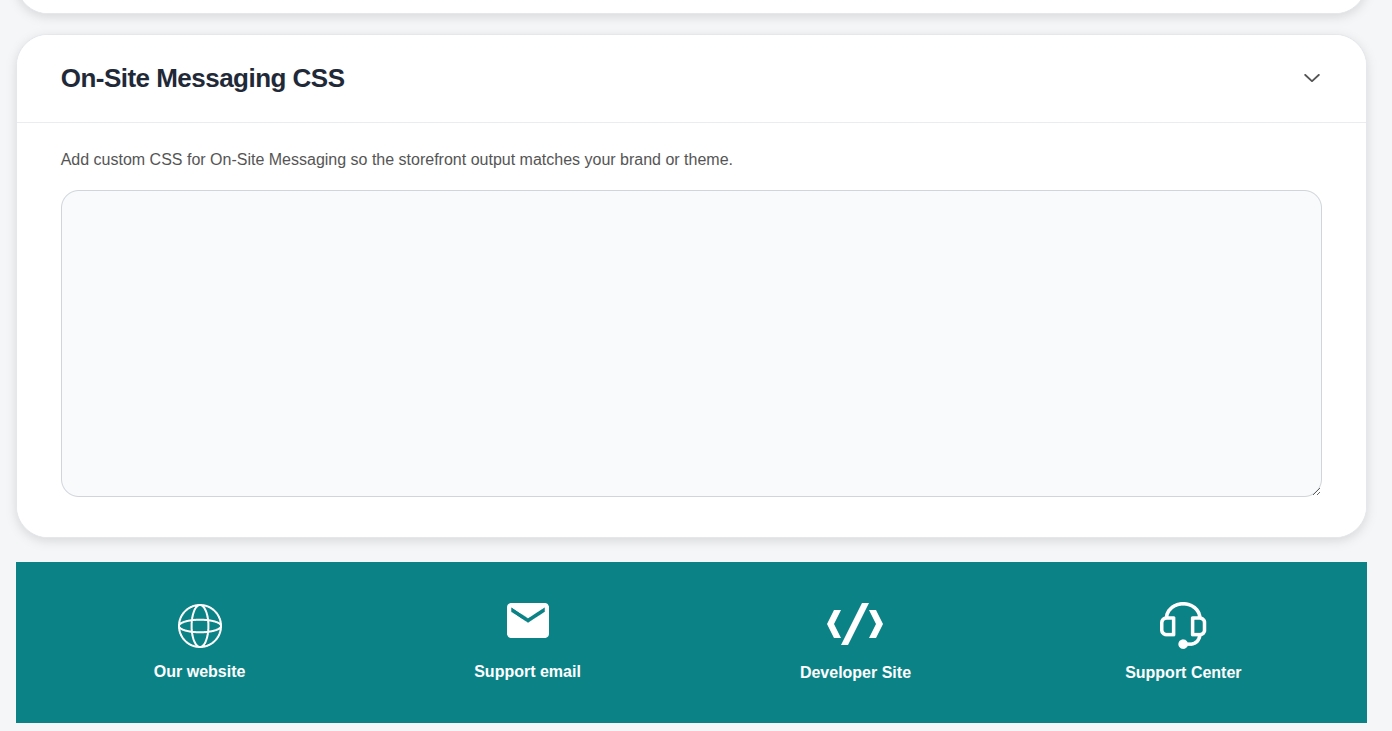
Make sure to click Save when you are finished with your configuration.
Testing
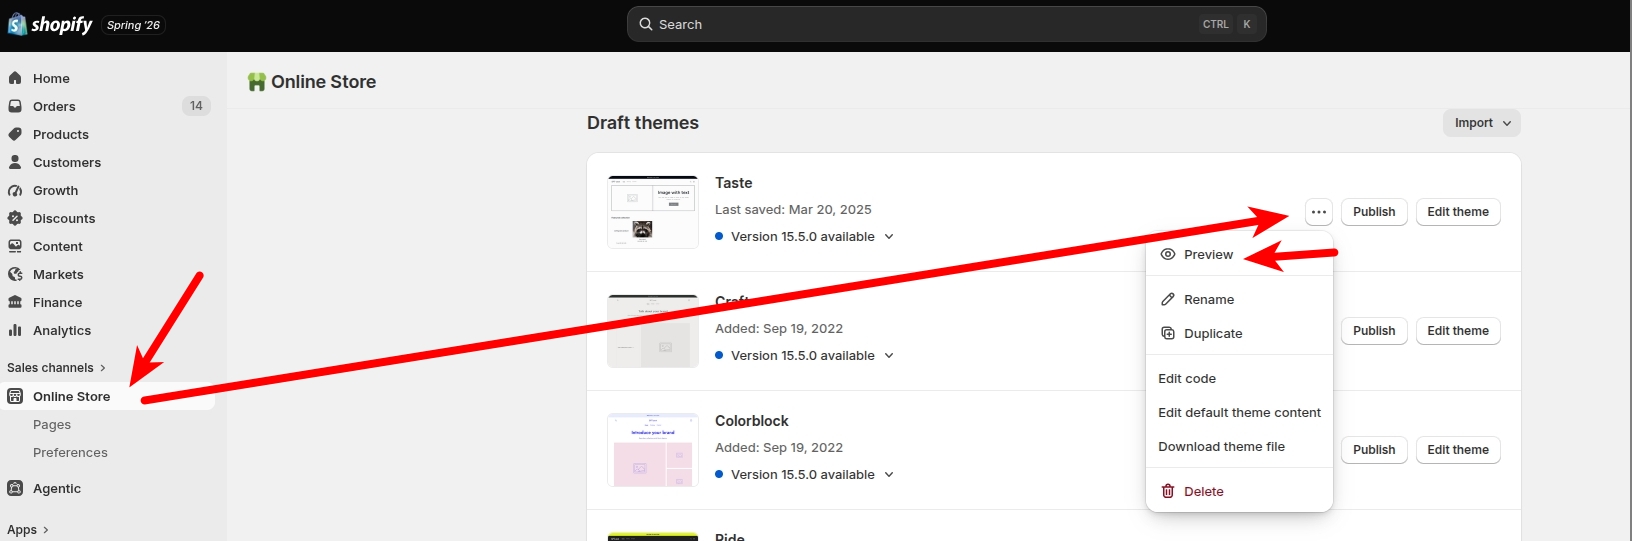
Use unpublished themes to test your configuration. You can create a duplicate of the theme you're using, then enable the app for that theme only.
Once that is done, go to Sales Channels > Online Store > Themes, find the theme, and preview it.